
Who says knitters are the only ones who can enjoy a good Fair Isle style sweater? Not me! In designing my Marzanna sweater I learned a lot about colourwork in crochet and I’m here to share all the deets! I am by no means a colourwork expert and this blog post is just a quick overview of how I managed the two colours while making the Marzanna sweater.
How to switch colours
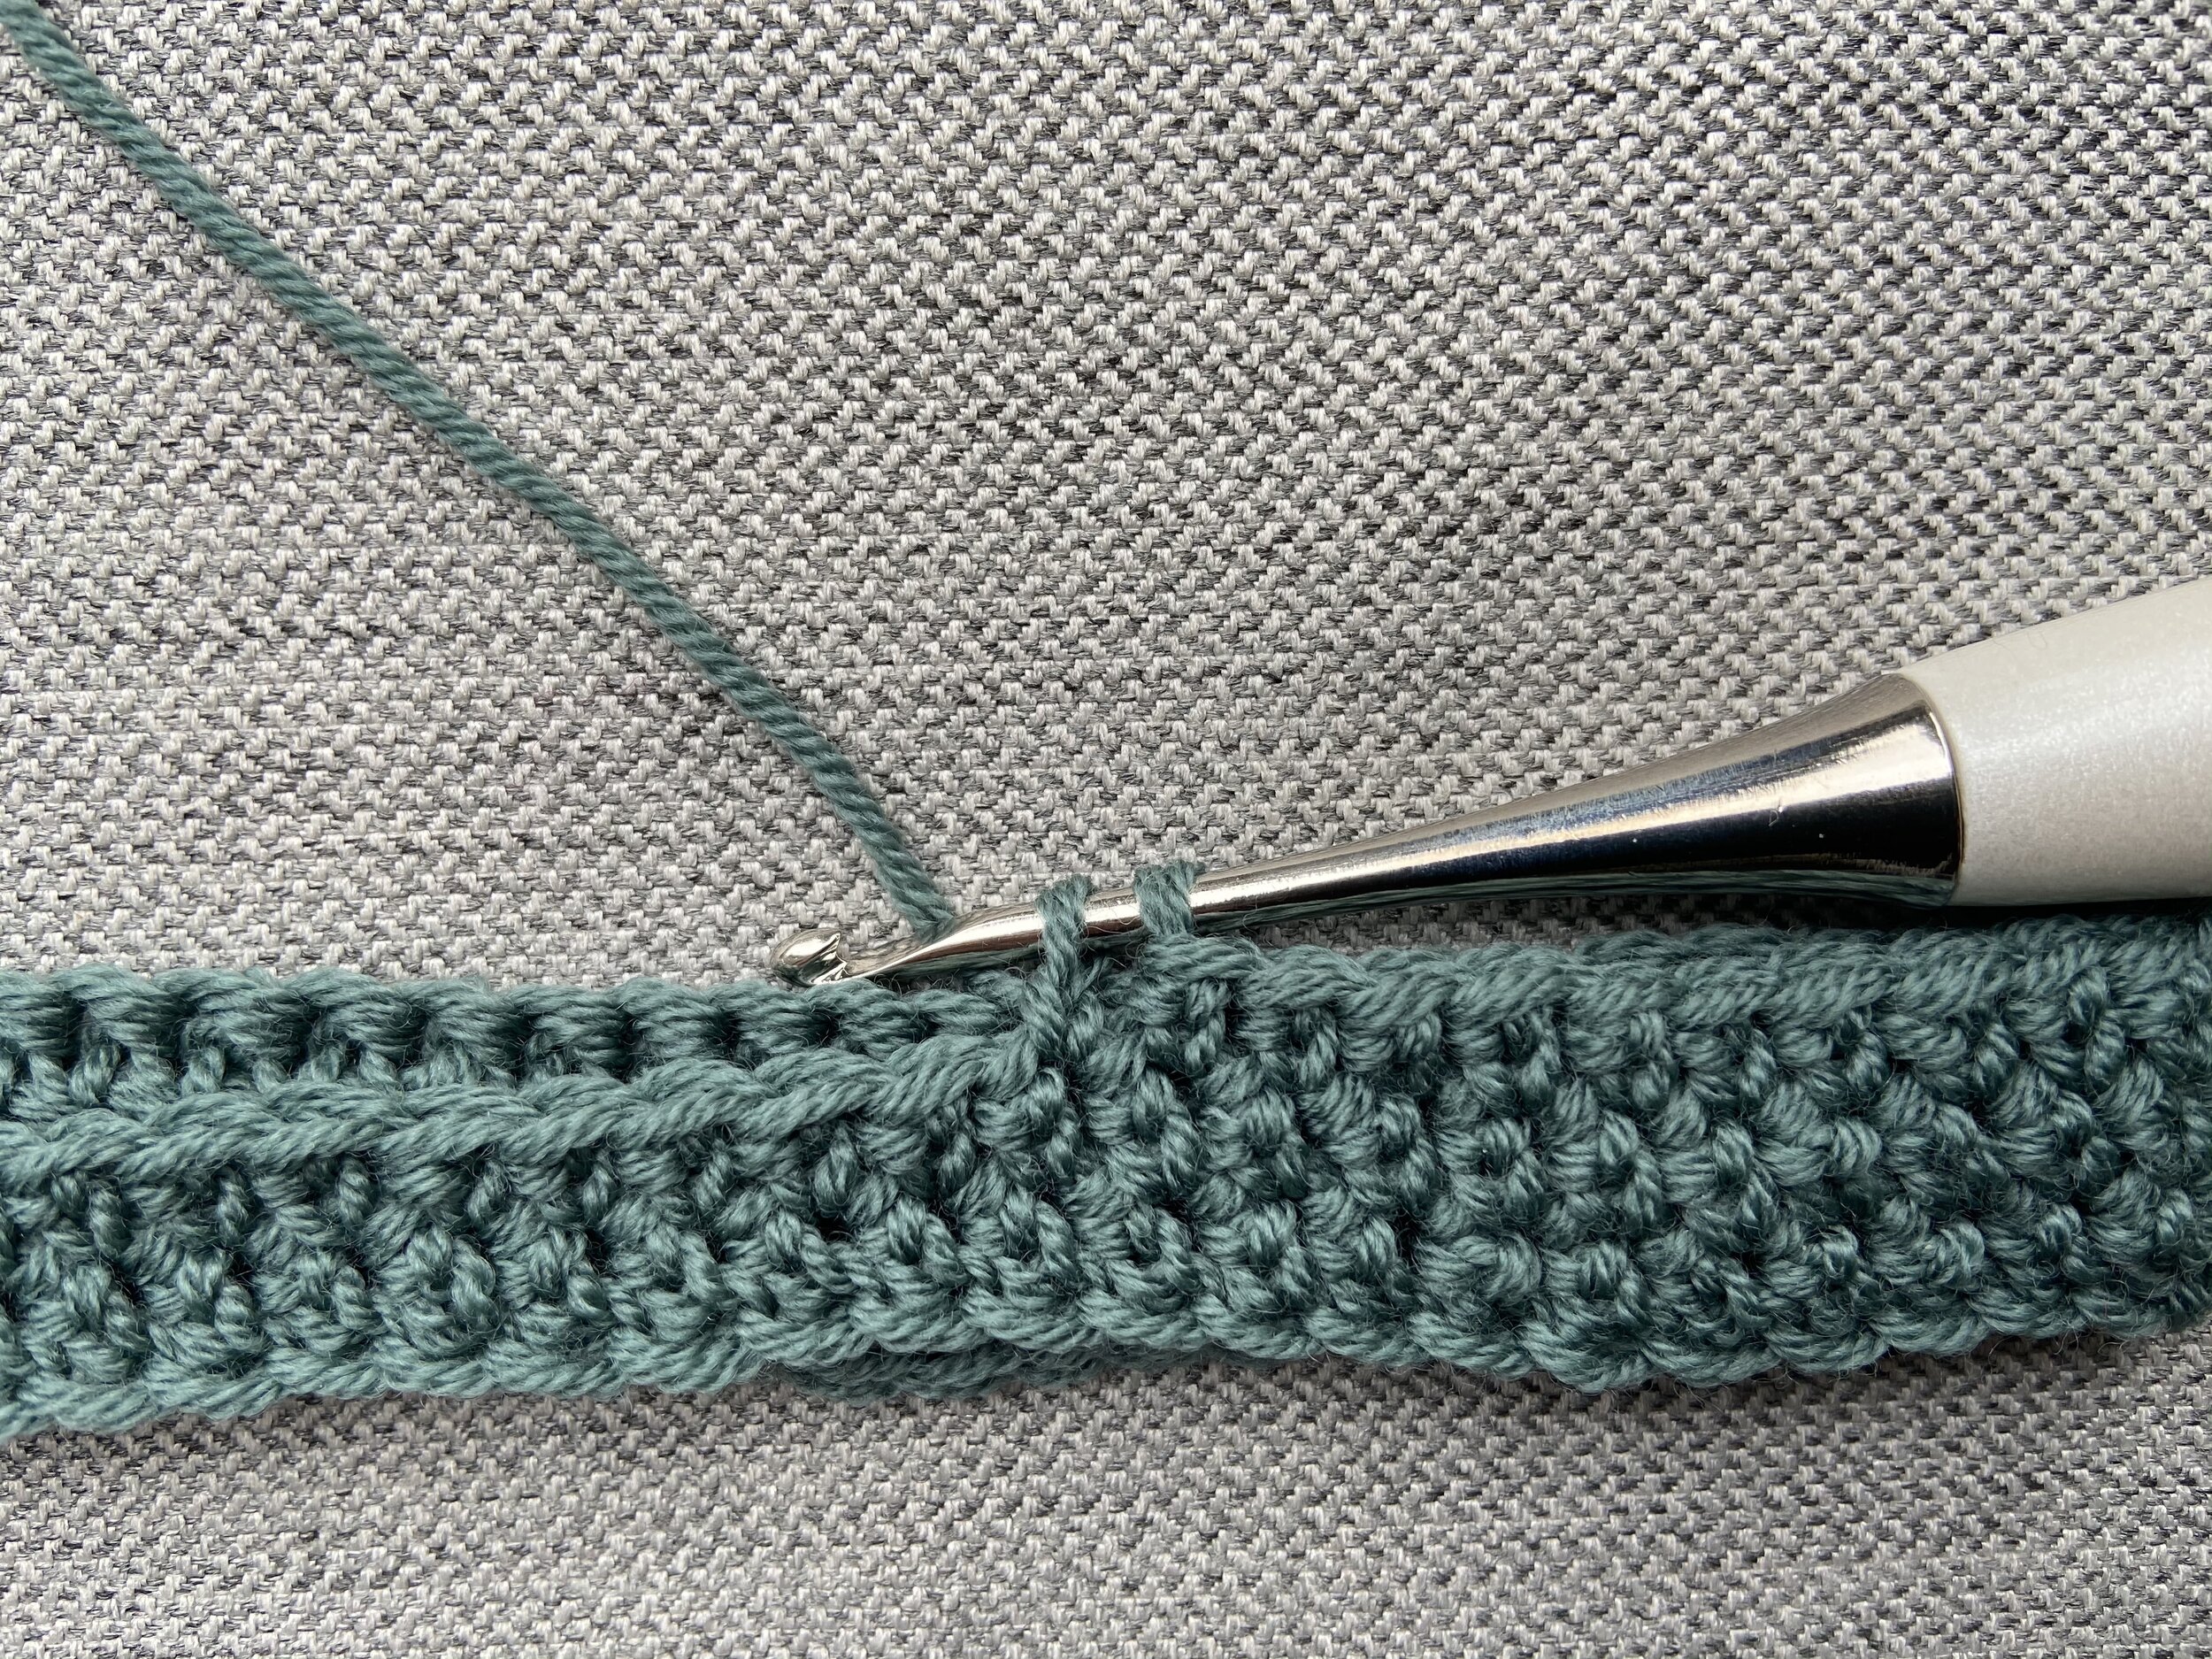
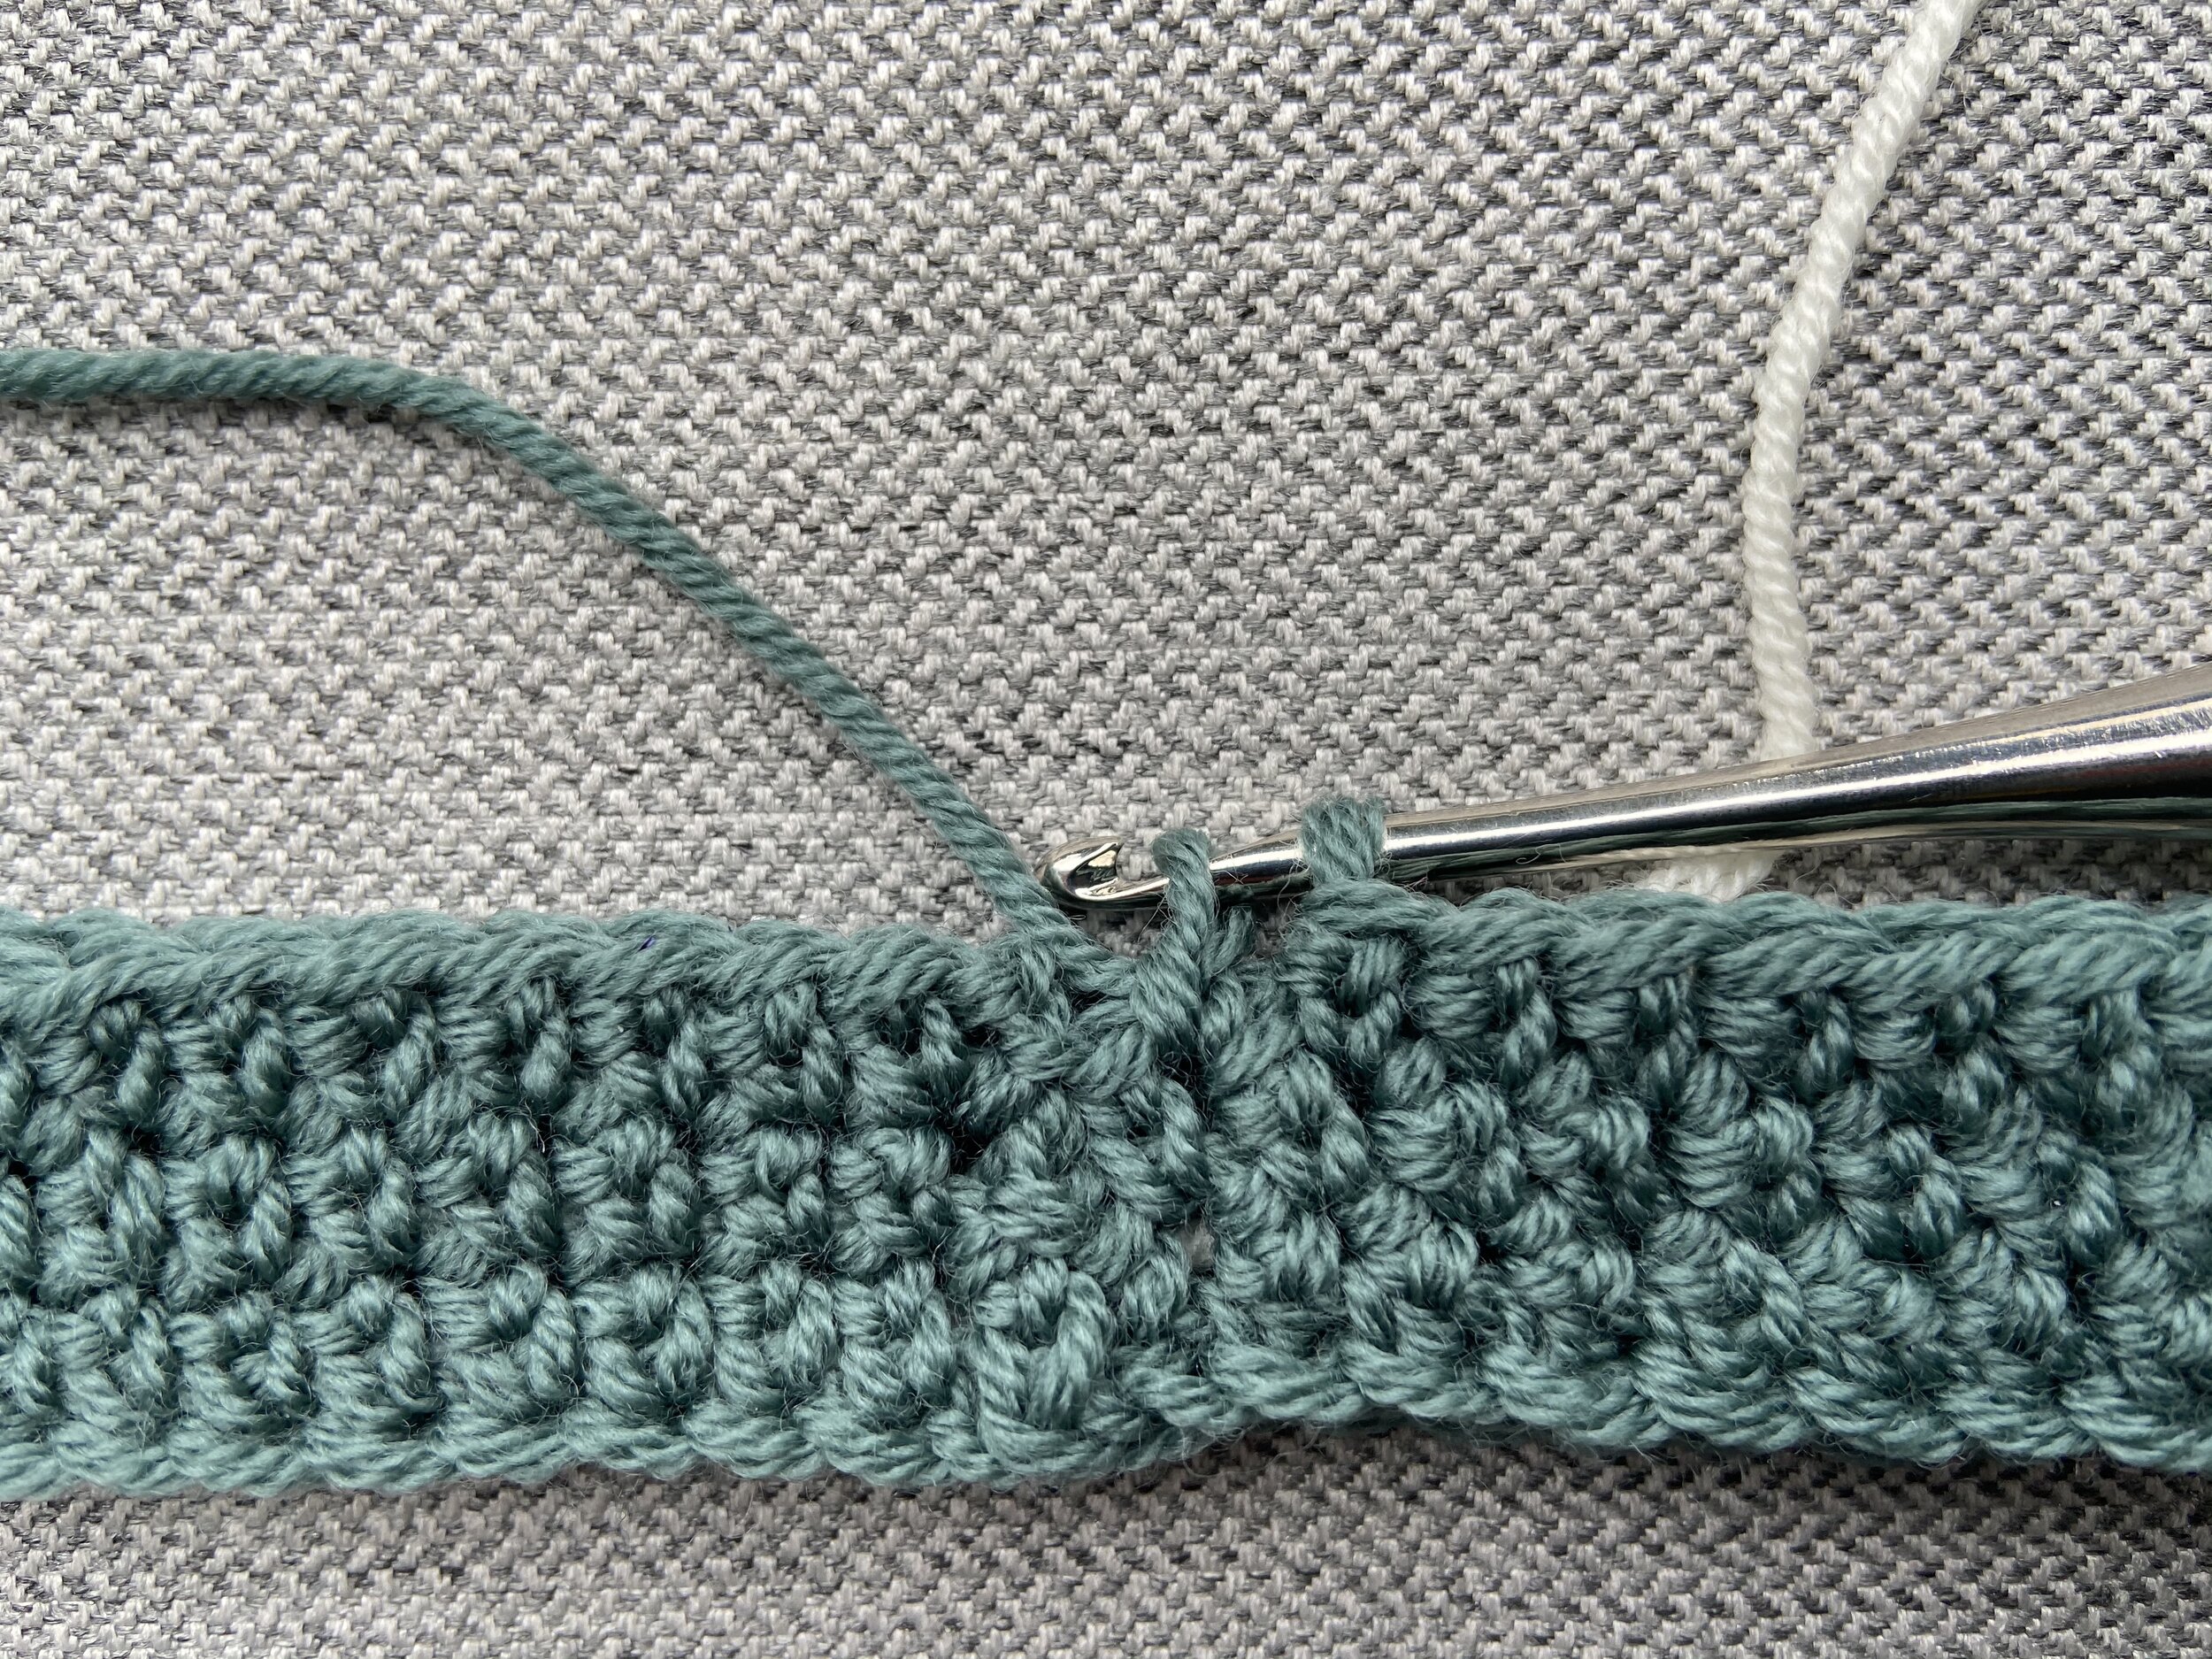
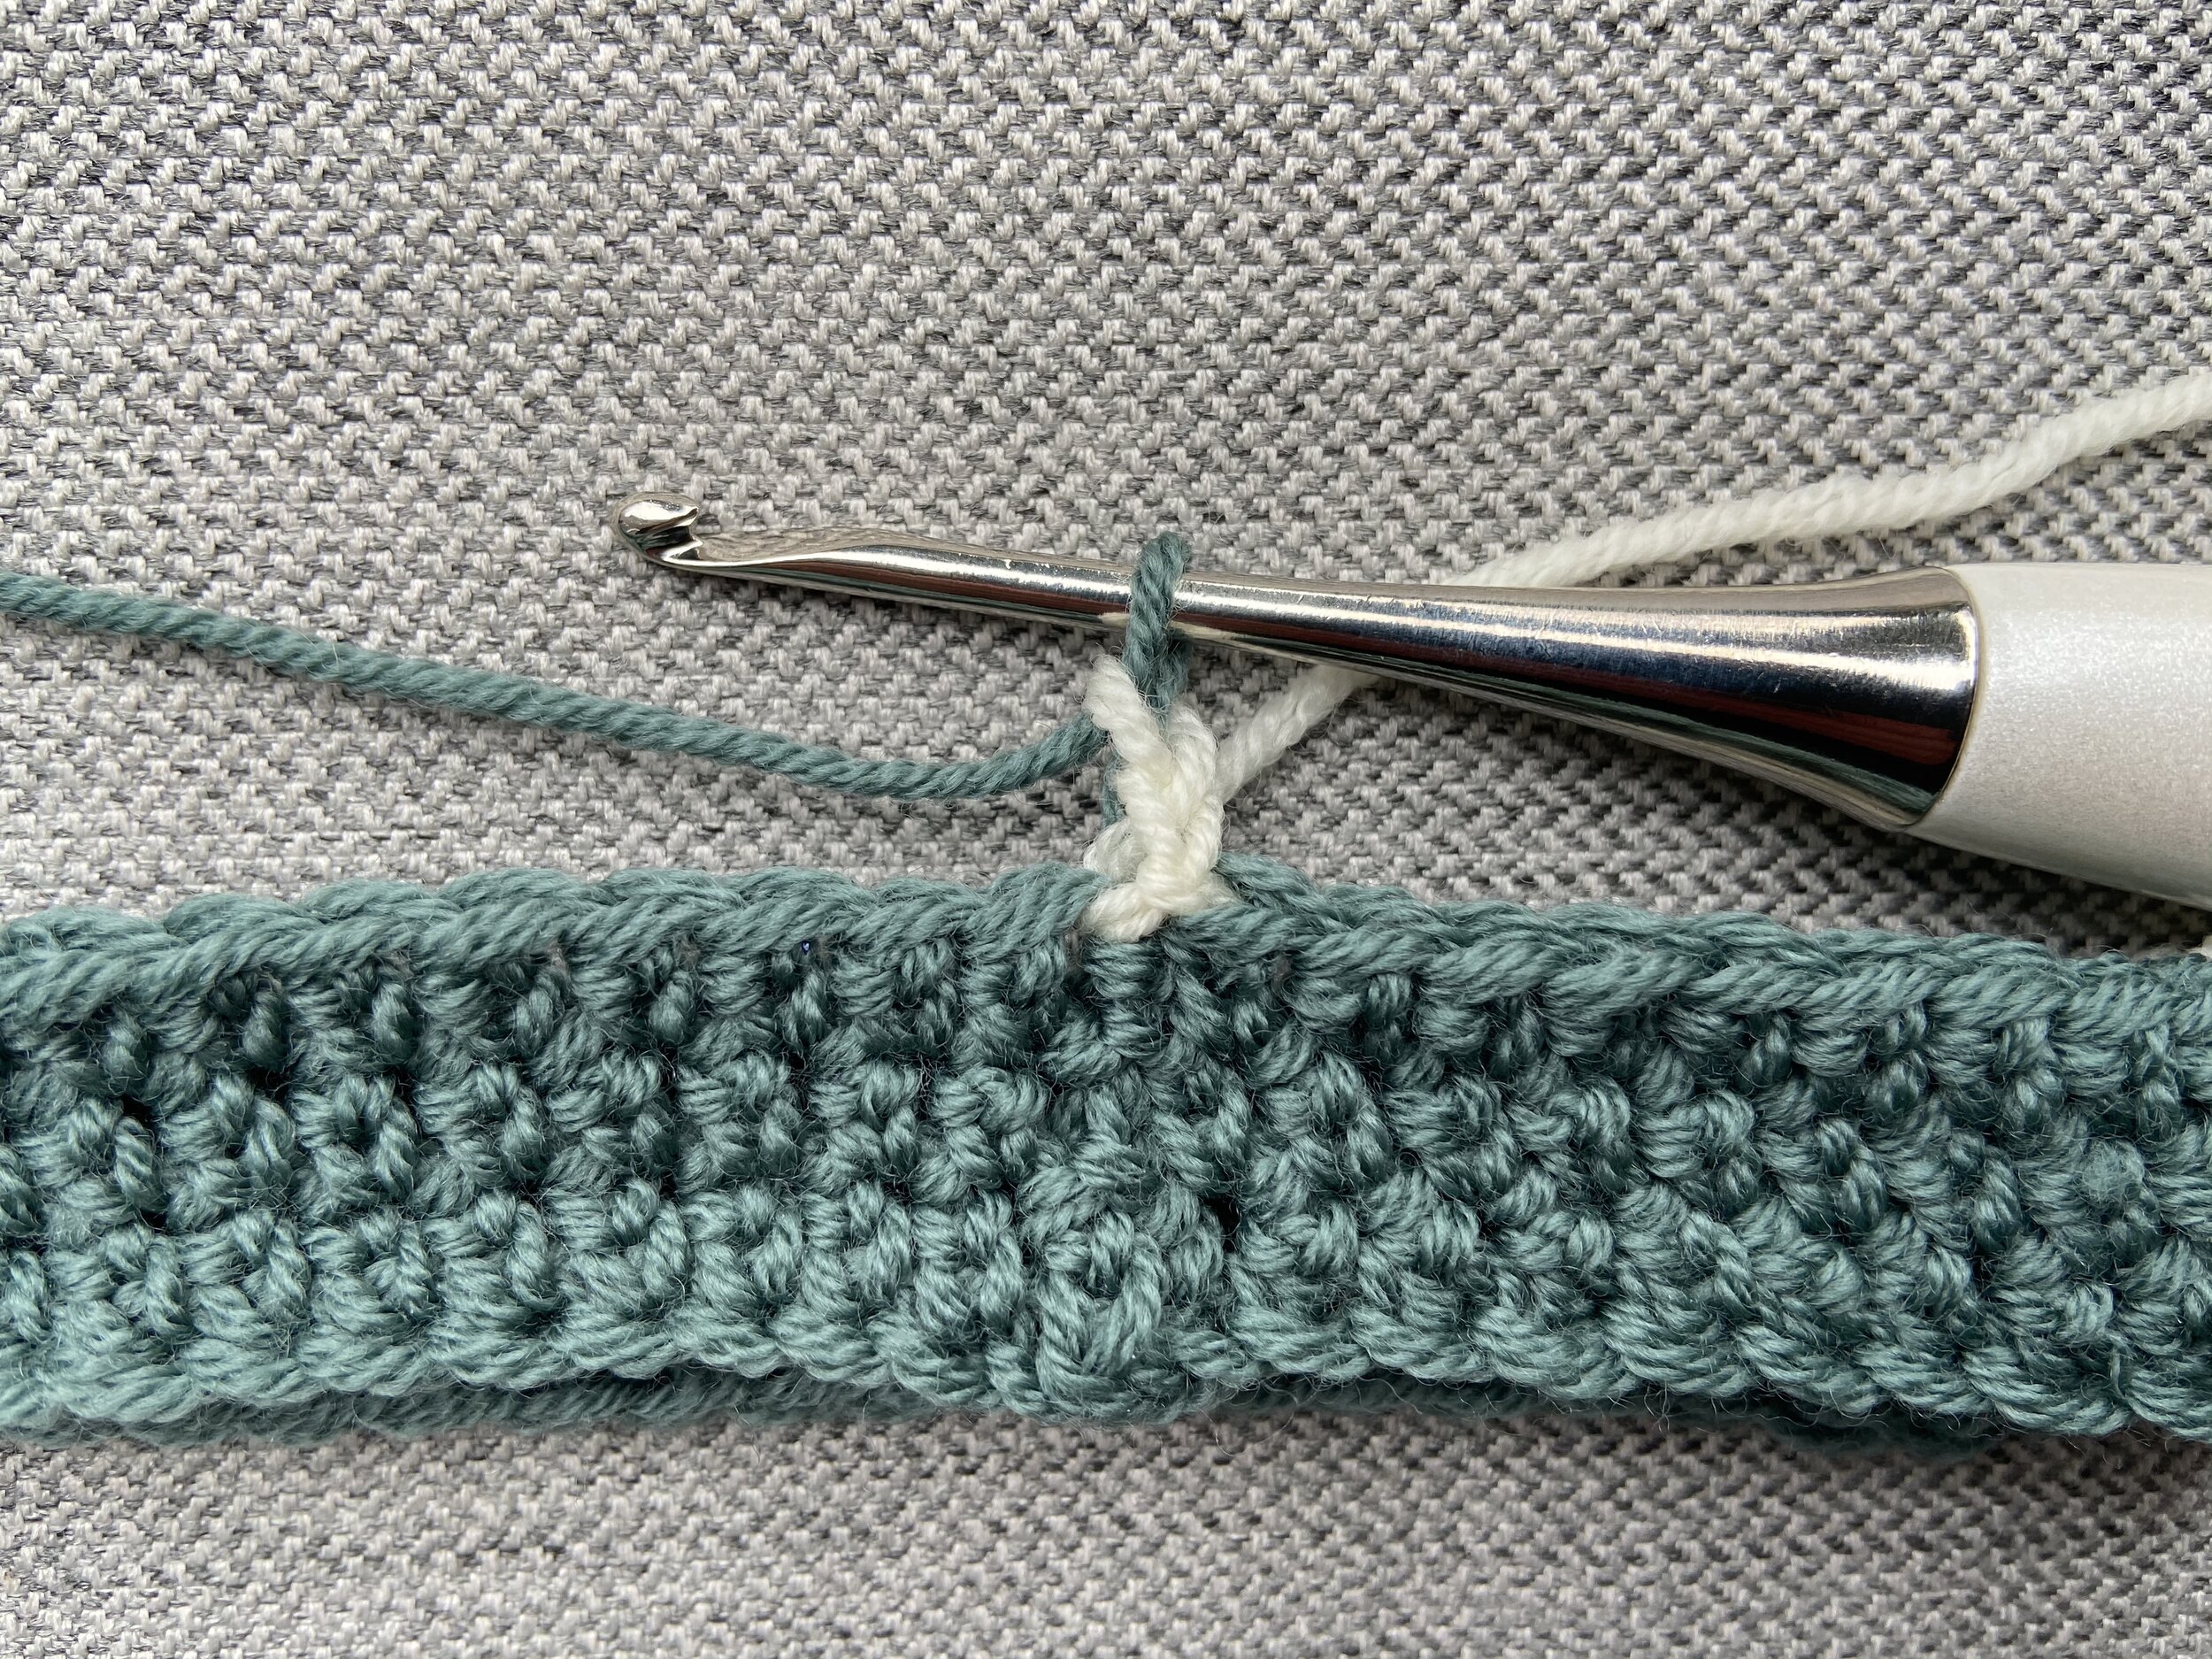
The most important thing to know about switching colours is that you *always* change your colour on the last step of the previous stitch. Meaning your last yarn over and pull through will be done in the colour of the NEXT stitch. This works no matter what stitch you are doing – single, half-double, double, treble or anything in between, you ALWAYS switch before the end of the stitch.
The Marzanna sweater is worked in the extended single crochet (ESC) stitch, so my sample photos are done in extended single crochet as well. Here you can see I’ve done all but the last yarn over, pull through on that final stitch in colour A (sage), then I yarn over and pull through with colour B (cream) and complete as many stitches as needed in B.
When the first stitch of the beginning of the next round begins in the opposite colour to the one you are currently working with you have two options, which come down to personal preference OR what works better for the pattern.
Option 1: Change colours for the slip stitch join only
In this option you will complete the last stitch of the last round entirely, then slip stitch using the new colour. This may work for some patterns, but for Marzanna, it made the colour change more obvious.
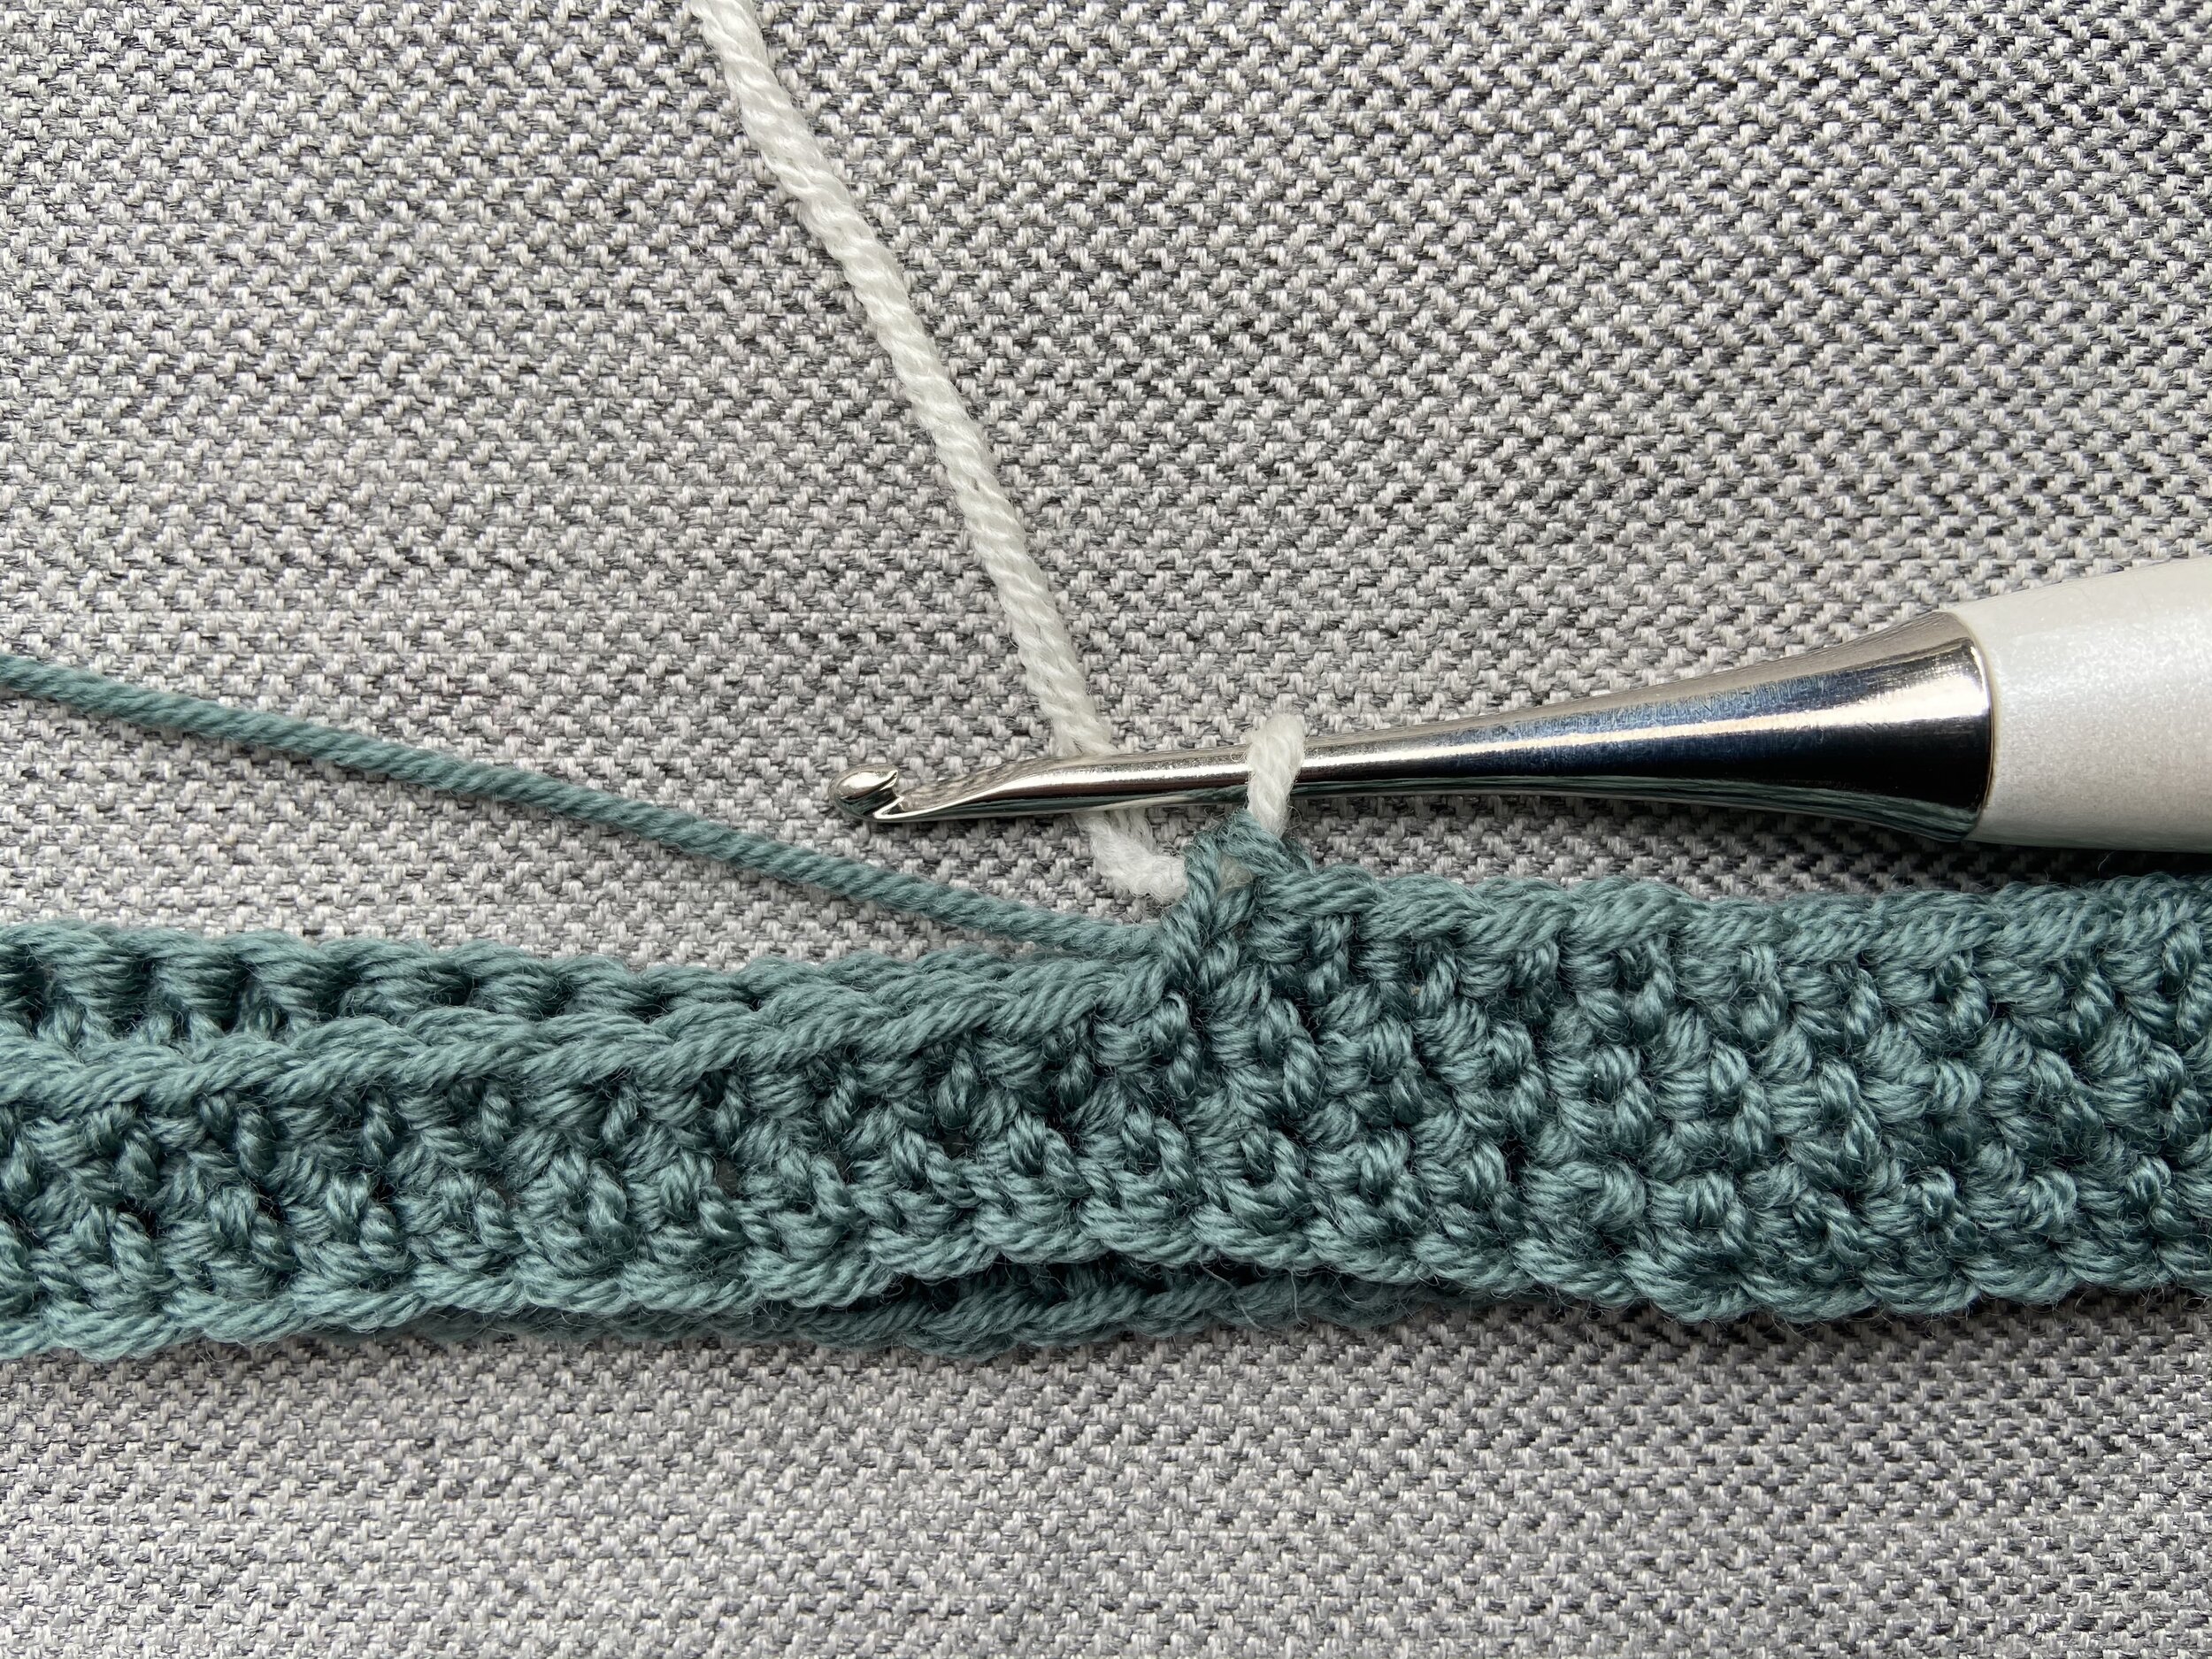
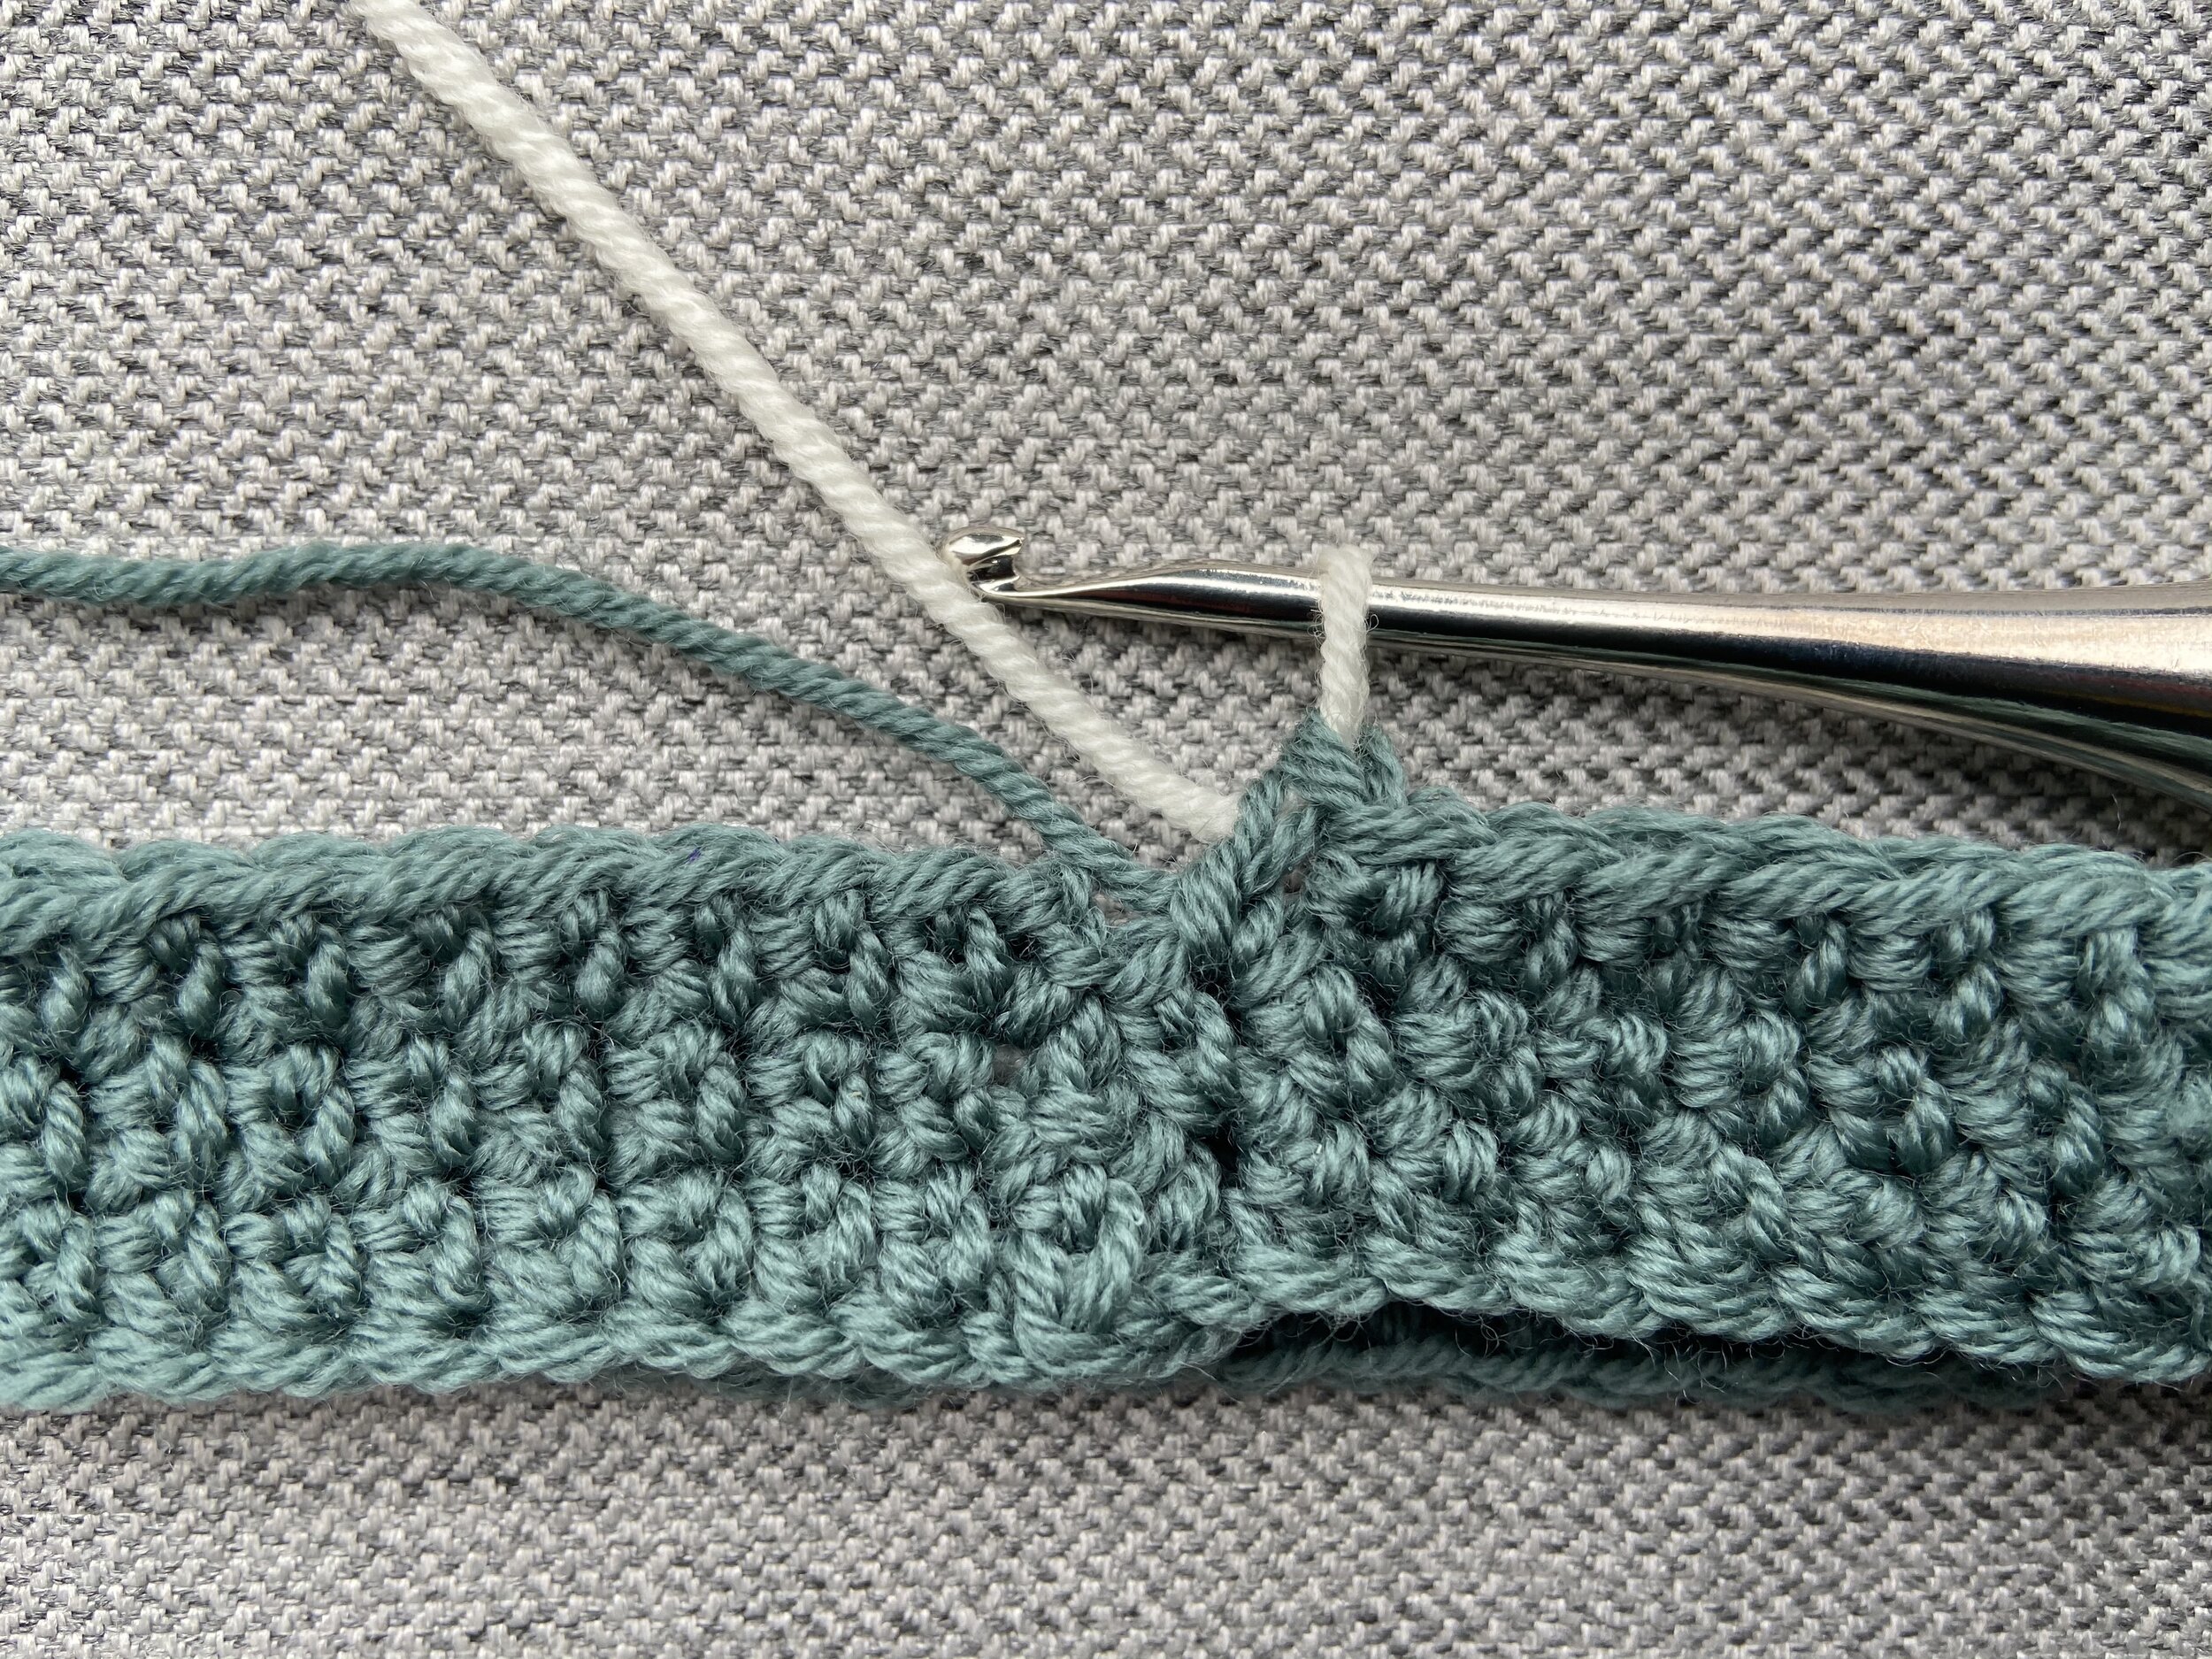
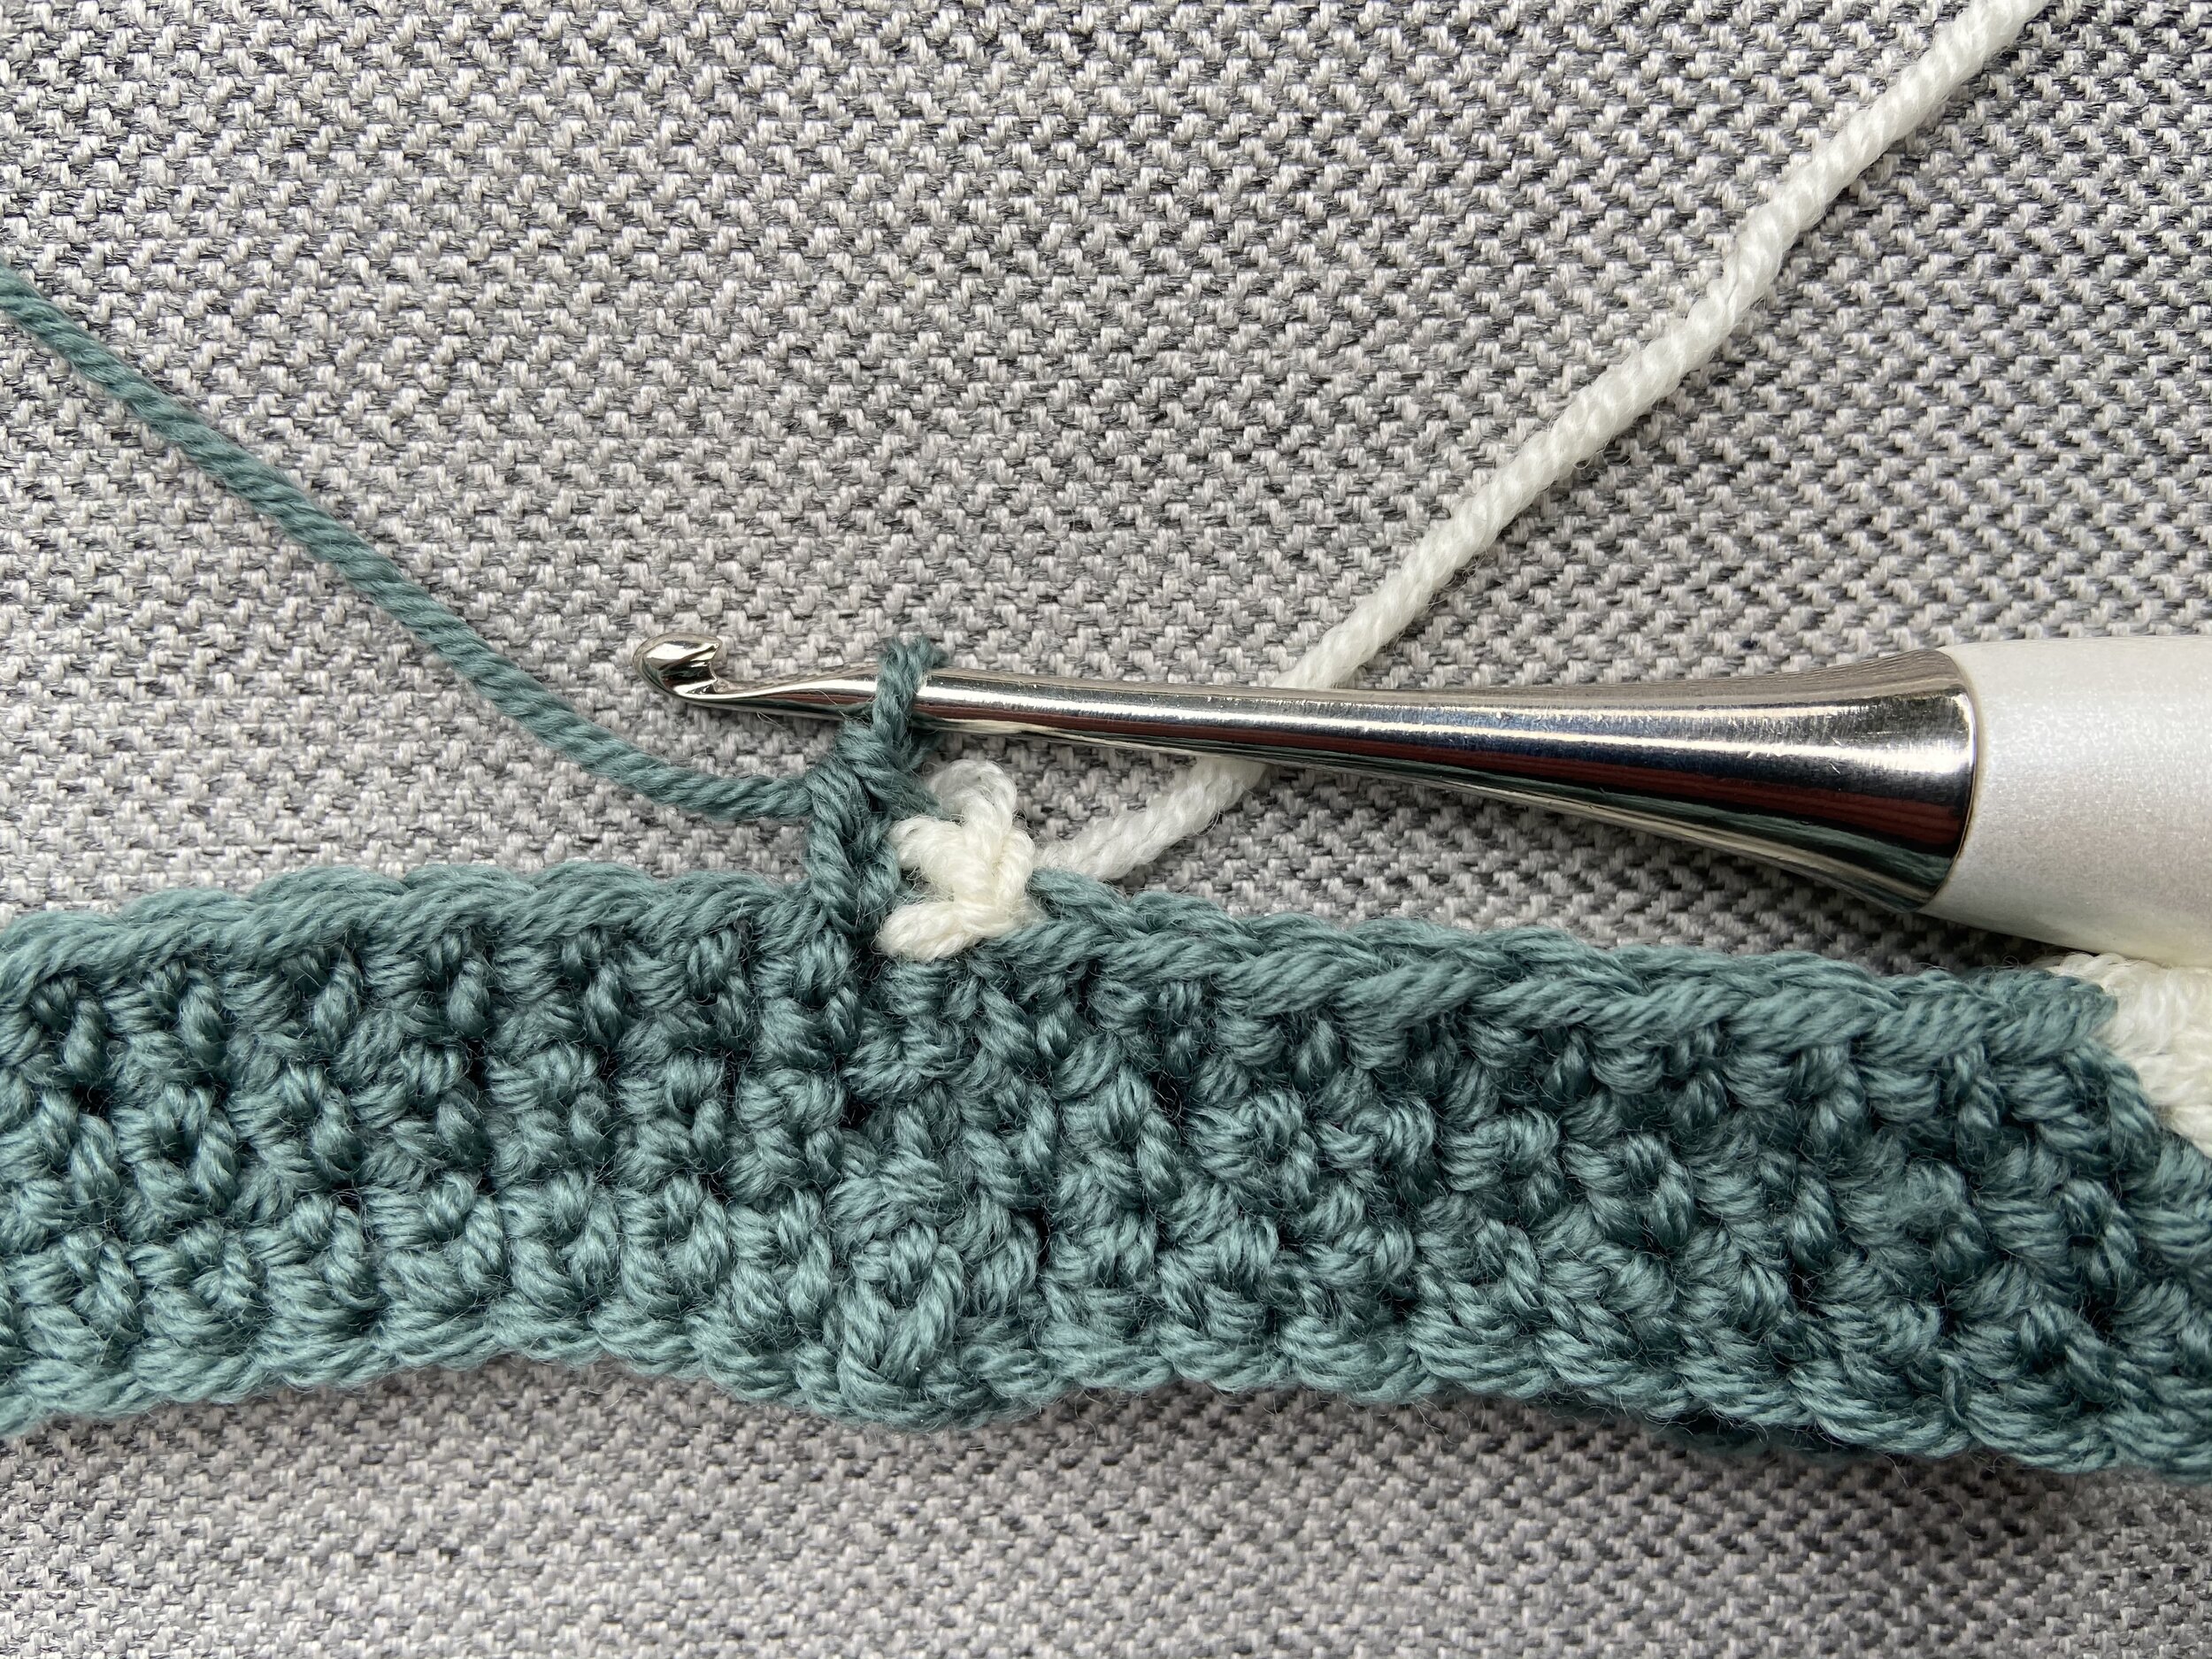
Option 2: Change colours for the last yarn over of the last stitch AND the slip stitch
This is my preferred method for the Marzanna sweater. I crocheted around to the last stitch but on the last yarn over I switched to the next colour, B, to complete that stitch, then proceeded to slip stitch using B as well. You’ll also notice in my photos that I joined using a tight slip stitch – this helps with colour cohesion in the Marzanna sweater, but is a personal preference as to if you apply it in other designs or not. I highly recommend the tight slip stitch when making your Marzanna sweater.
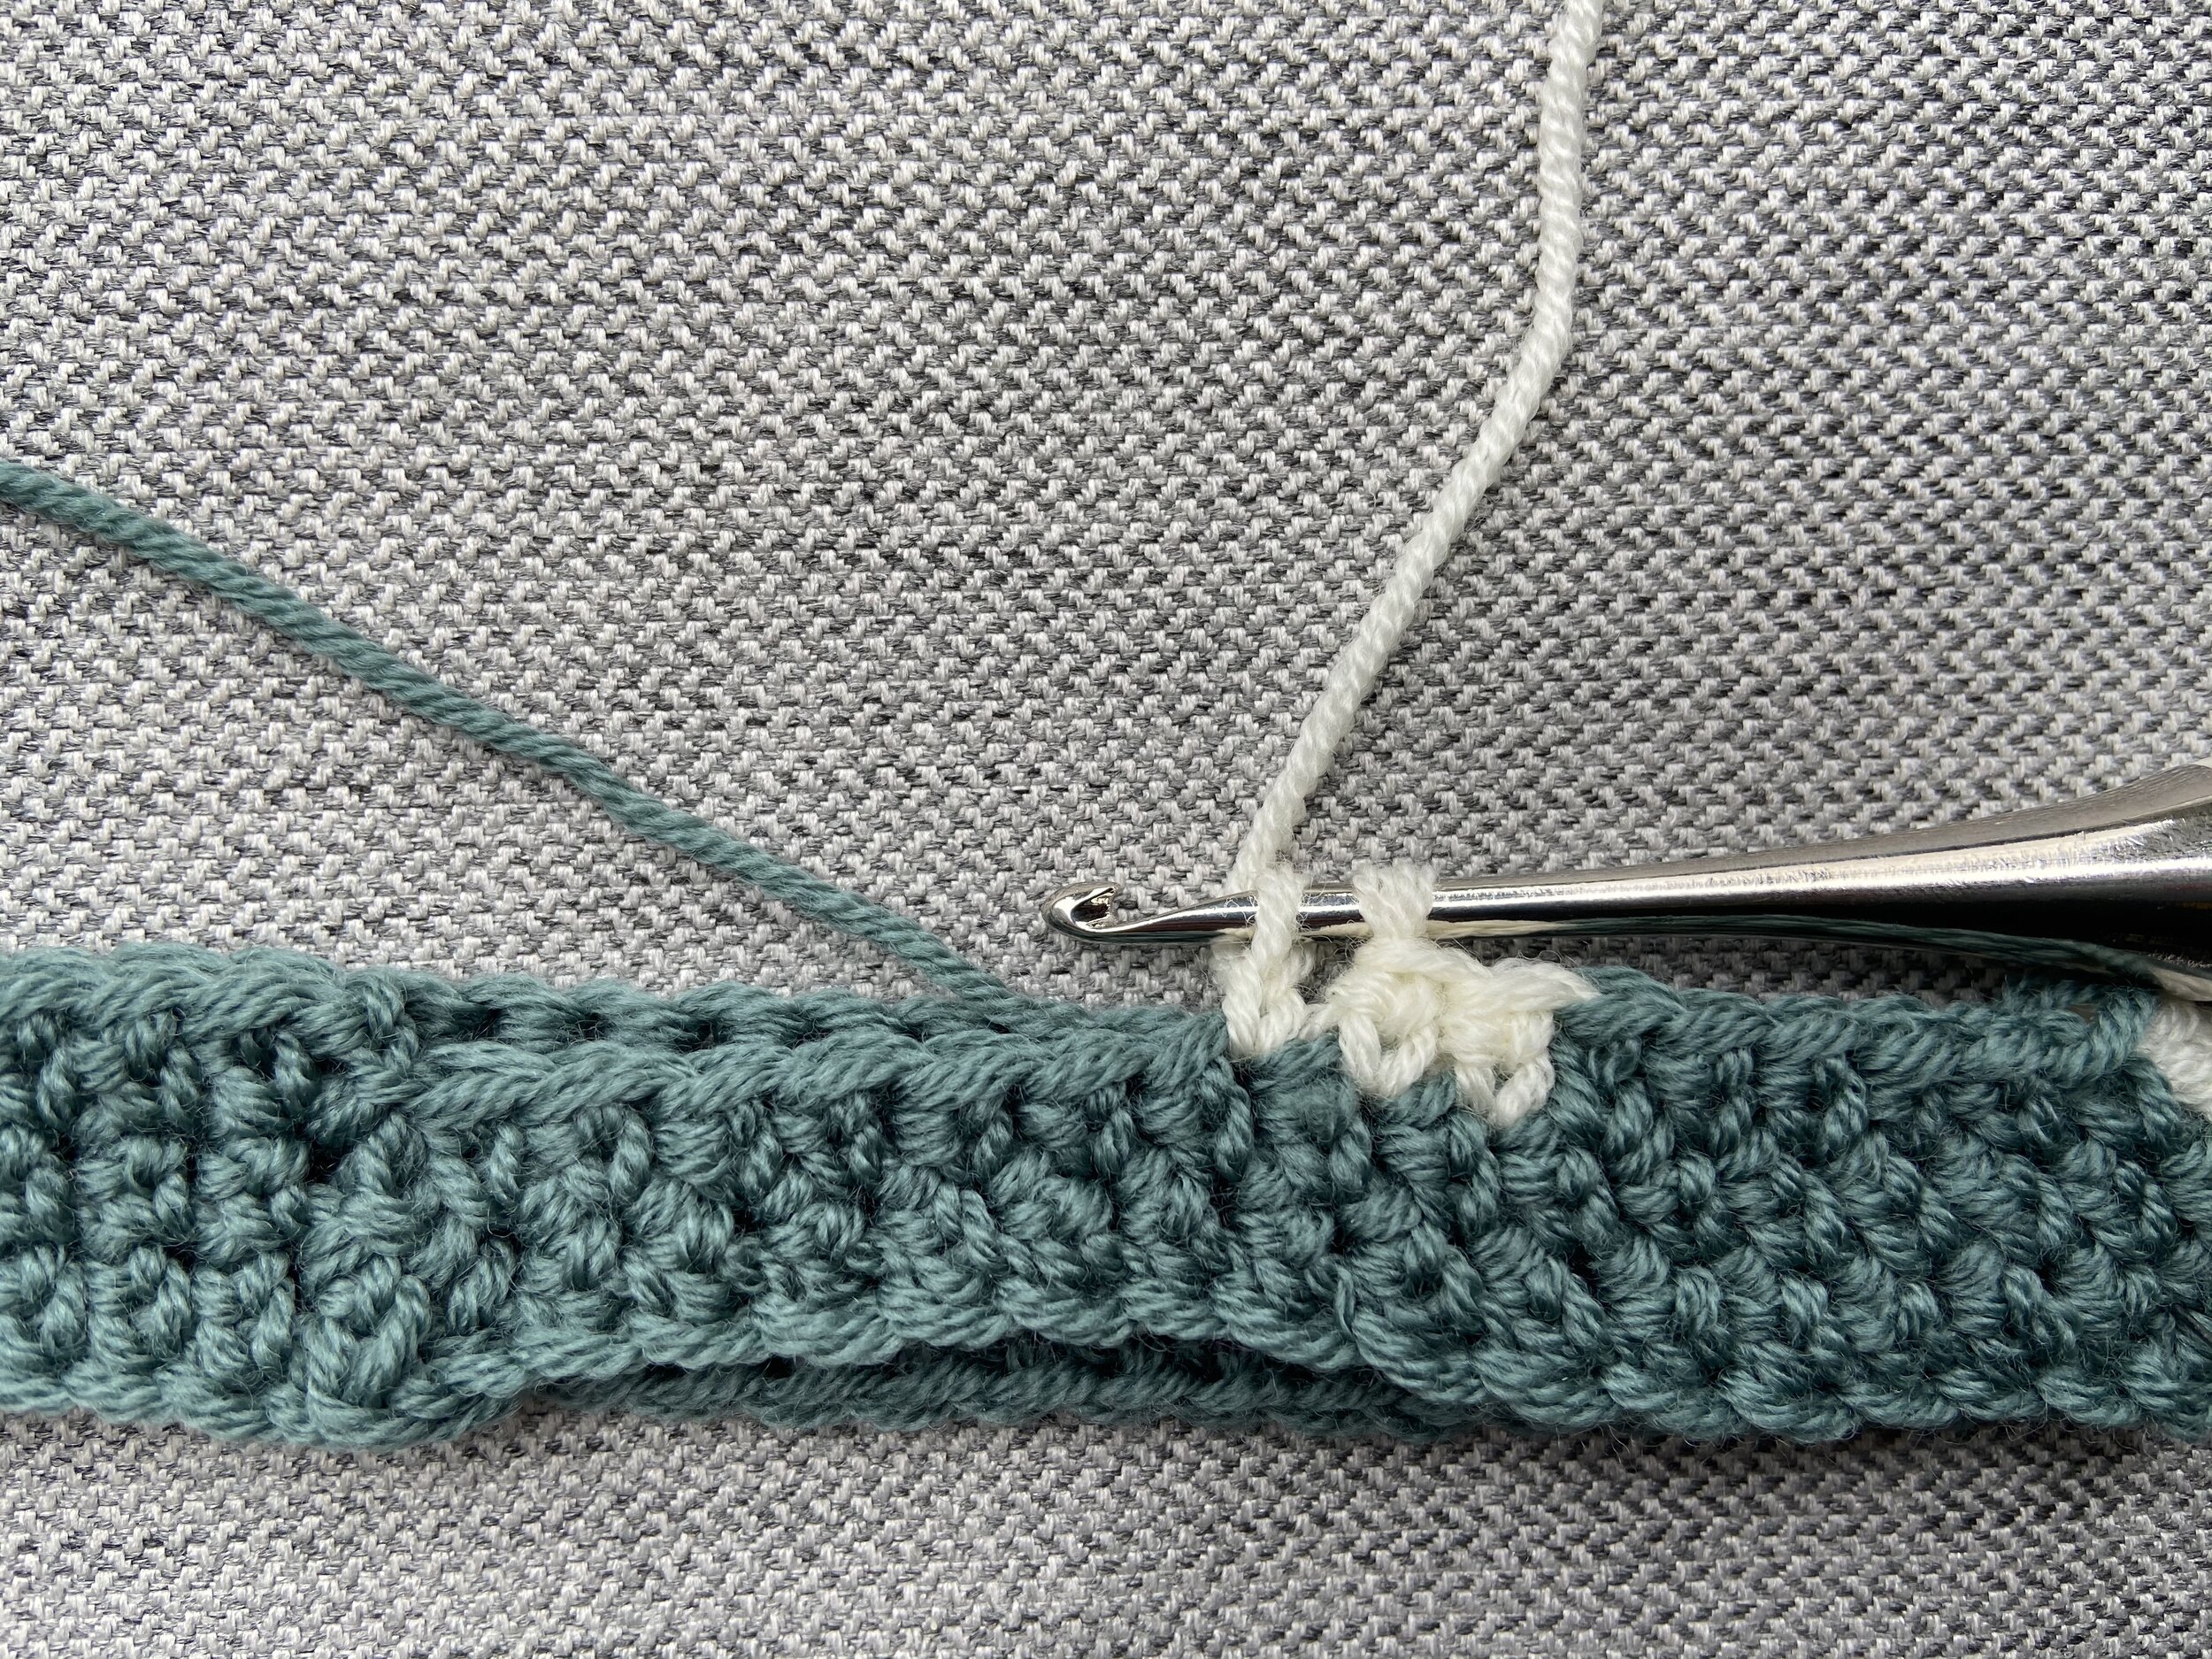
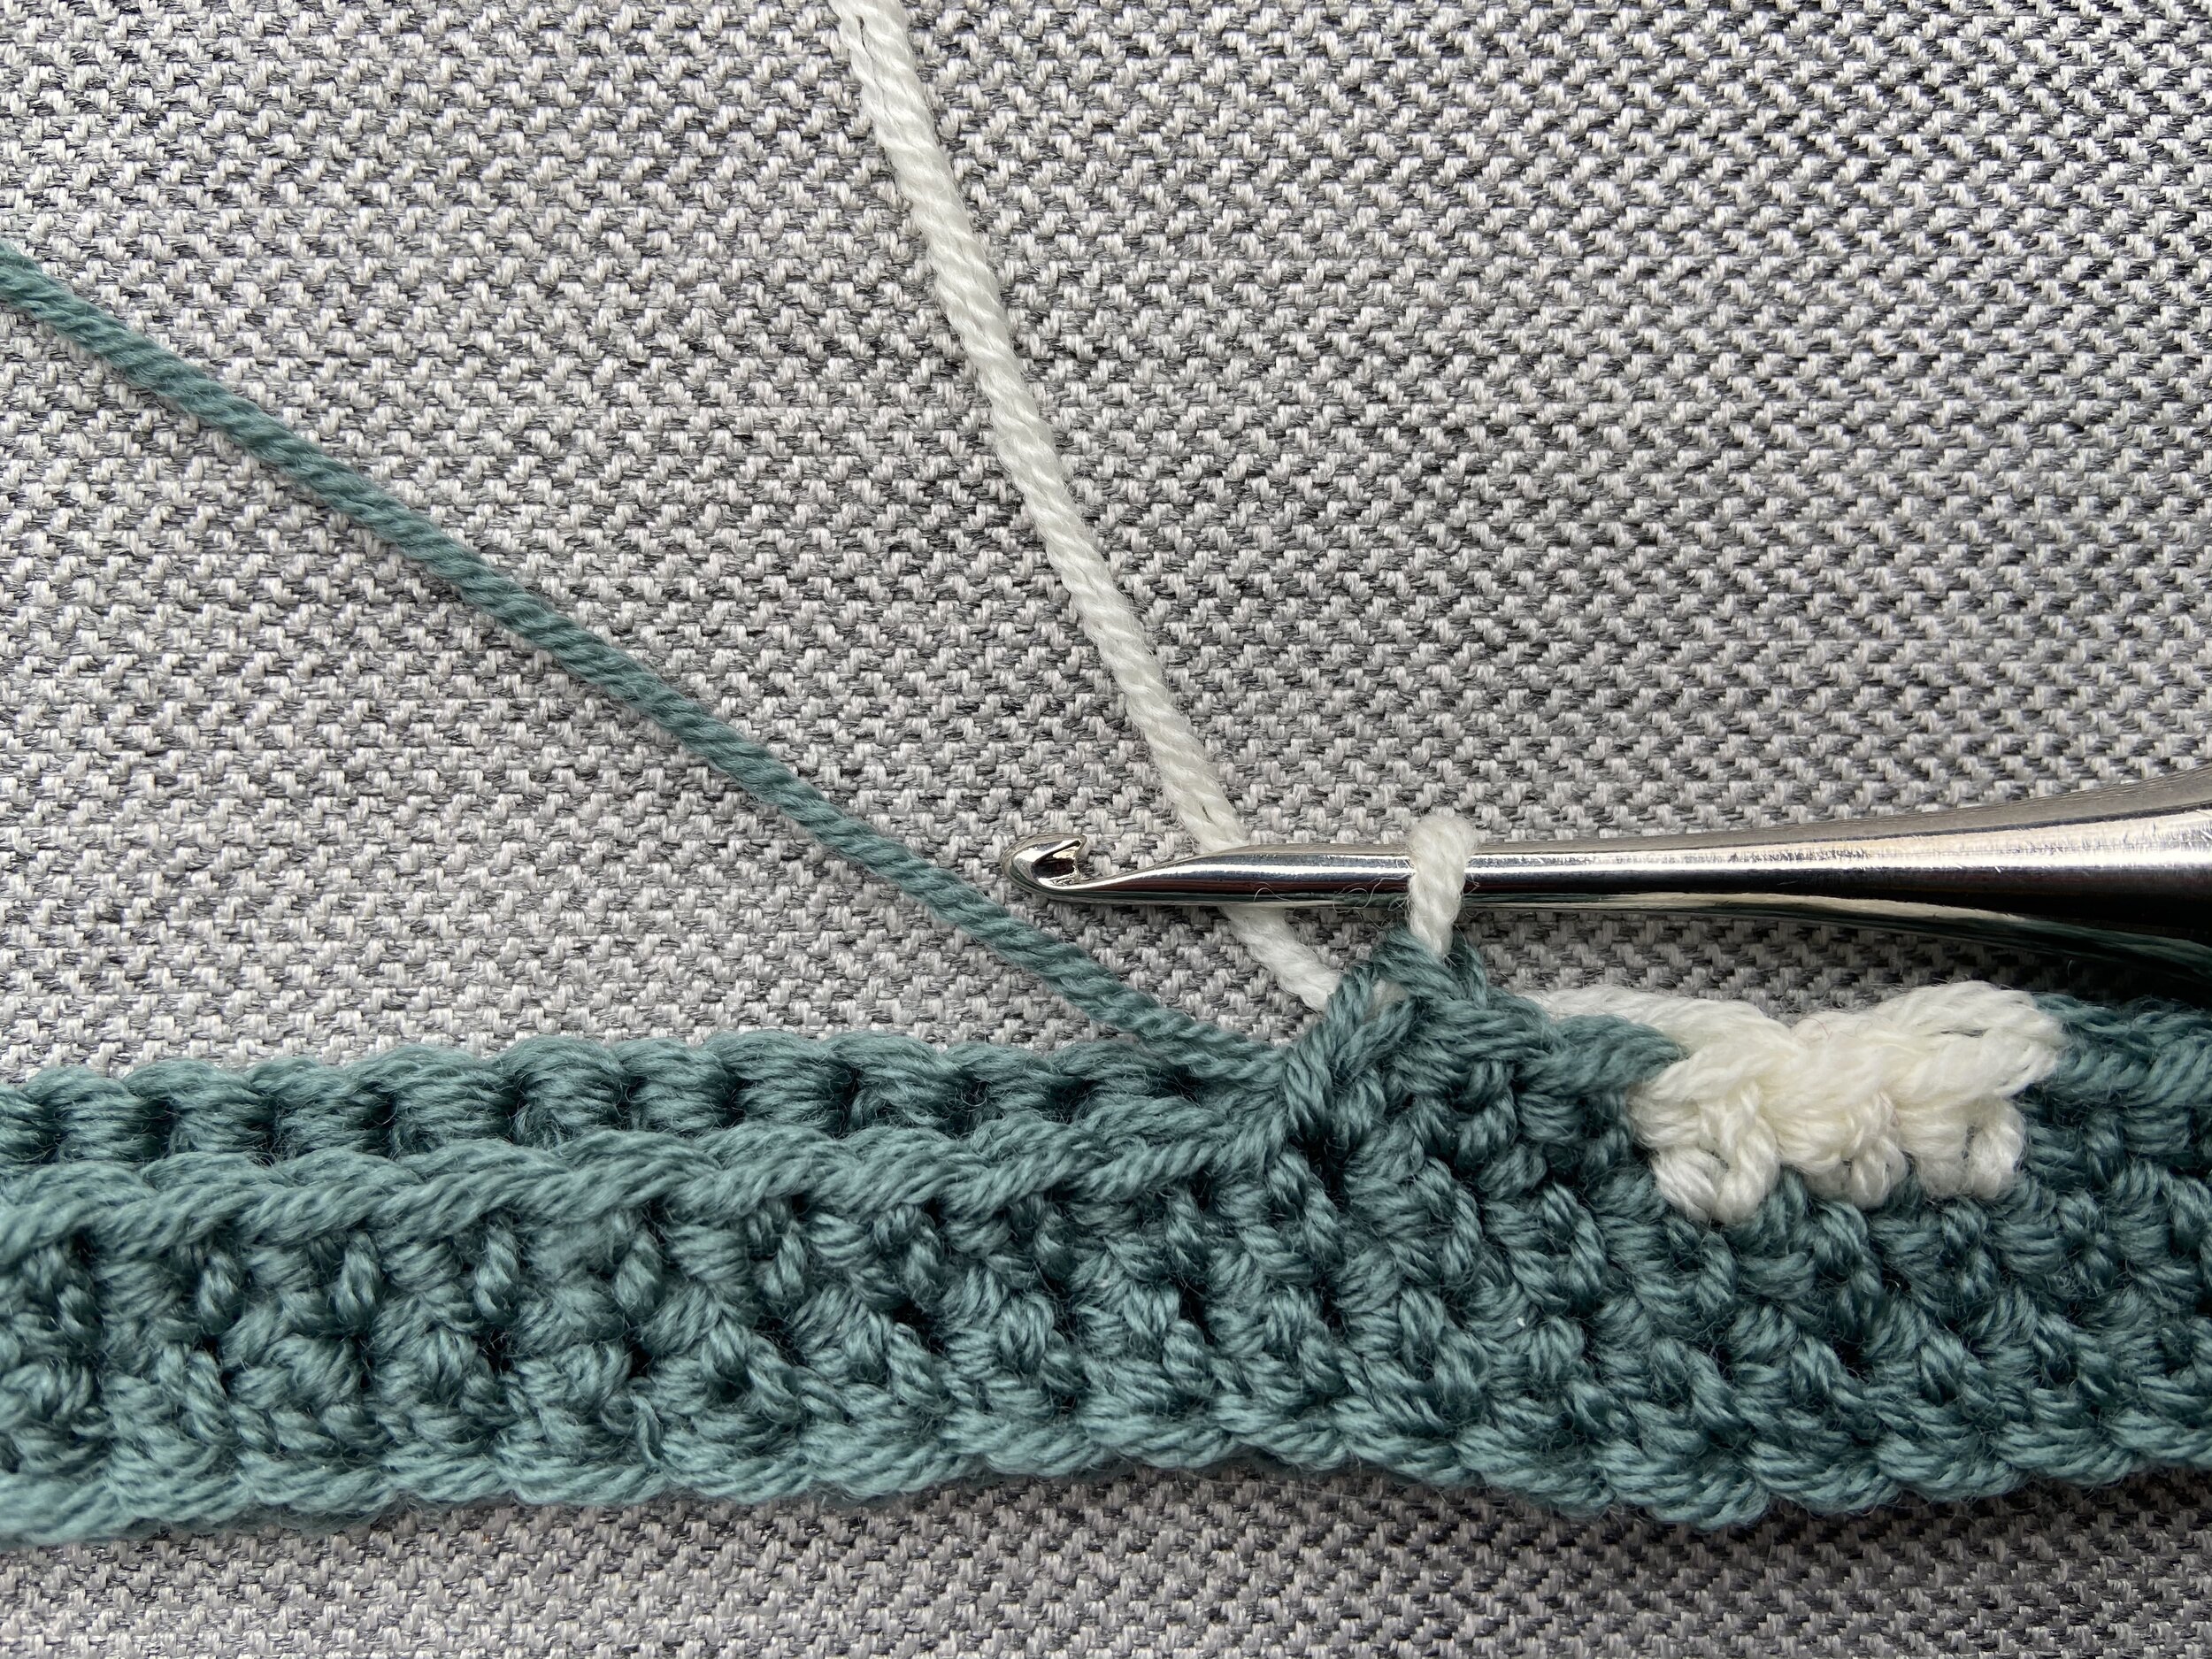
When the first stitch after the chains is a new colour it is important to complete one less chain in the previous colour as is needed and do the last chain with the next colour. This is similar in theory to changing colour before the last yarn over of the last stitch. For example, in Marzanna each round begins with a chain 2, when the first extended single crochet changes colours, you will instead chain 1, change colours, chain 1 in the new colour then begin the extended single crochet stitch as normal.
Yarn management
Arguably the hardest part of colourwork for me is yarn management and stopping my two (or more) working yarns from twisting and tangling around each other. I had to lean on the crochet community to find ways to prevent the tangling and here is how I did it.
First, I chose a “top” yarn and a “bottom” yarn. I chose the main, sage colour (A) as my bottom yarn, and the contracting cream colour (B) as my top yarn. When switching from A to B I would put A down and to the left, and when switching from B to A I would put B up and to the right. So one yarn will always be over the other, and one will always be under.
If you continually pull both yarns over (which is my habit), you will end up spiralling your two working yarns together. I found it easiest to keep track if I kept my bottom colour (A) to the left side of my body, because I am right-handed, and the top colour (B) directly ahead of me on the coffee table. This served as a remind for me to move the yarn up or down each colour change.

If you’re working with 3 or more colours it gets trickier, but the concept is the same order your yarns from top to bottom and ALWAYS keep them in this order. Working with 3 or more yarns does not result in a cute little spiralling effect like when you work with 2 colours. You end up with a big icky tangled mess.
Floats
“What’s a float?” you ask? A float is the strand of yarn that trails behind your work when the opposite colour is being used for the stitches. “Why does it matter”? Because it takes a bit of playing to get your floats *just right*.
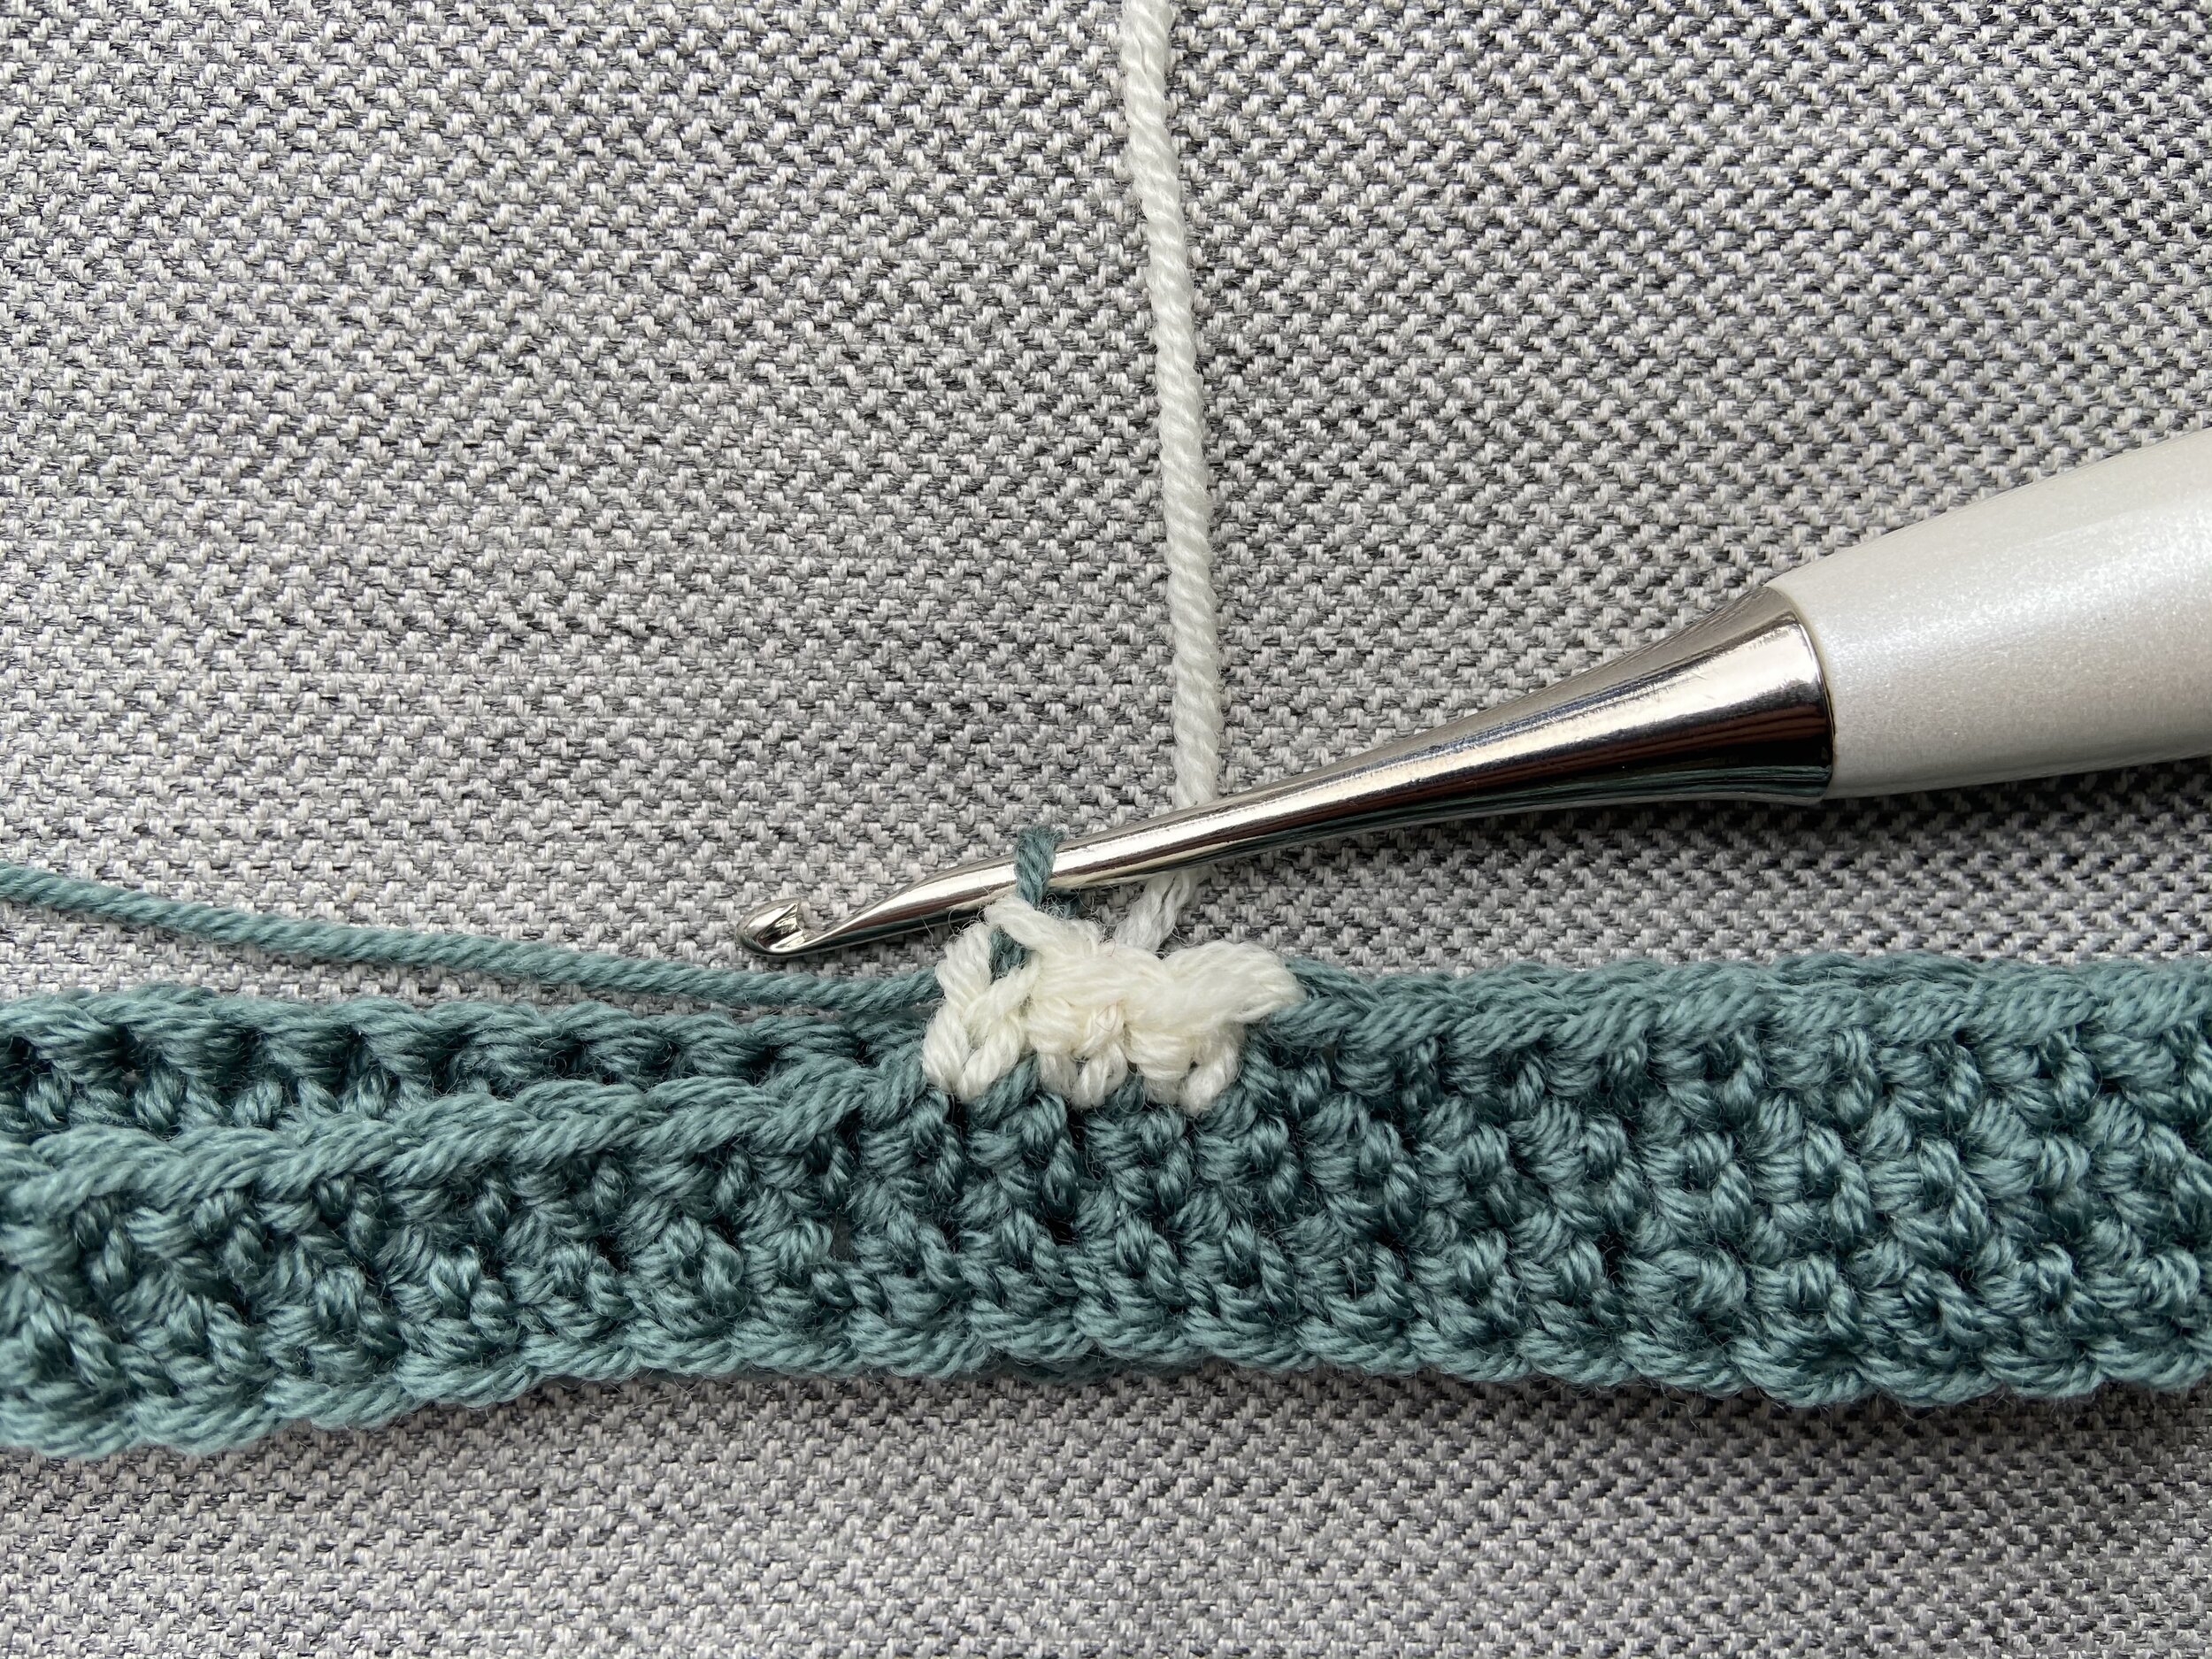
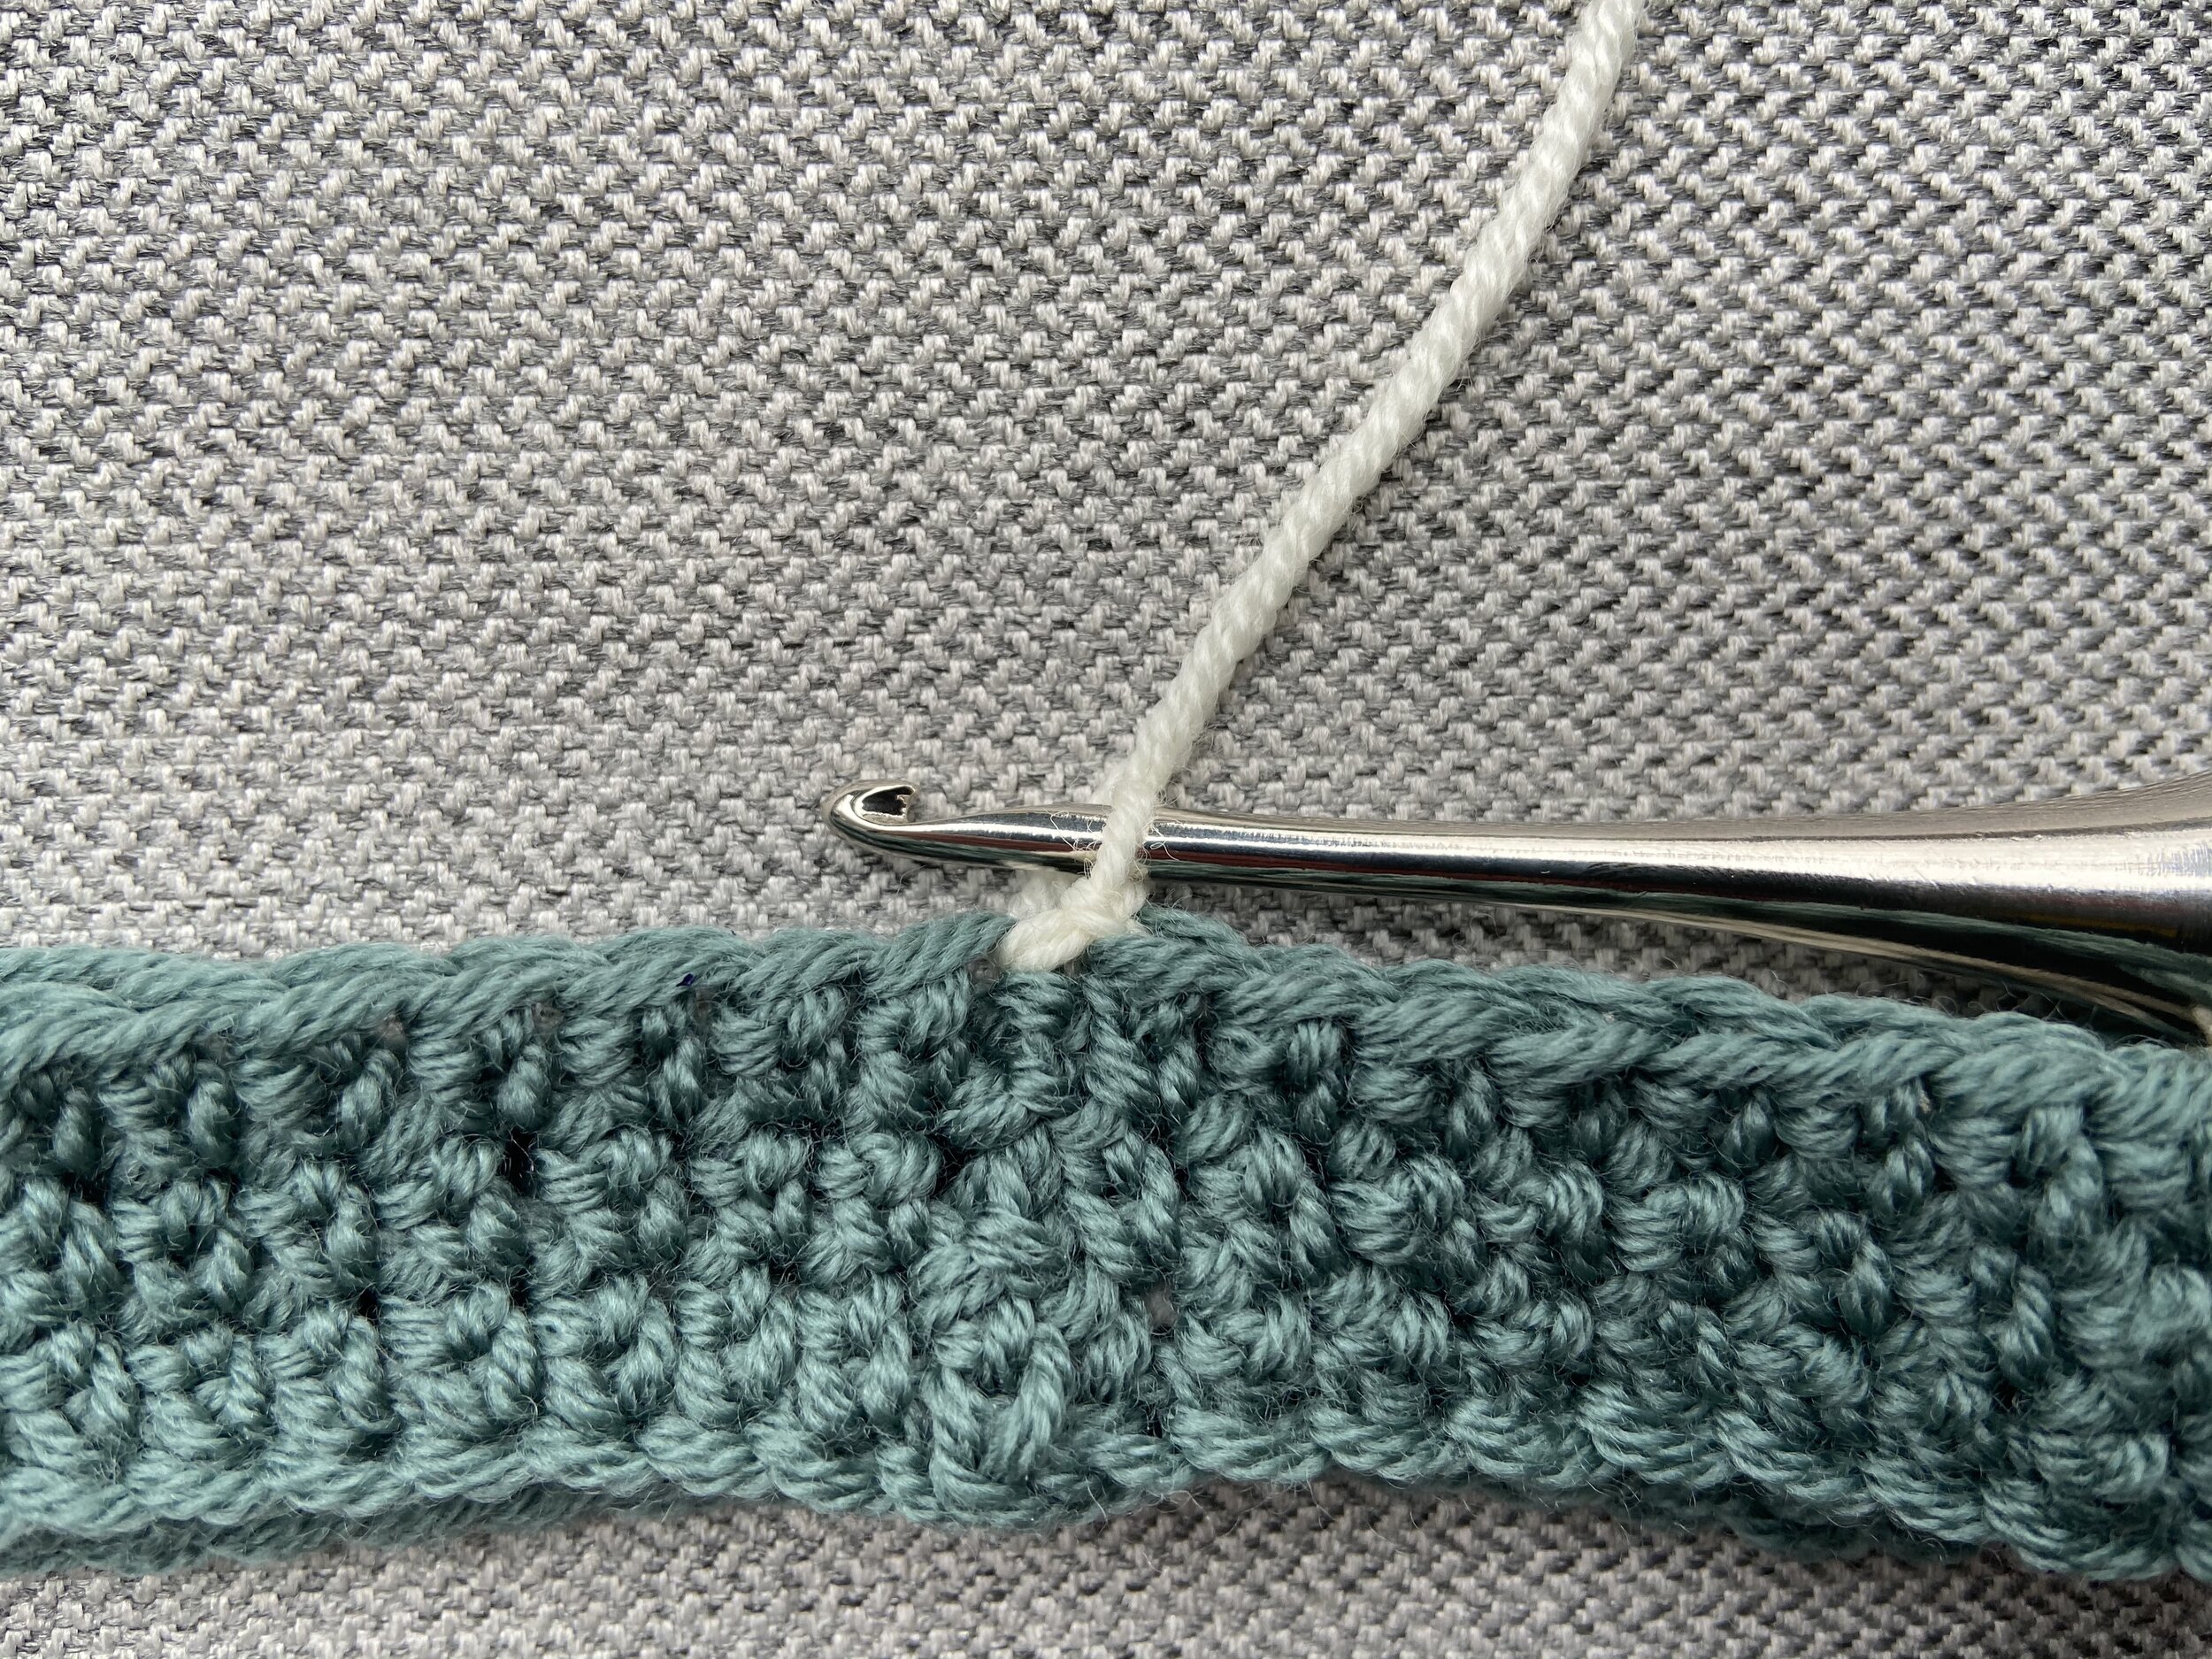
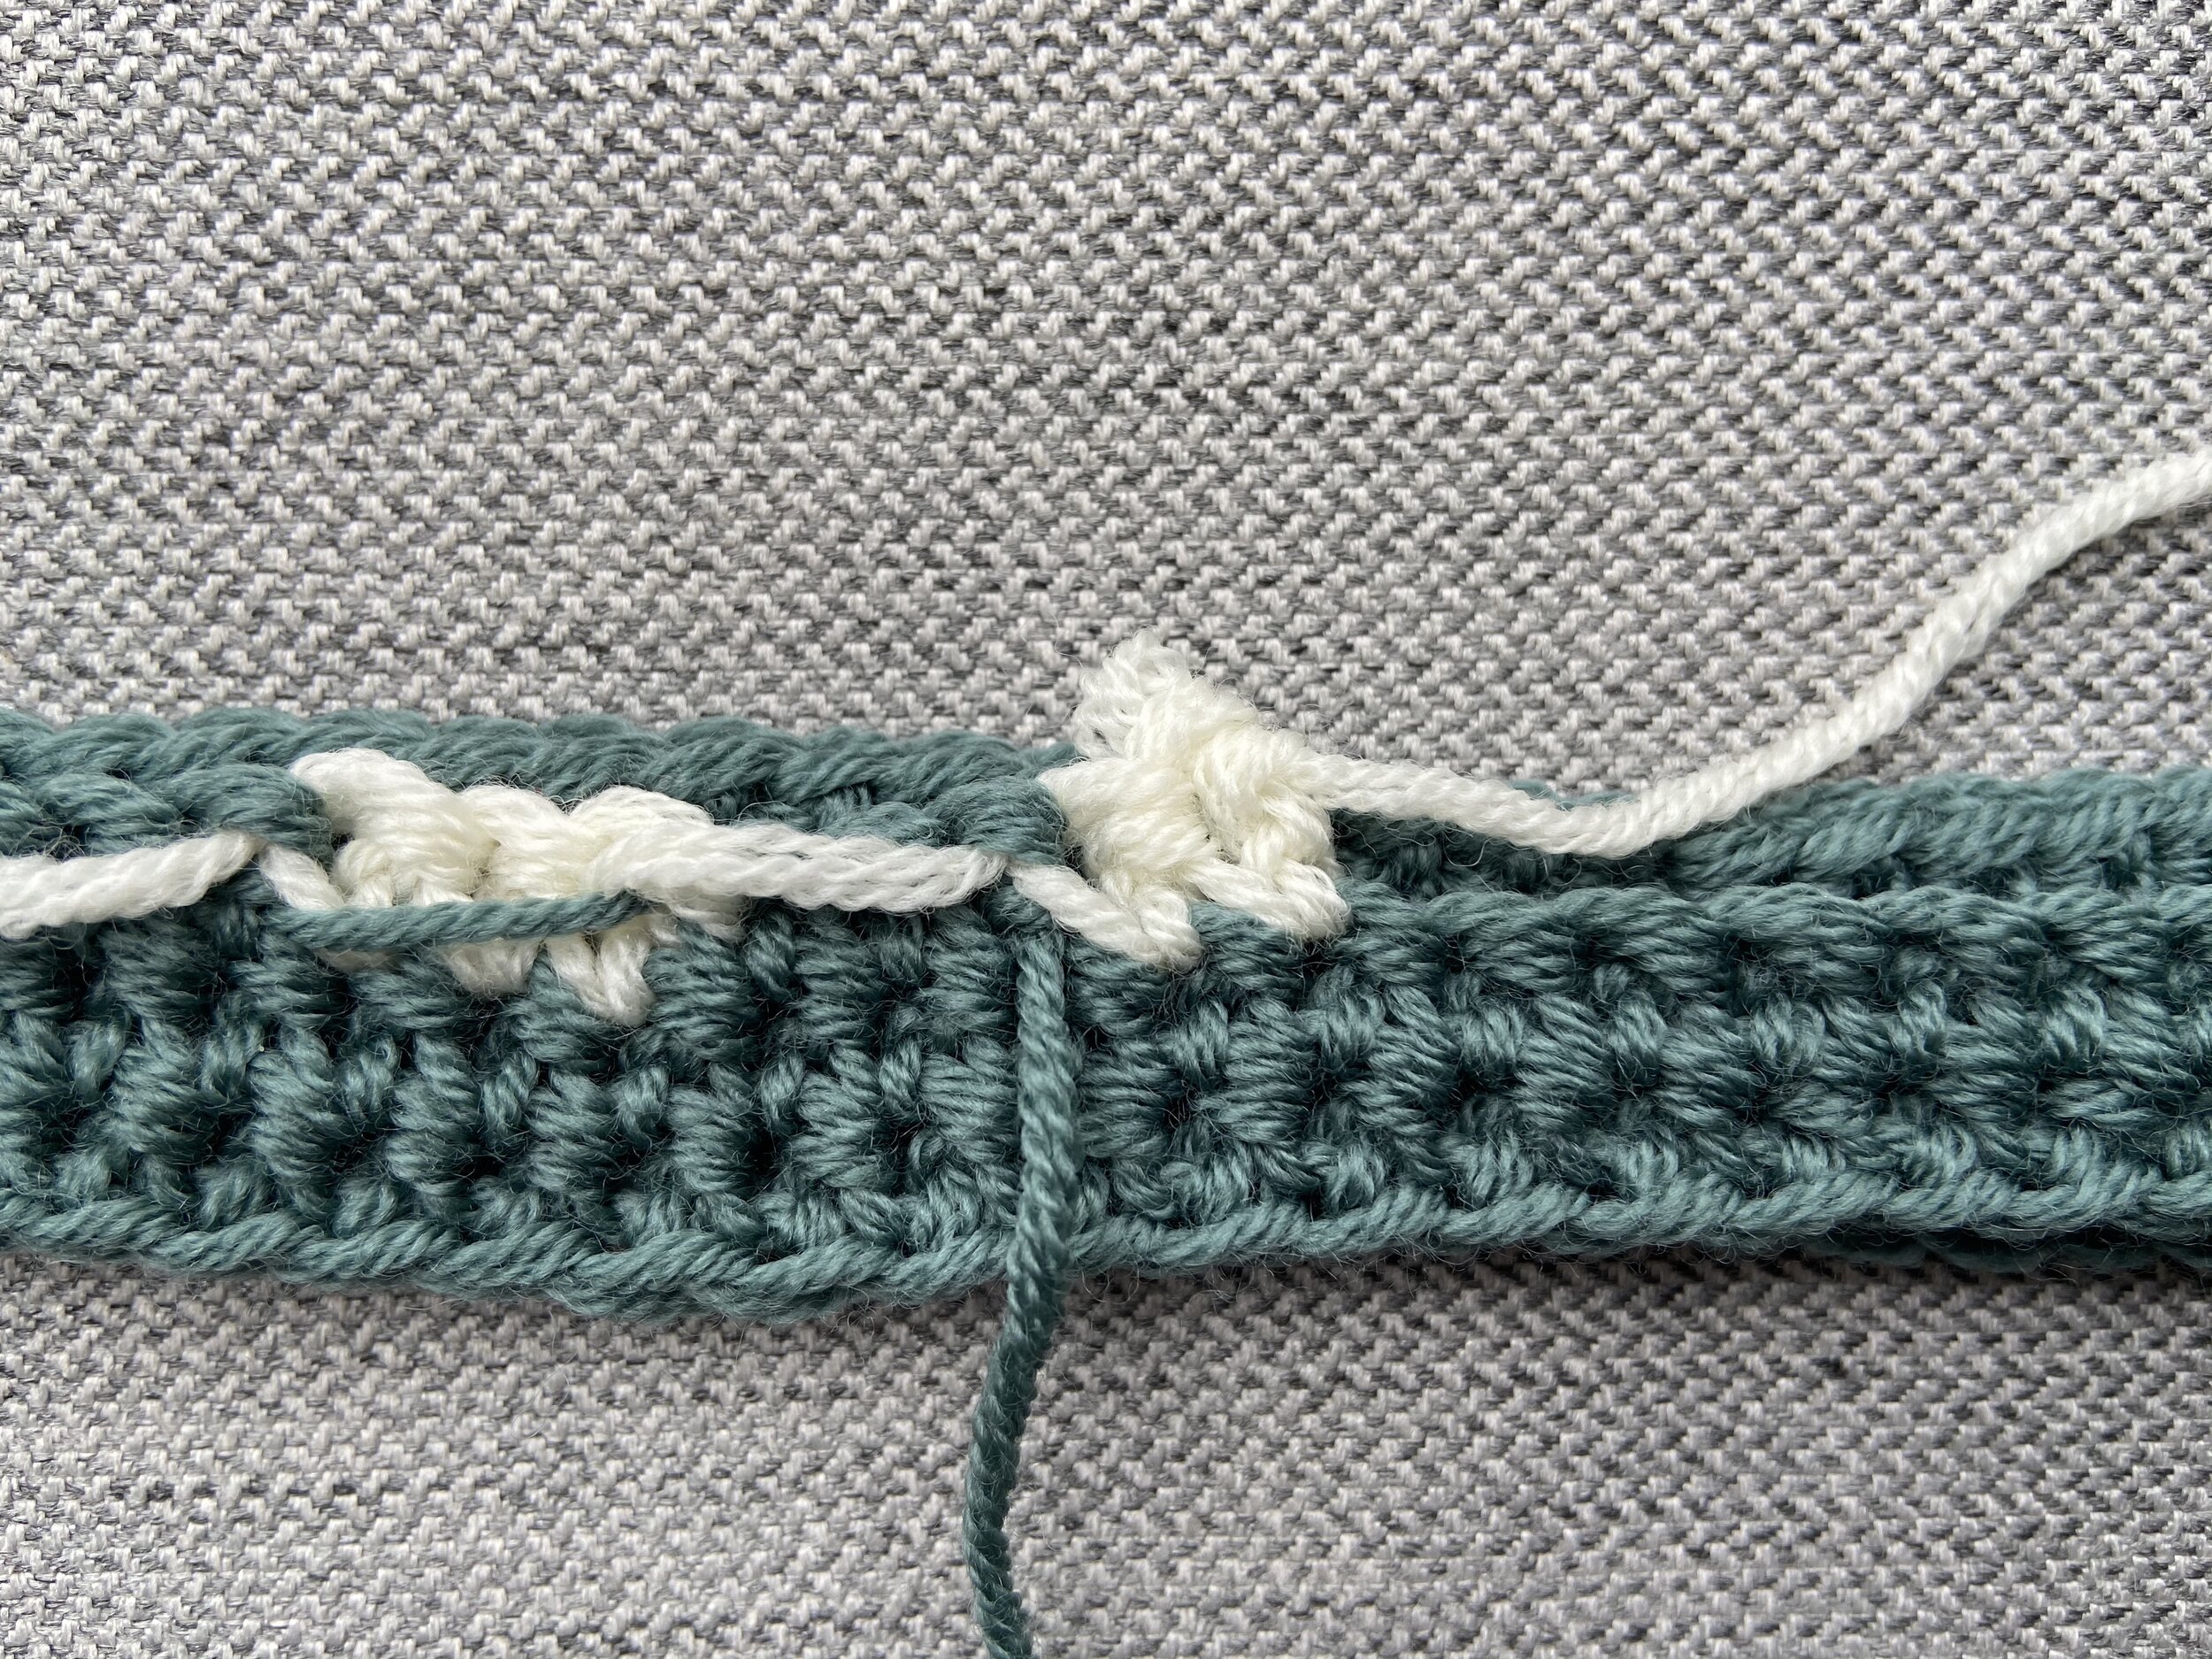
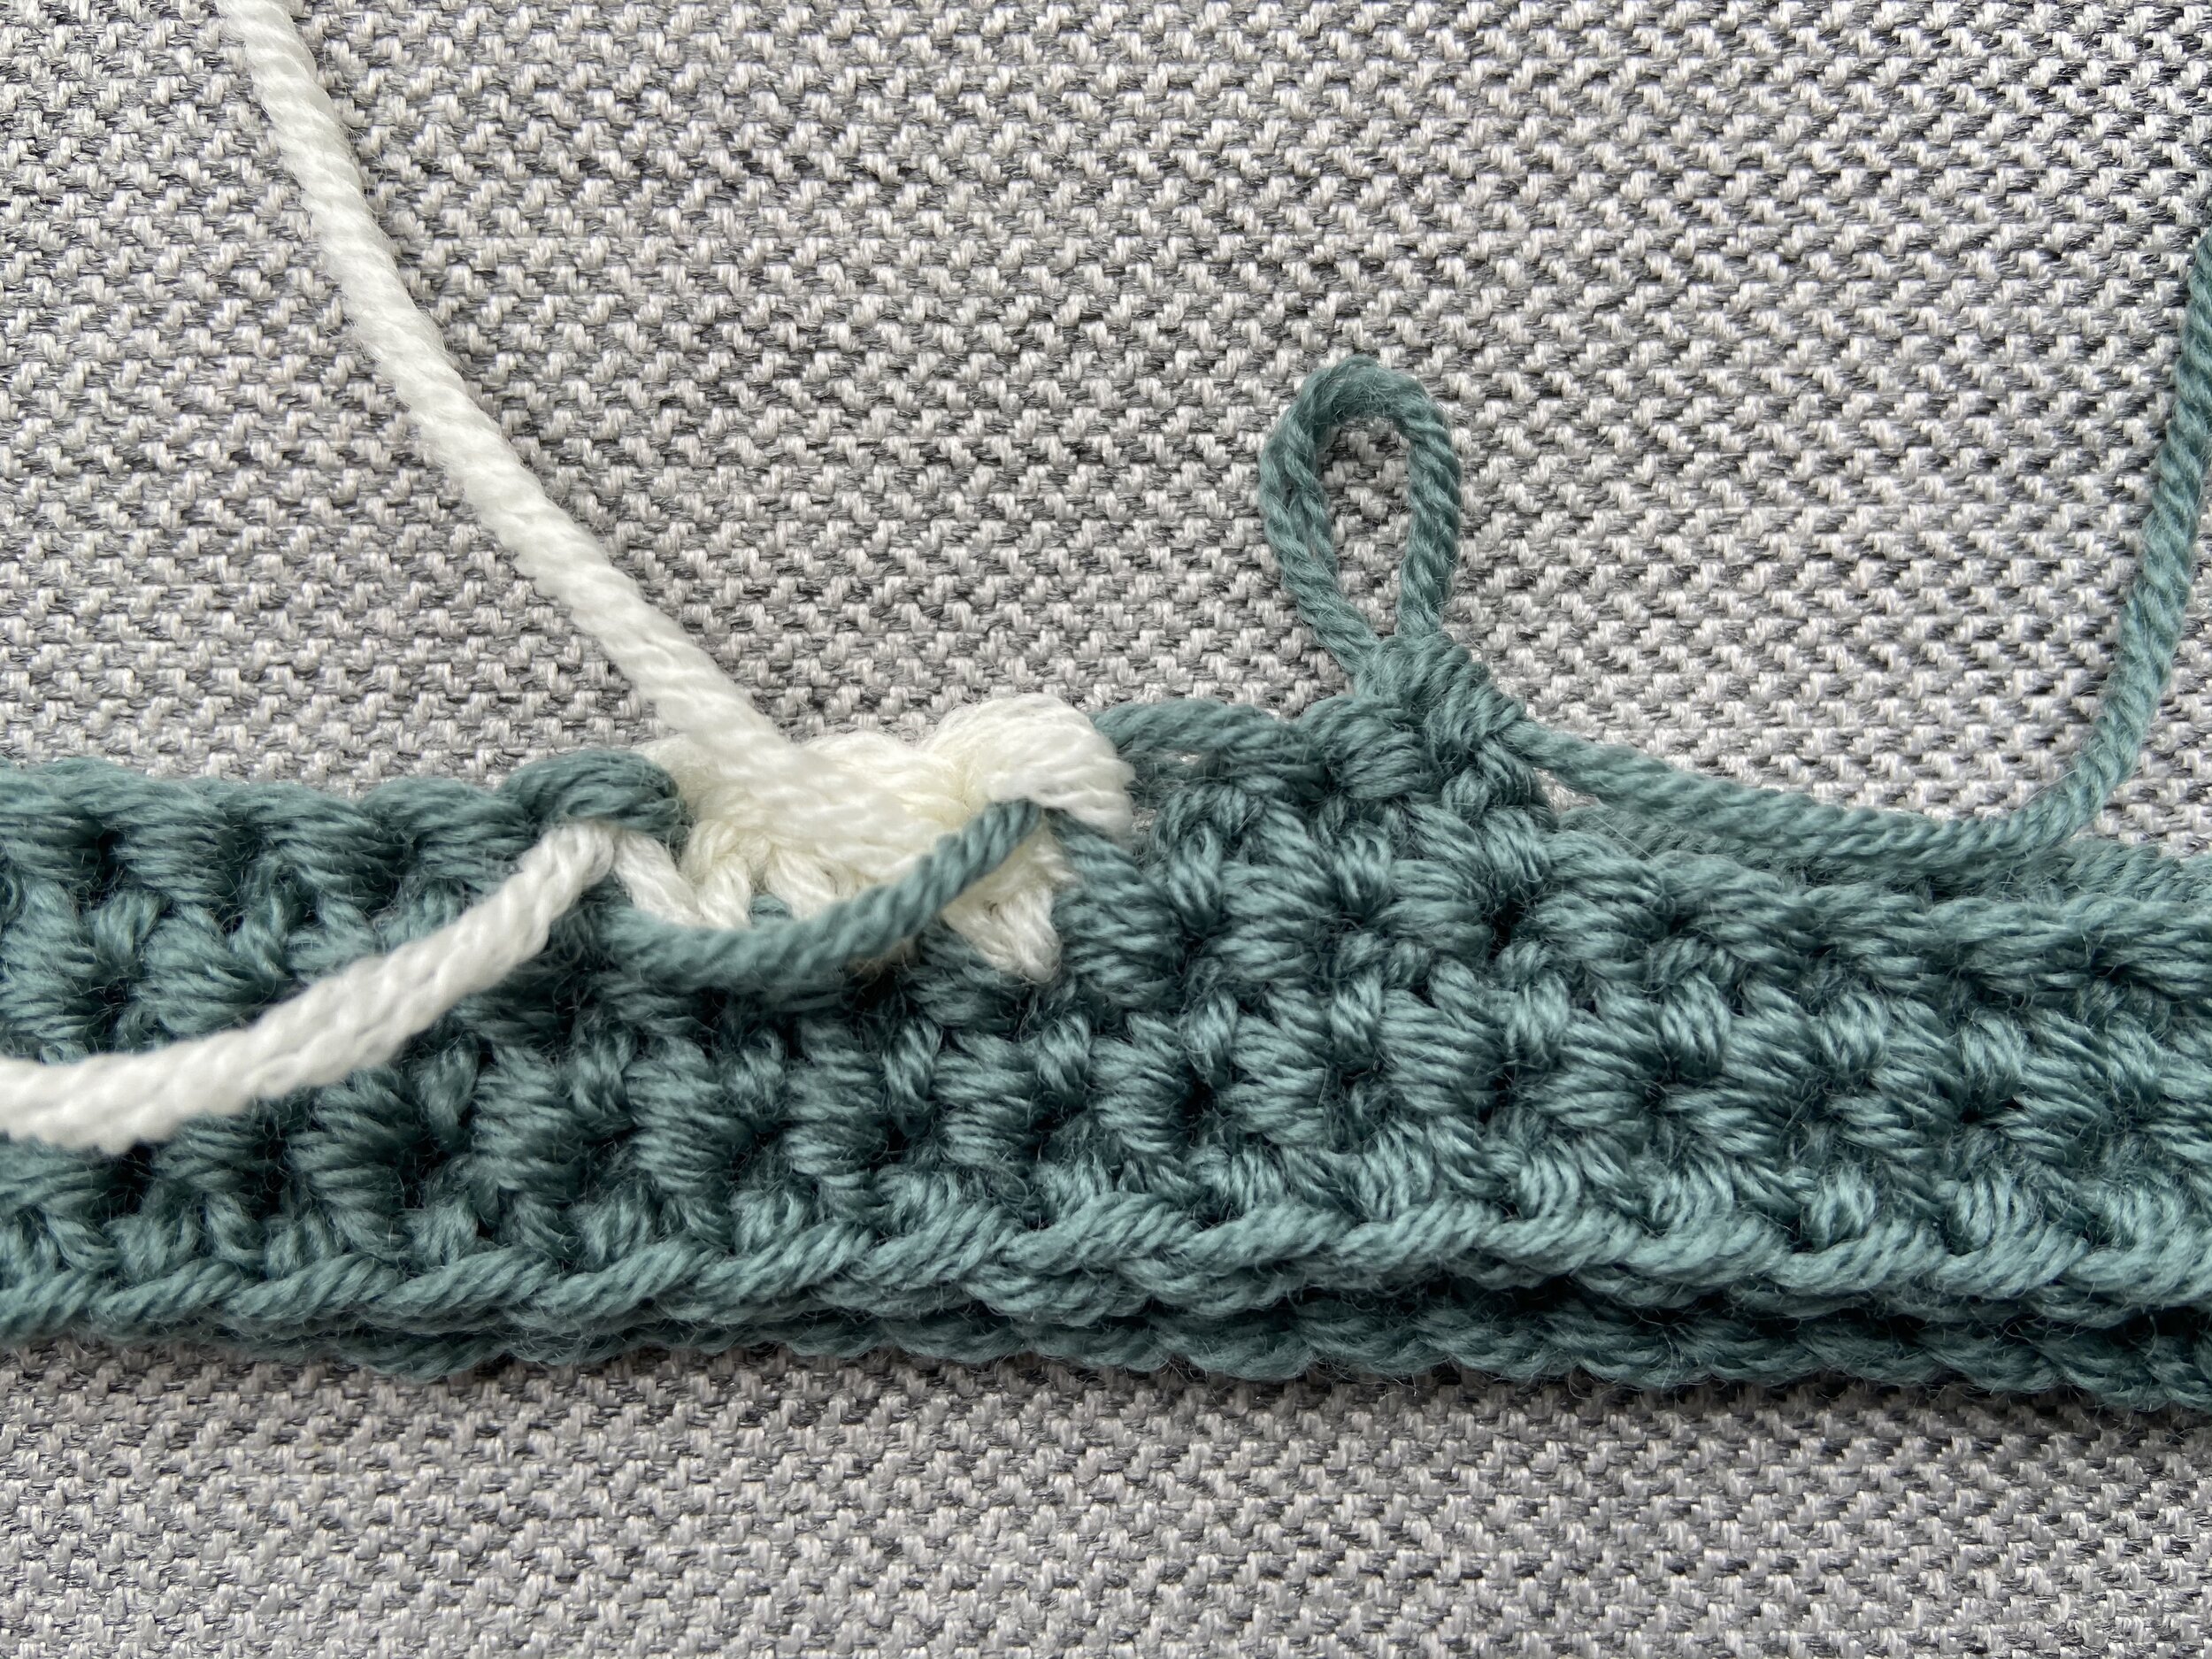
Let’s start with what NOT to do. Do not pull your floats too tight or you will pull on the last and first stitch of that colour as well as cause your fabric to pucker or not lay flat. Here is an example of too tight floats:
You can see the last and first stitches in the sage colour on either side of the white are misshapen and it’s more difficult to see but the white stitches are bumped out from the work causing some puckering and pulling your gauge much tighter.
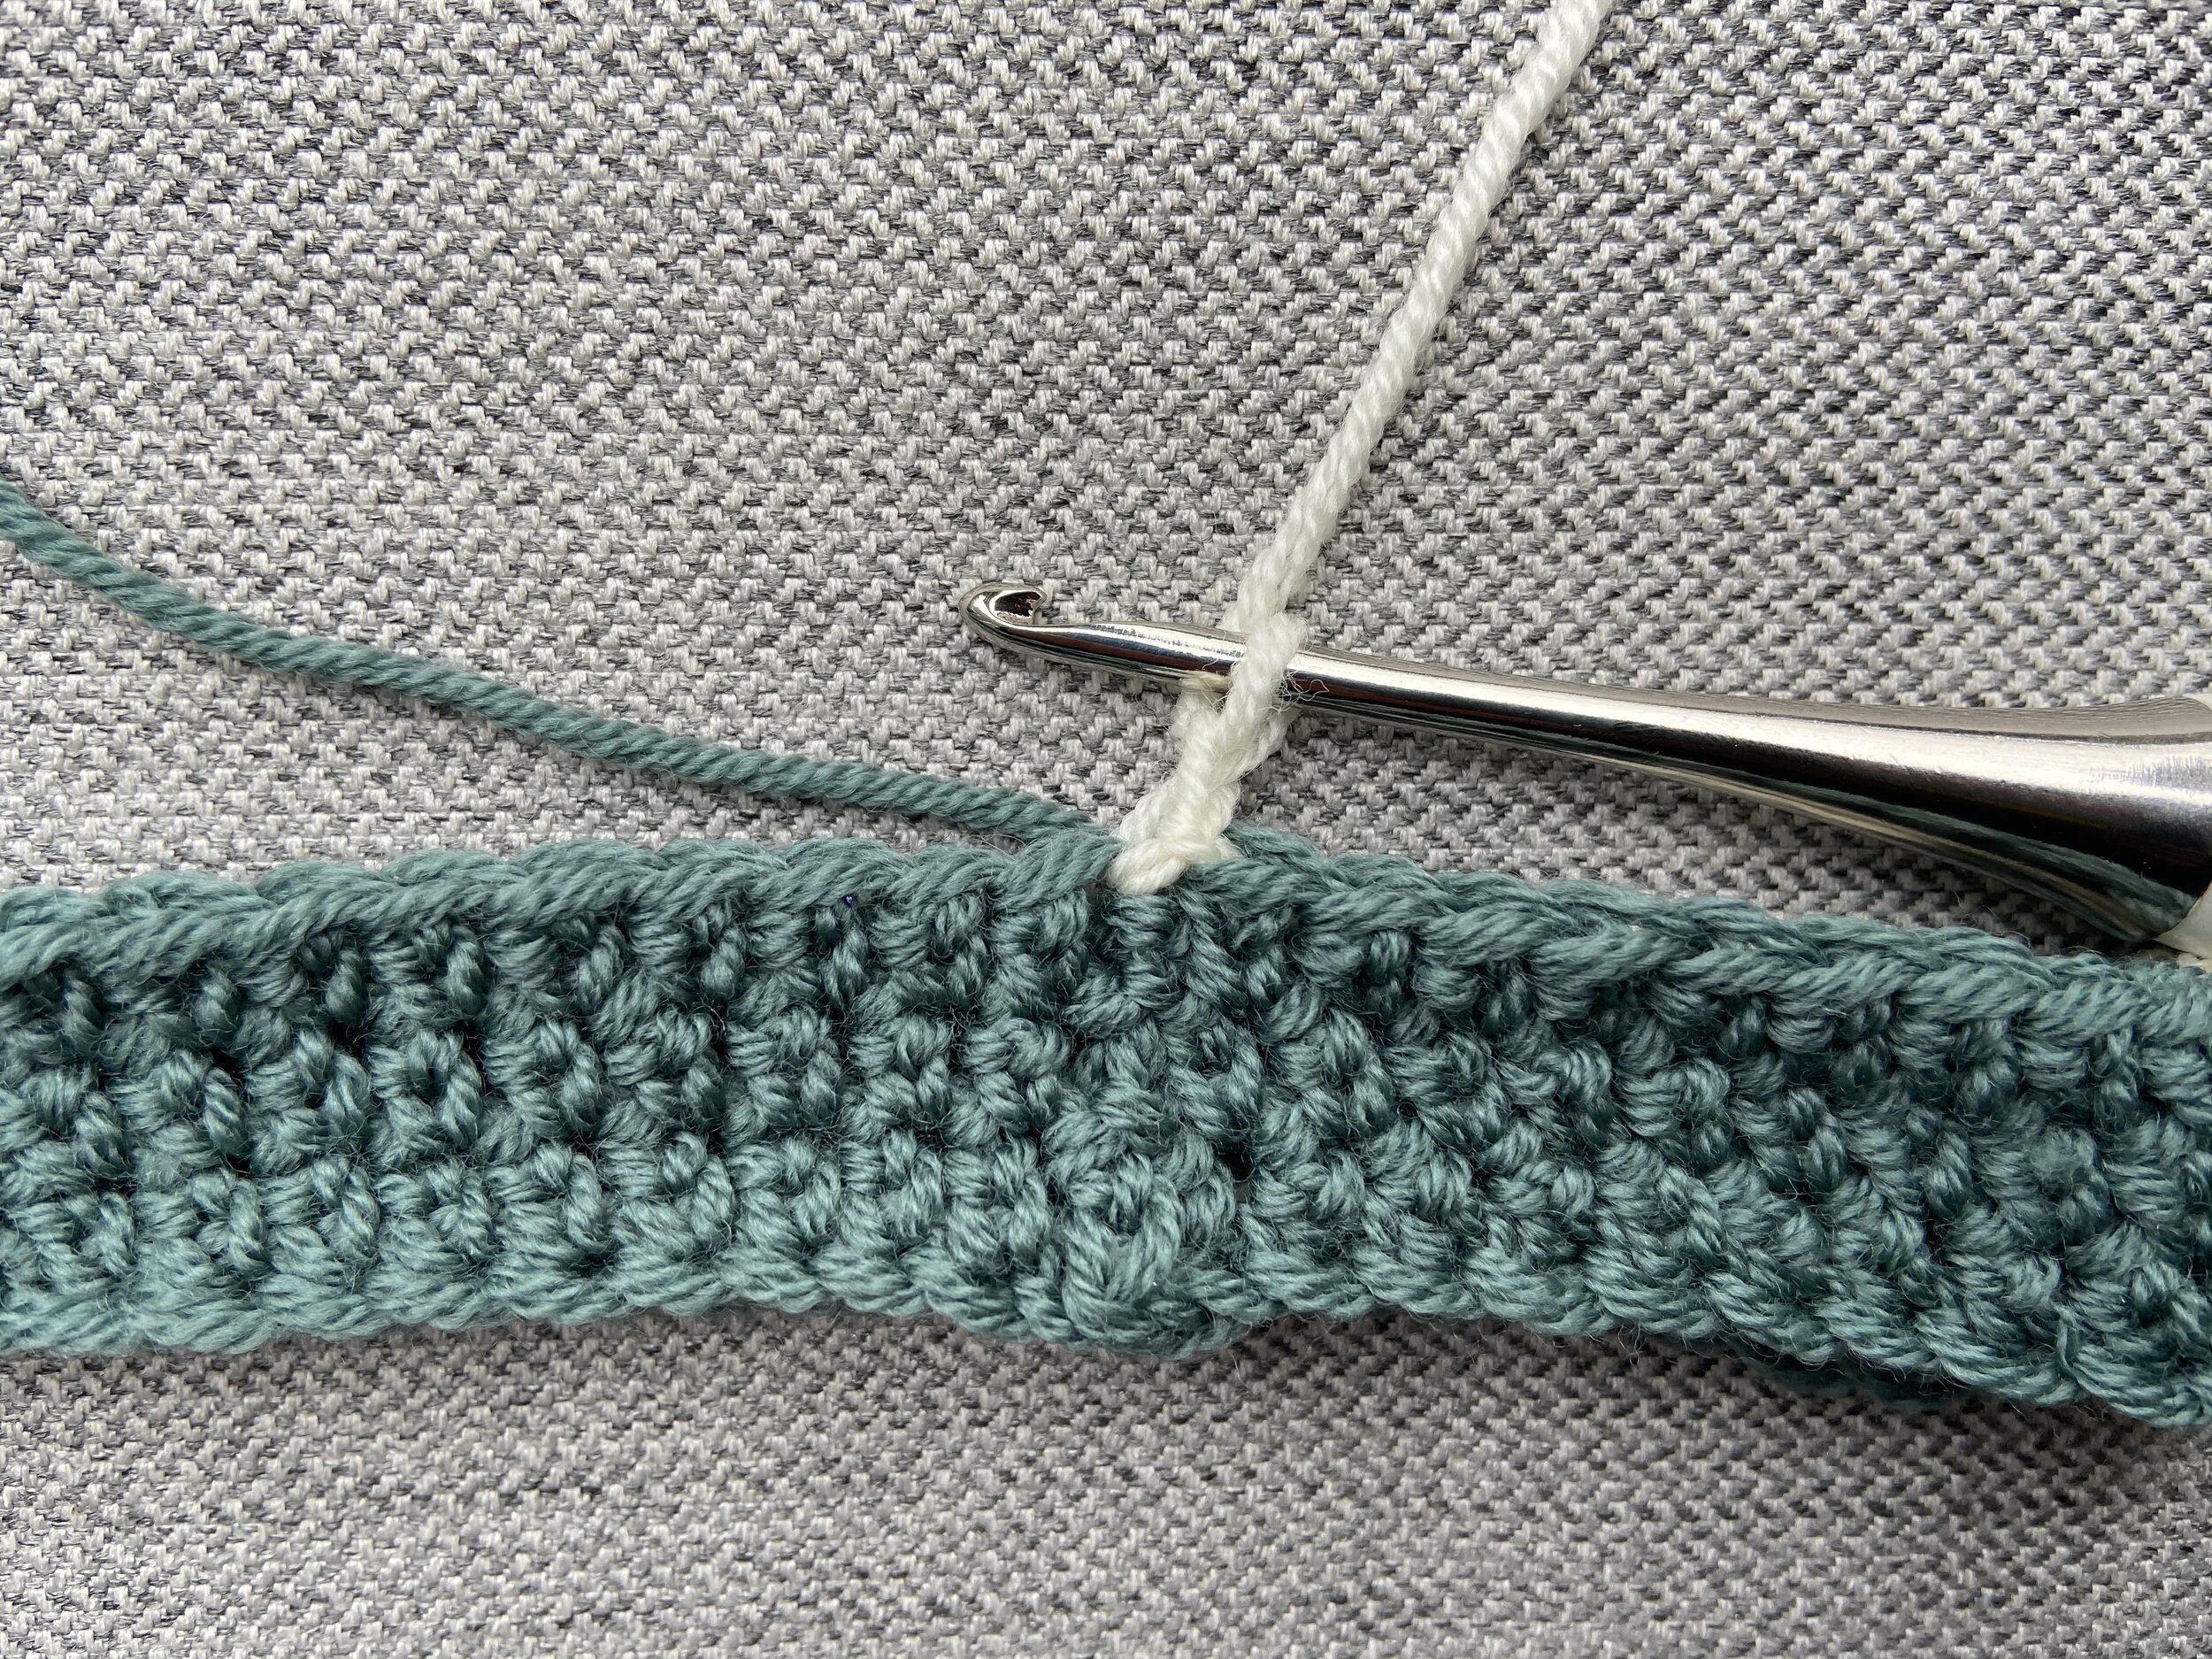
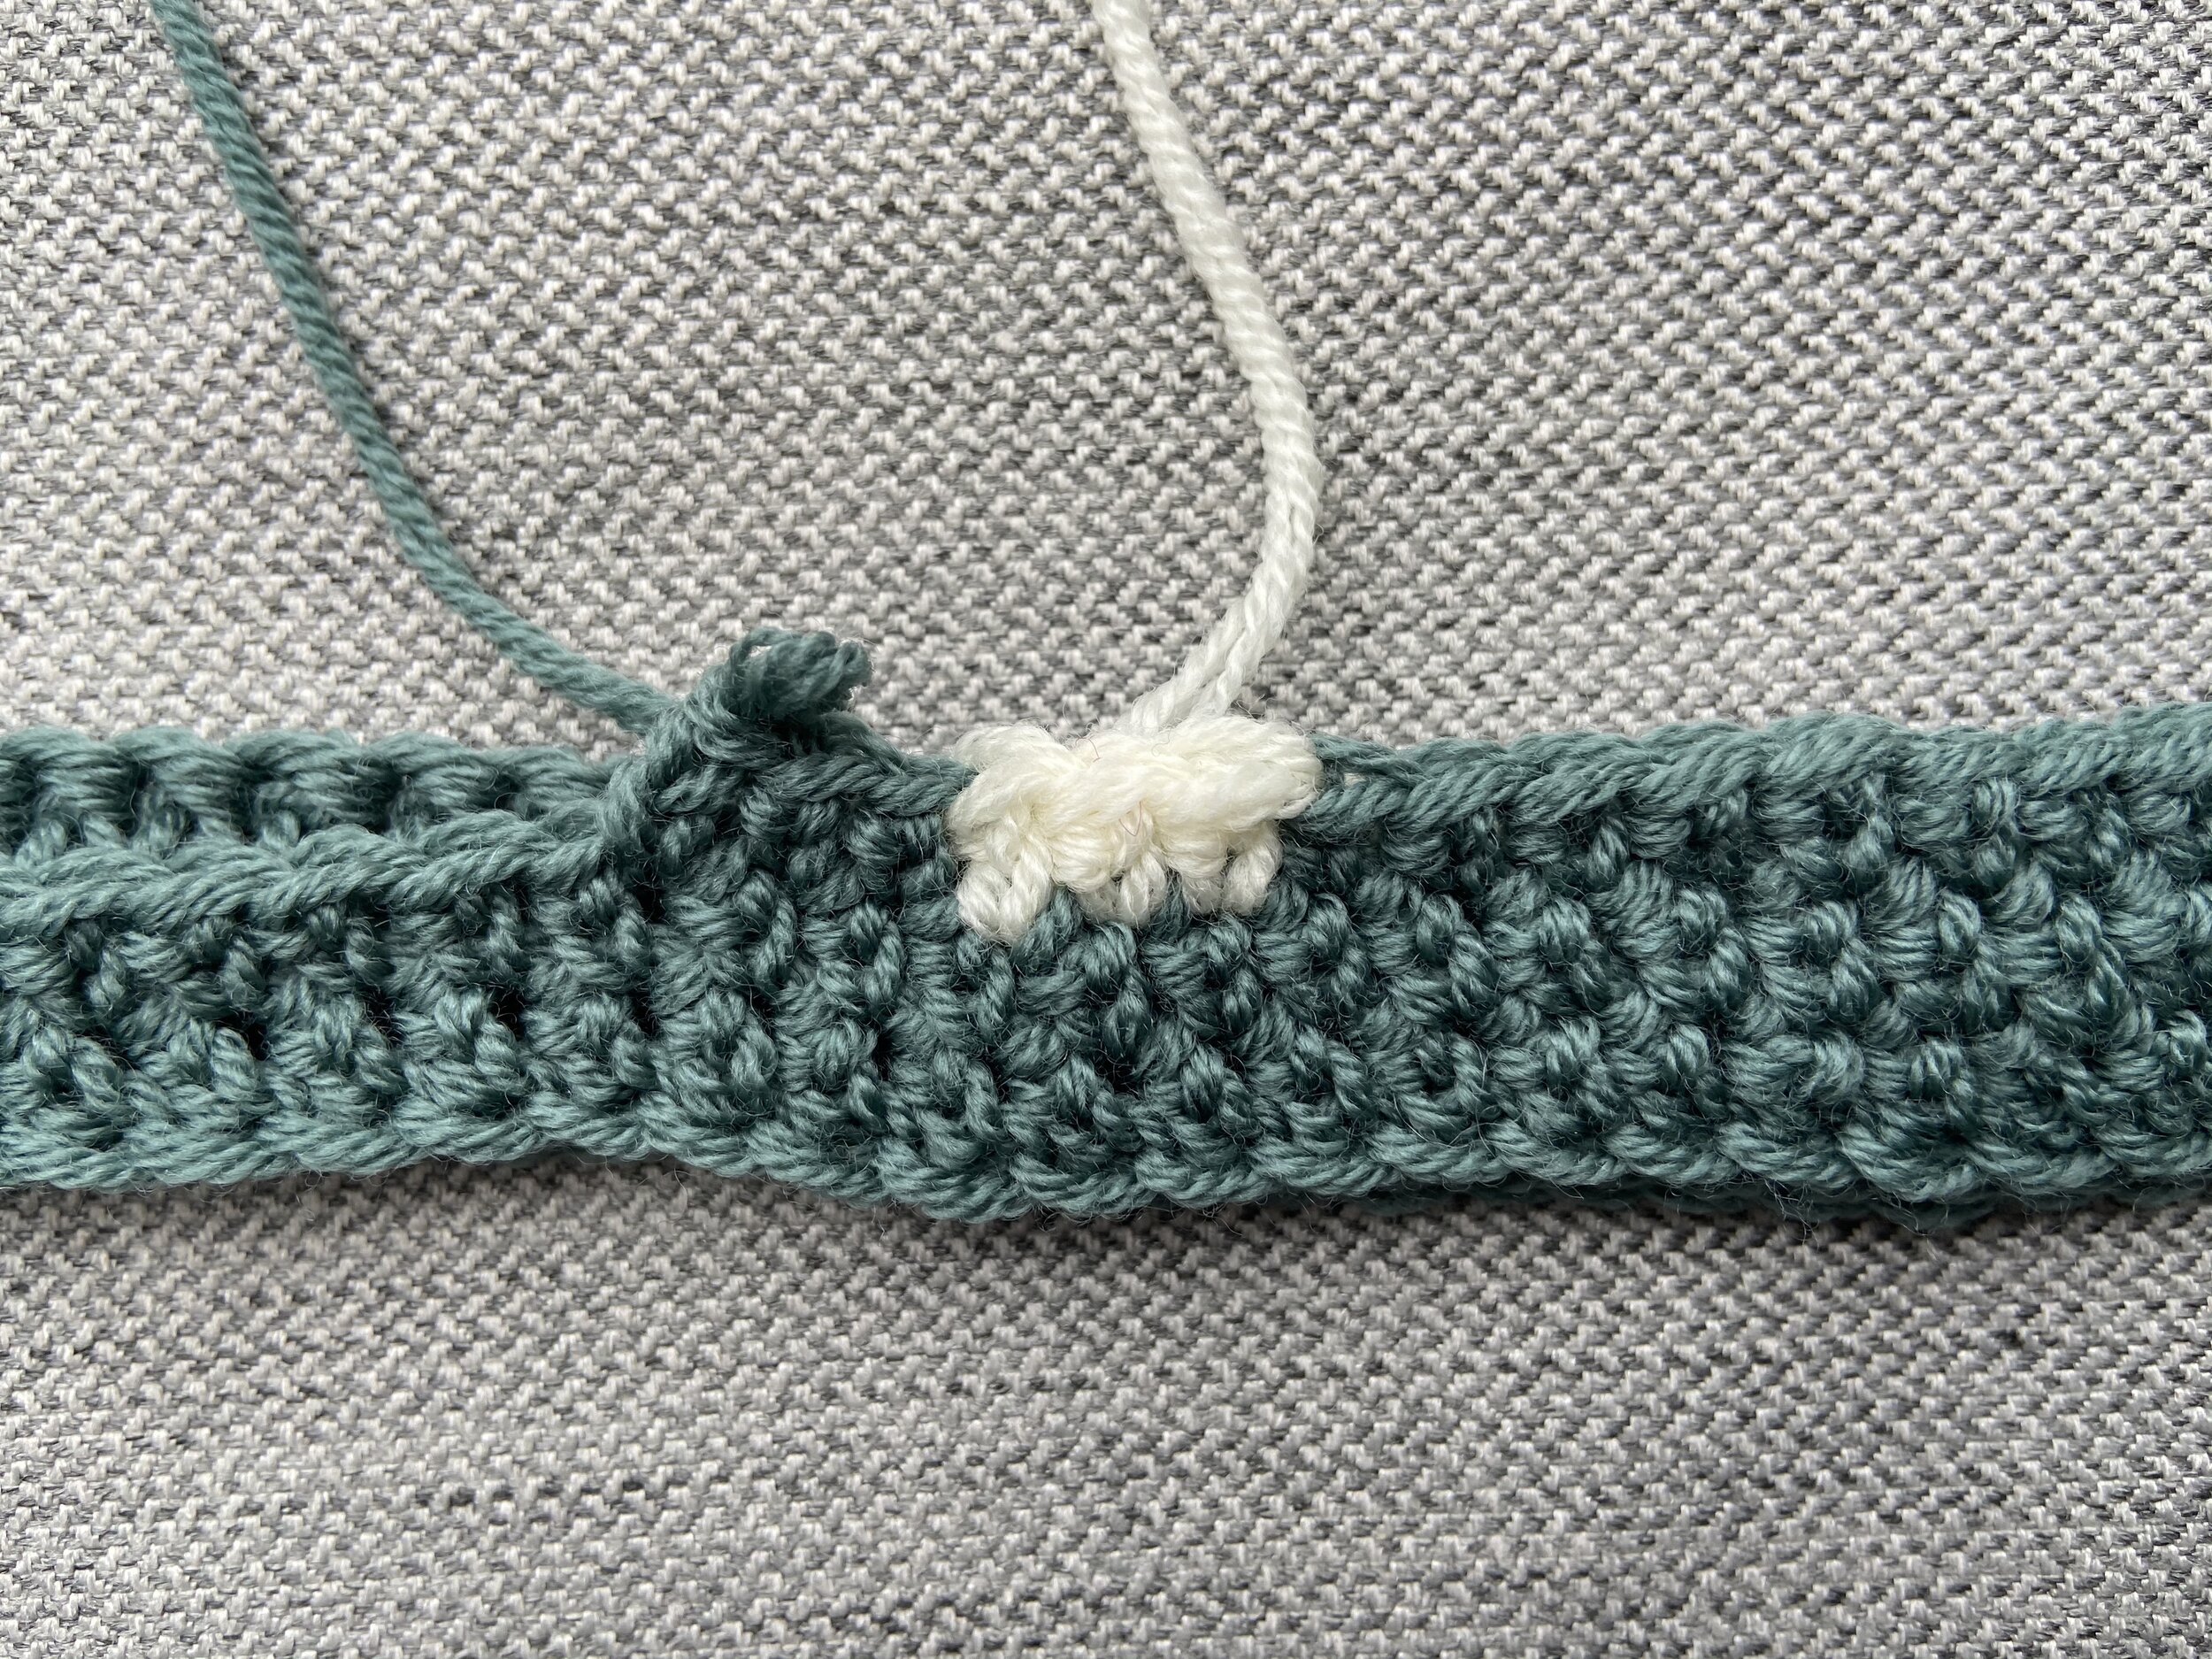
While you do not want to pull your float too tight, you also want to ensure you don’t leave it too loose. A loose float is just asking for a finger or an earring to catch on it. Additionally, loose floats will loosen the stitches on either side of a colour change, which can make your work look “gappy” or have small holes at each colour change. This would then also affect your gauge. In this photo I’ve done a float that is much too loose and you can see that first sage stitch really opening up, and it could get worse over time. On the wrong side you can see the floats aren’t laying flat on the piece, there is a lot of extra yarn.
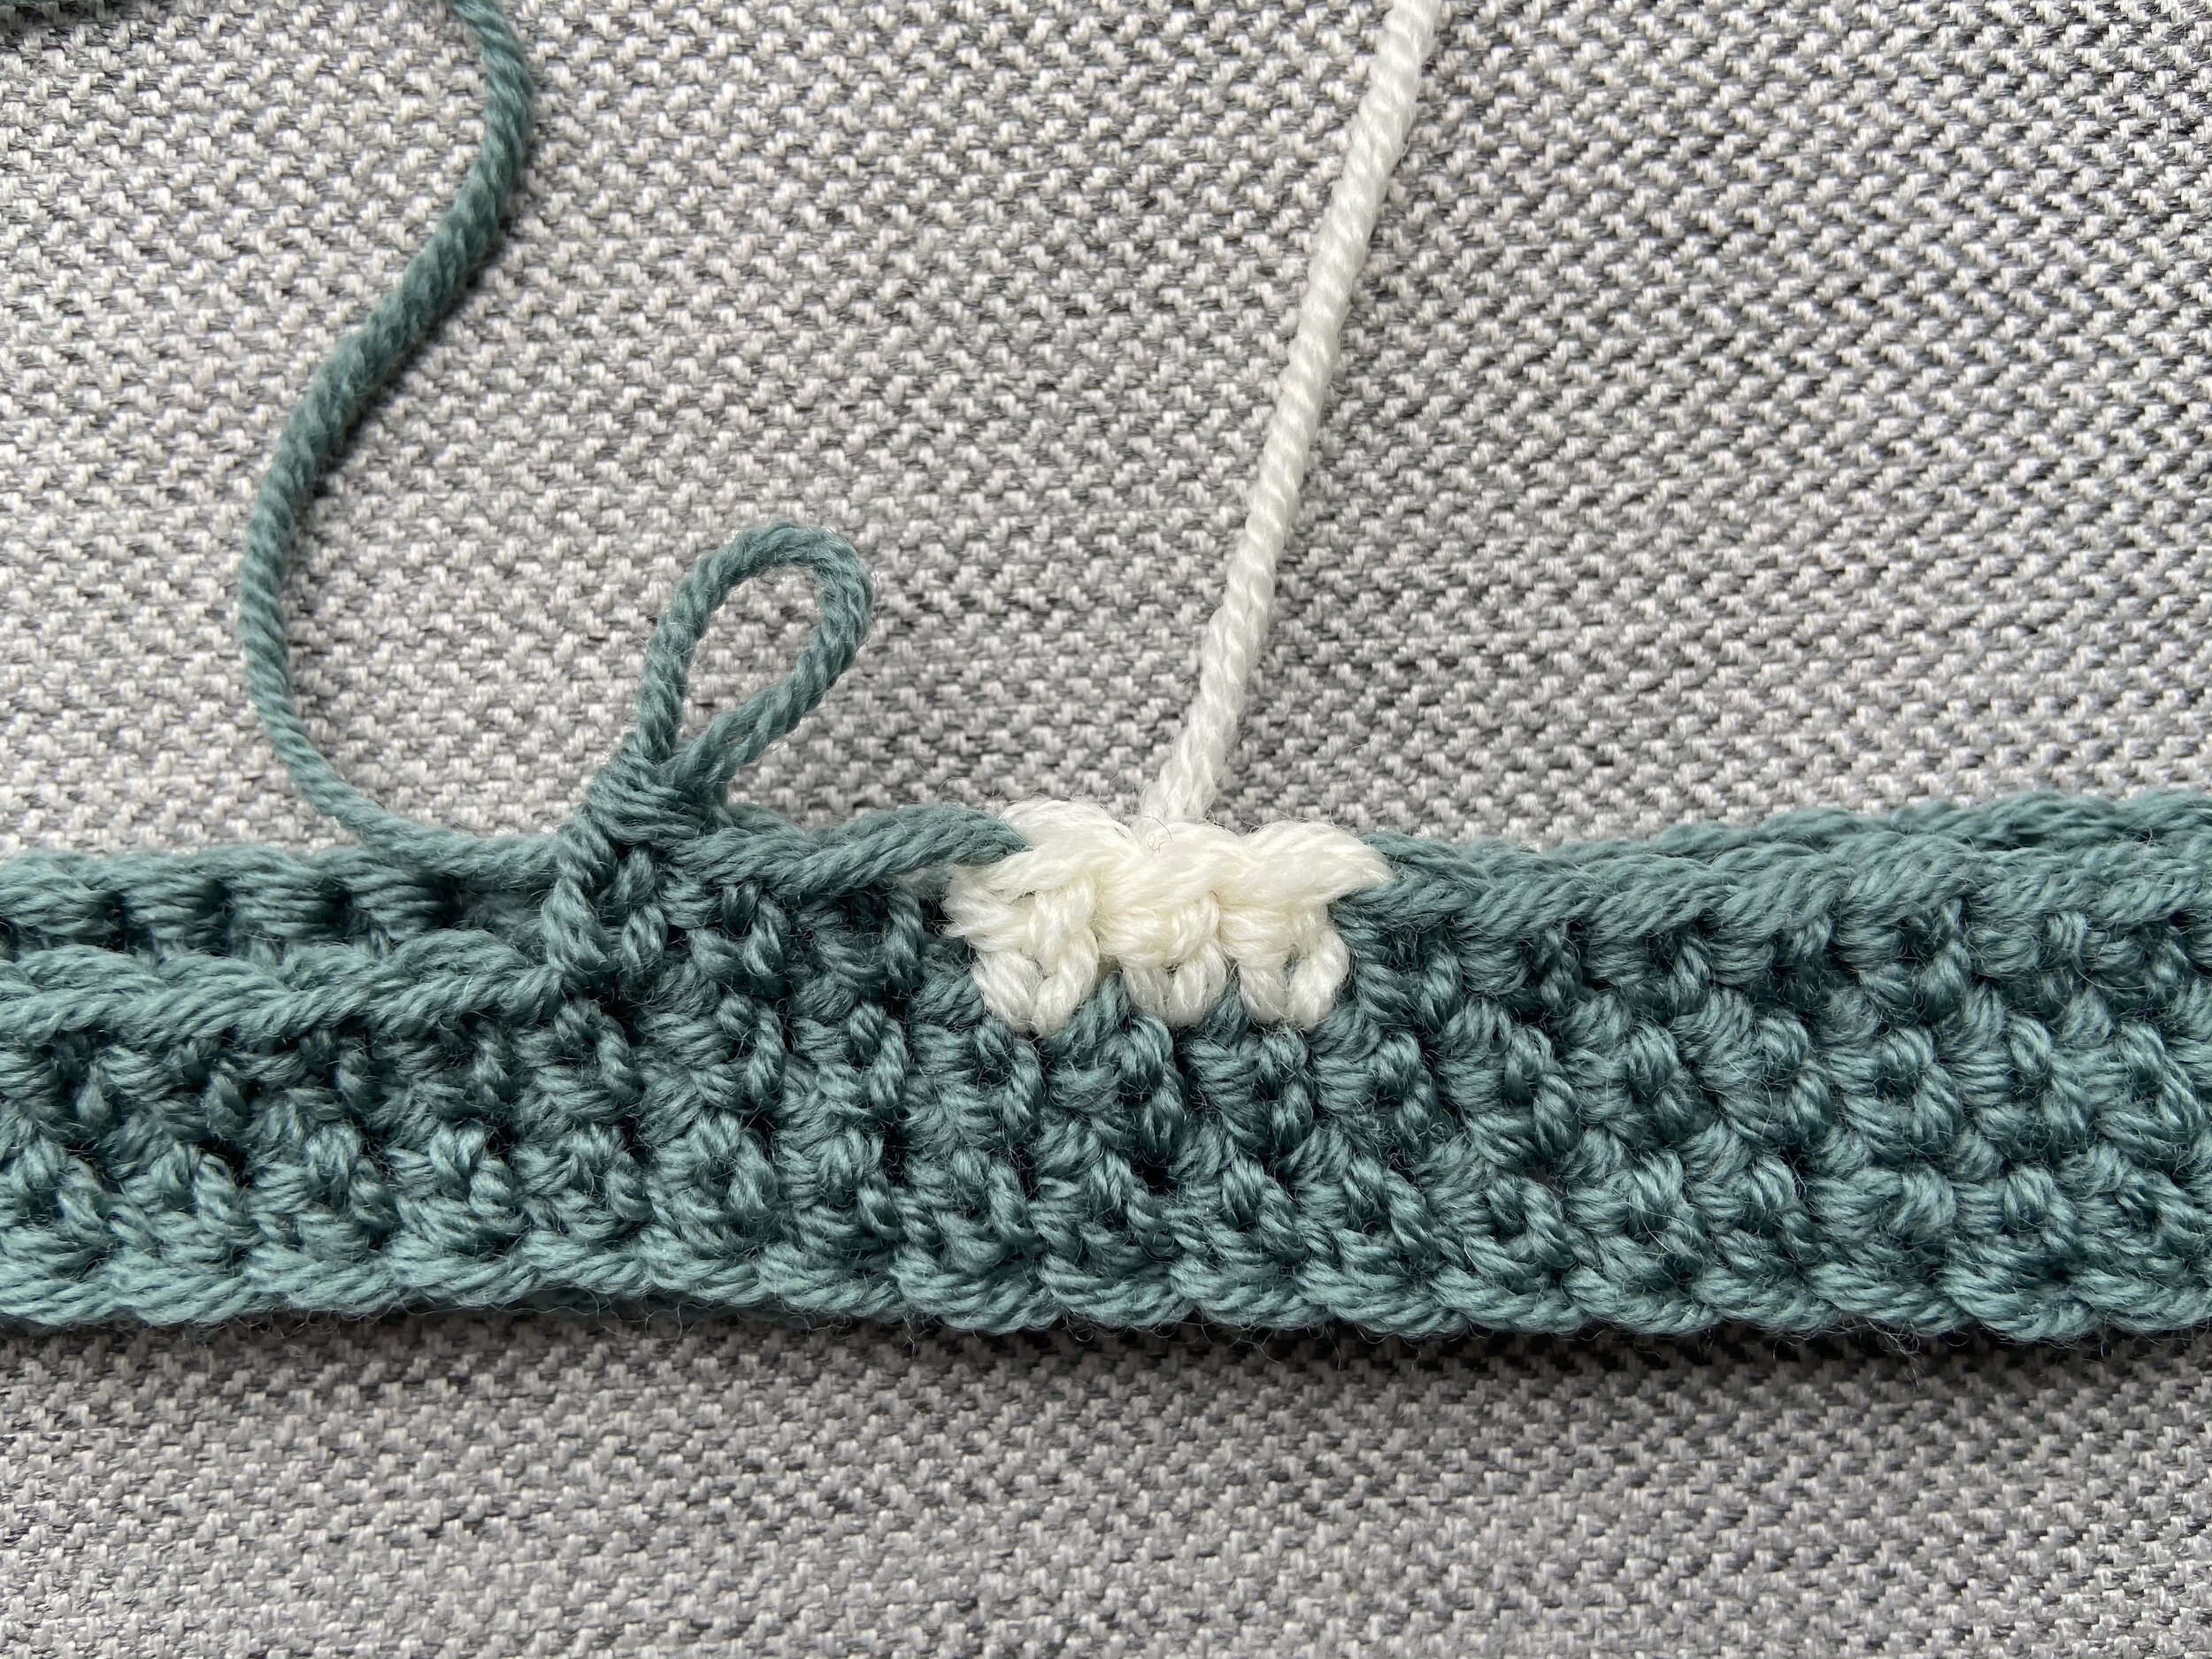
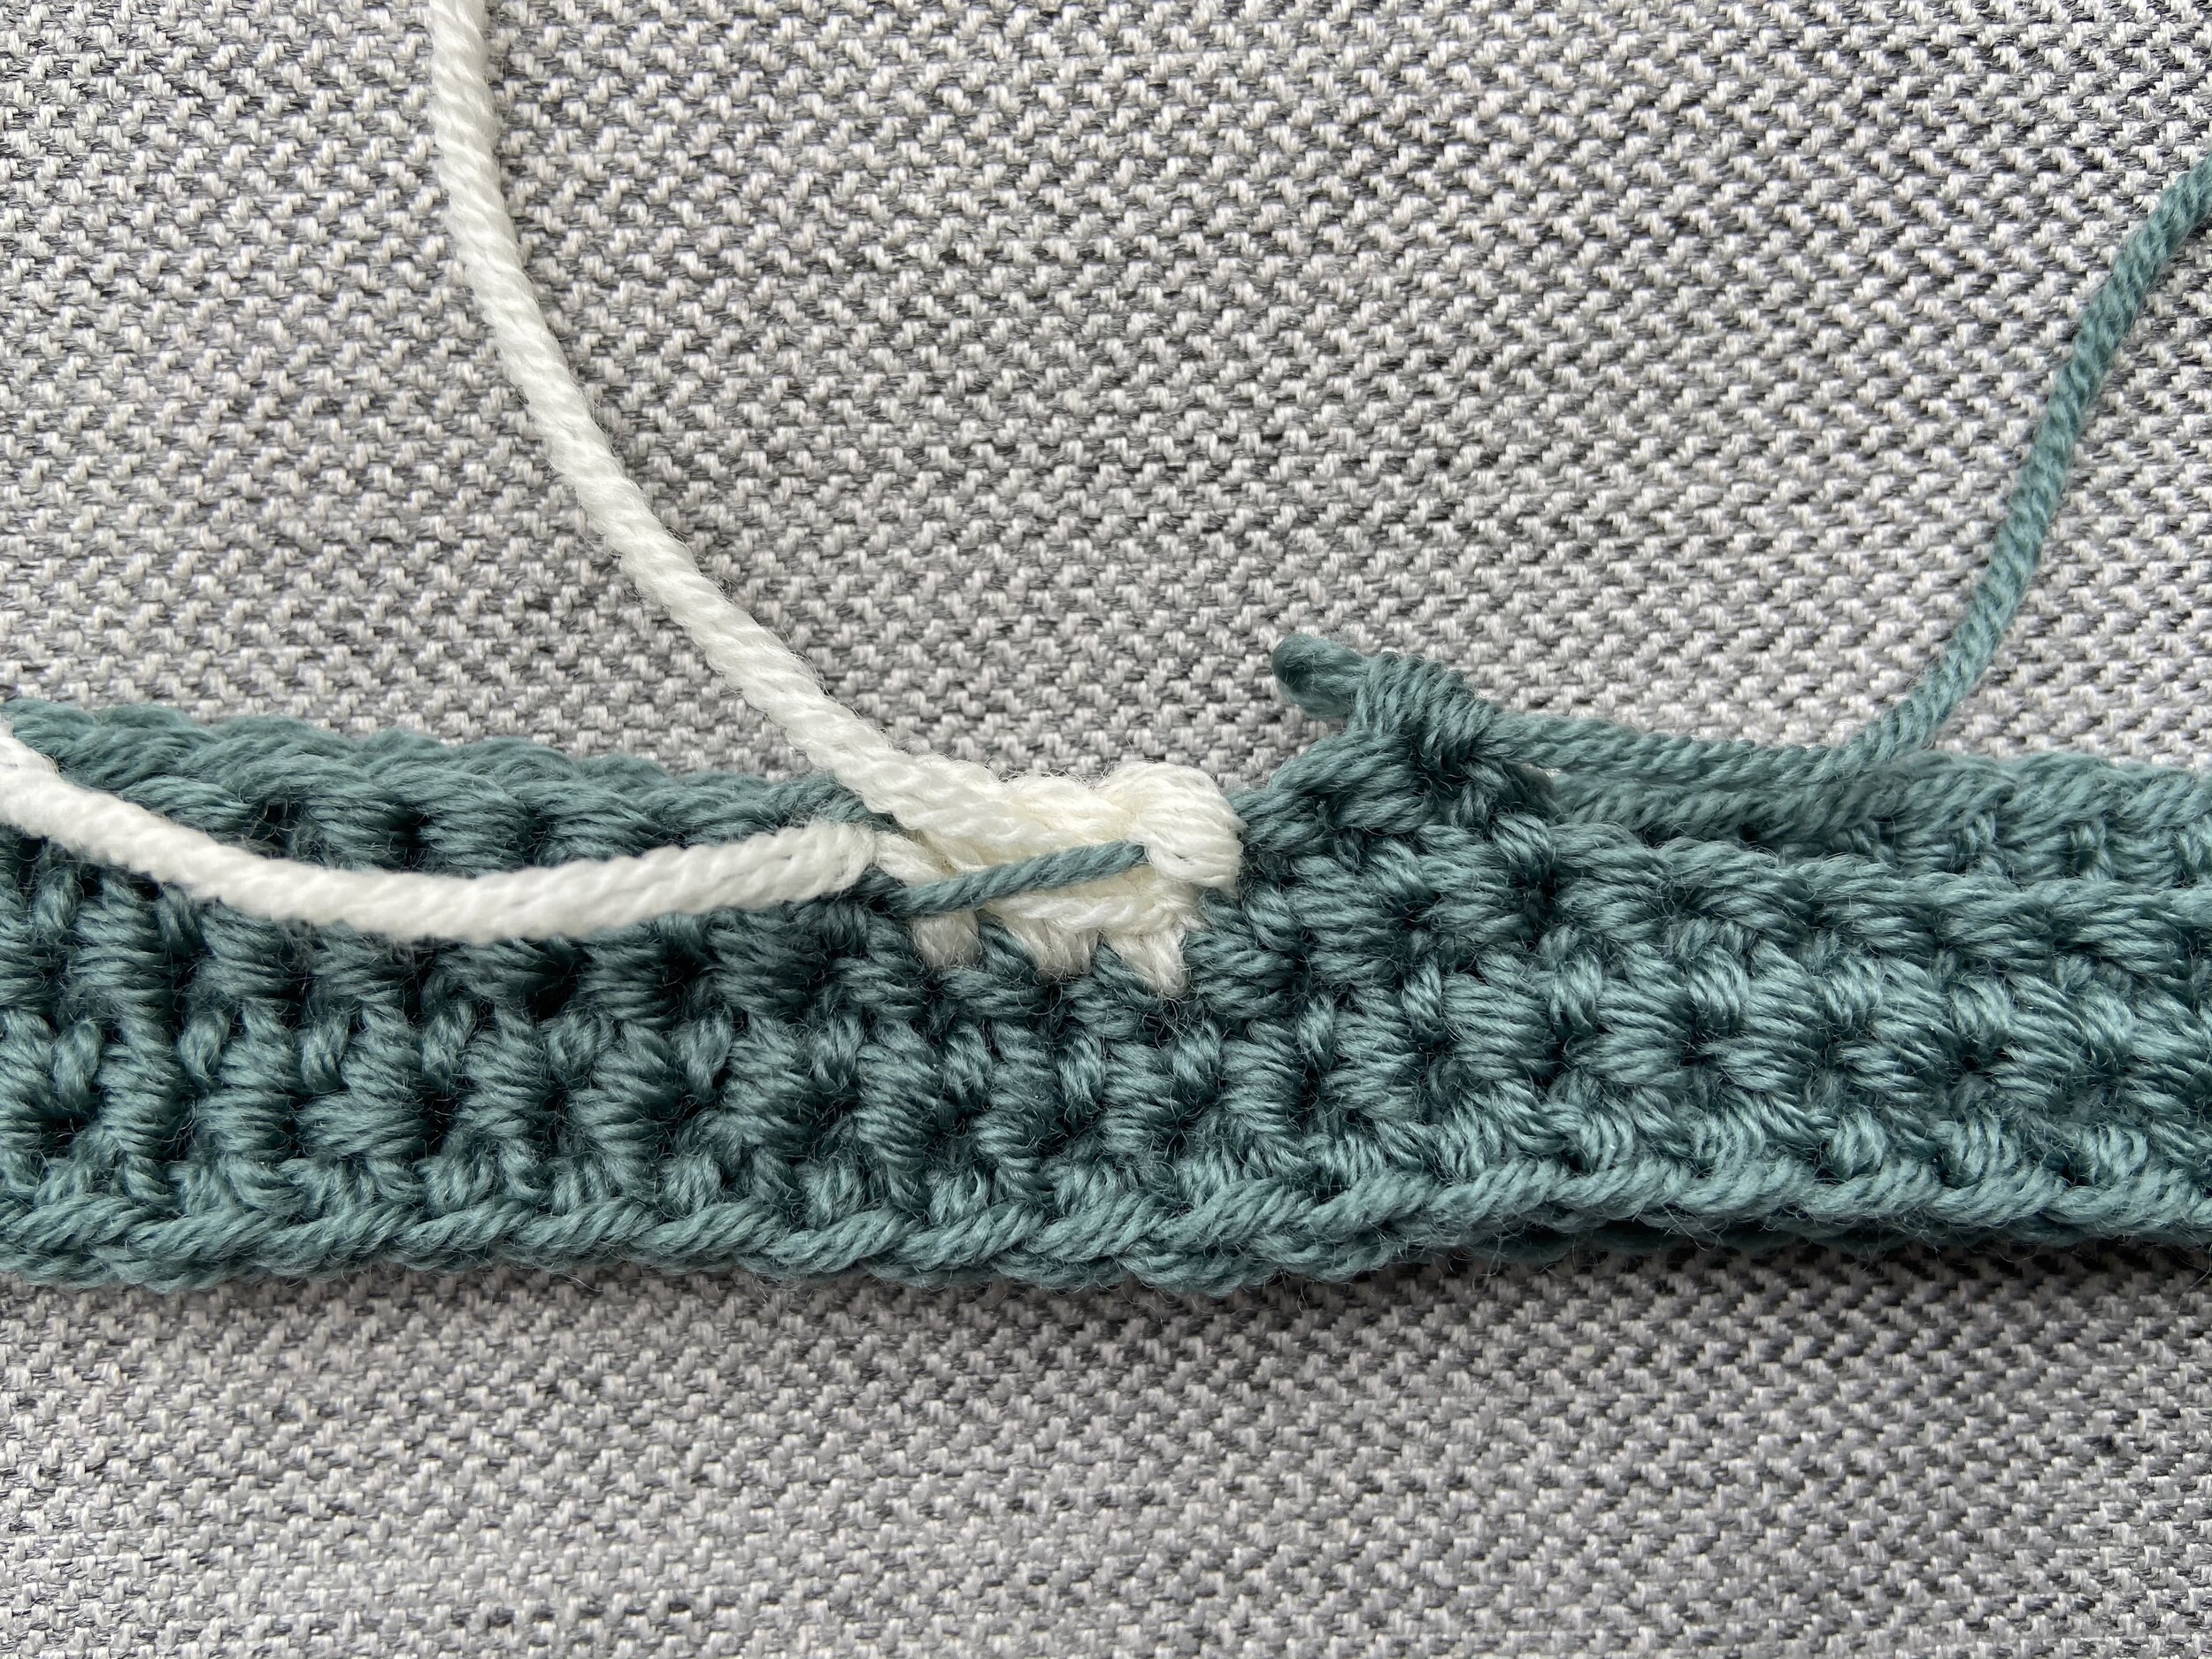
Getting your floats just right can take a little time and practice so it is important to be patient with yourself as you’re learning. My secret for testing the proper length of the float is after completing the first stitch in the new colour I tug the fabric a little bit between my hands. You want the float to be able to withstand this slight stretching without deforming the stitches on either side.
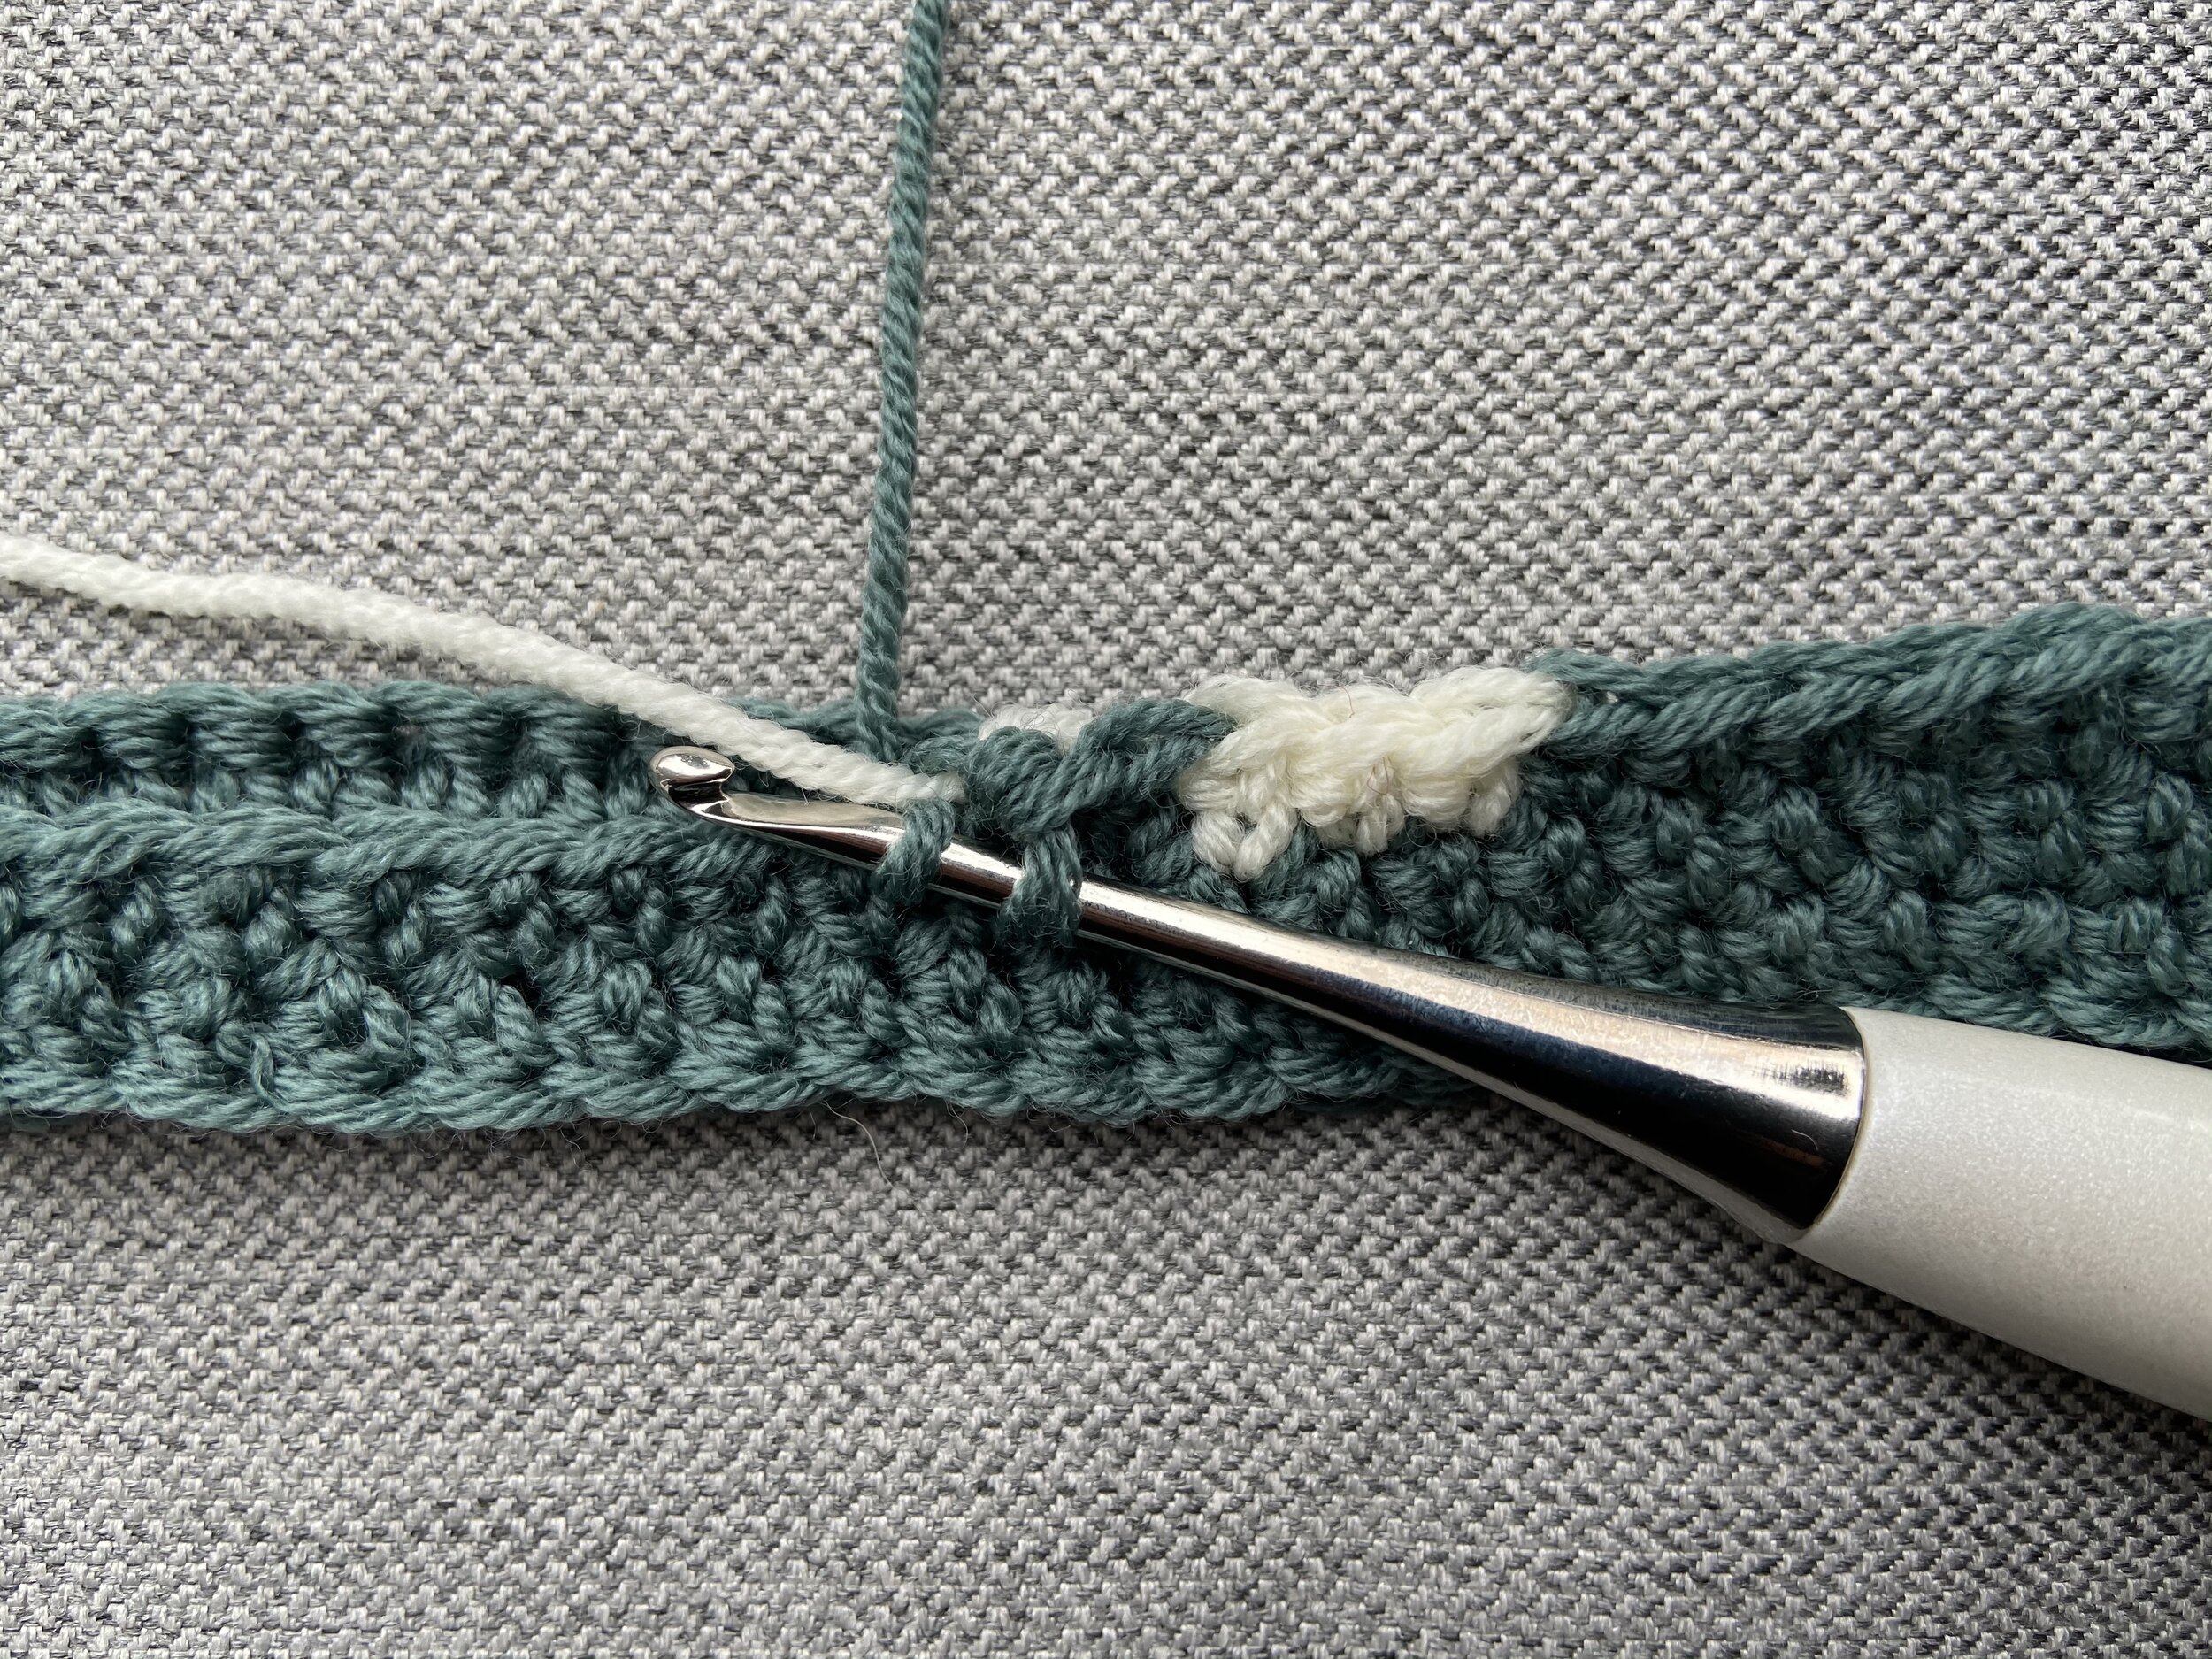
Trapping Long Floats
I consider long floats to be floats that are longer than 5 stitches. Having this long of a float can increase the likelihood of the yarn getting snagged and I find it makes it more difficult to determine the correct float tension. So, every 3-5 stitches I “catch” the float in the bottom of a stitch. With your current working yarn you will work around the float and into the next stitch at the same time, holding the float along the bottom/back of the stitch. The float should not be visible from the right side of your work if done correctly. Here is how I catch my floats:

Thank you for reading all the things I know about crocheting colourwork, fair isle style! I hope you were able to learn something new!
Pick up the Marzanna Sweater PDF here to get started on yours today!
Happy crocheting,
Courtney