Hello crochet pal!

I’m so excited to welcome a new piece to my Mya line - the Mya Mittens! Mya is inspired by her sister patterns: The Mya Sweater, Mya Hat, & Mya Shawl, all of which I designed between 2018 & 2021. Click here to check out the full Mya series of designs!
If you’re looking for a smoother, ad-free version of this pattern, it is available in my shop & Ravelry store here:
https://www.ilovetinderbox.com/shop/mya-mittens
https://www.ravelry.com/patterns/library/mya-mittens
If you have any questions about this pattern please email me at: courtney@ilovetinderbox.com as comments on this post and DMs on social media may get missed!
Want to know when I release new (& free) patterns? Sign up for my email list here.
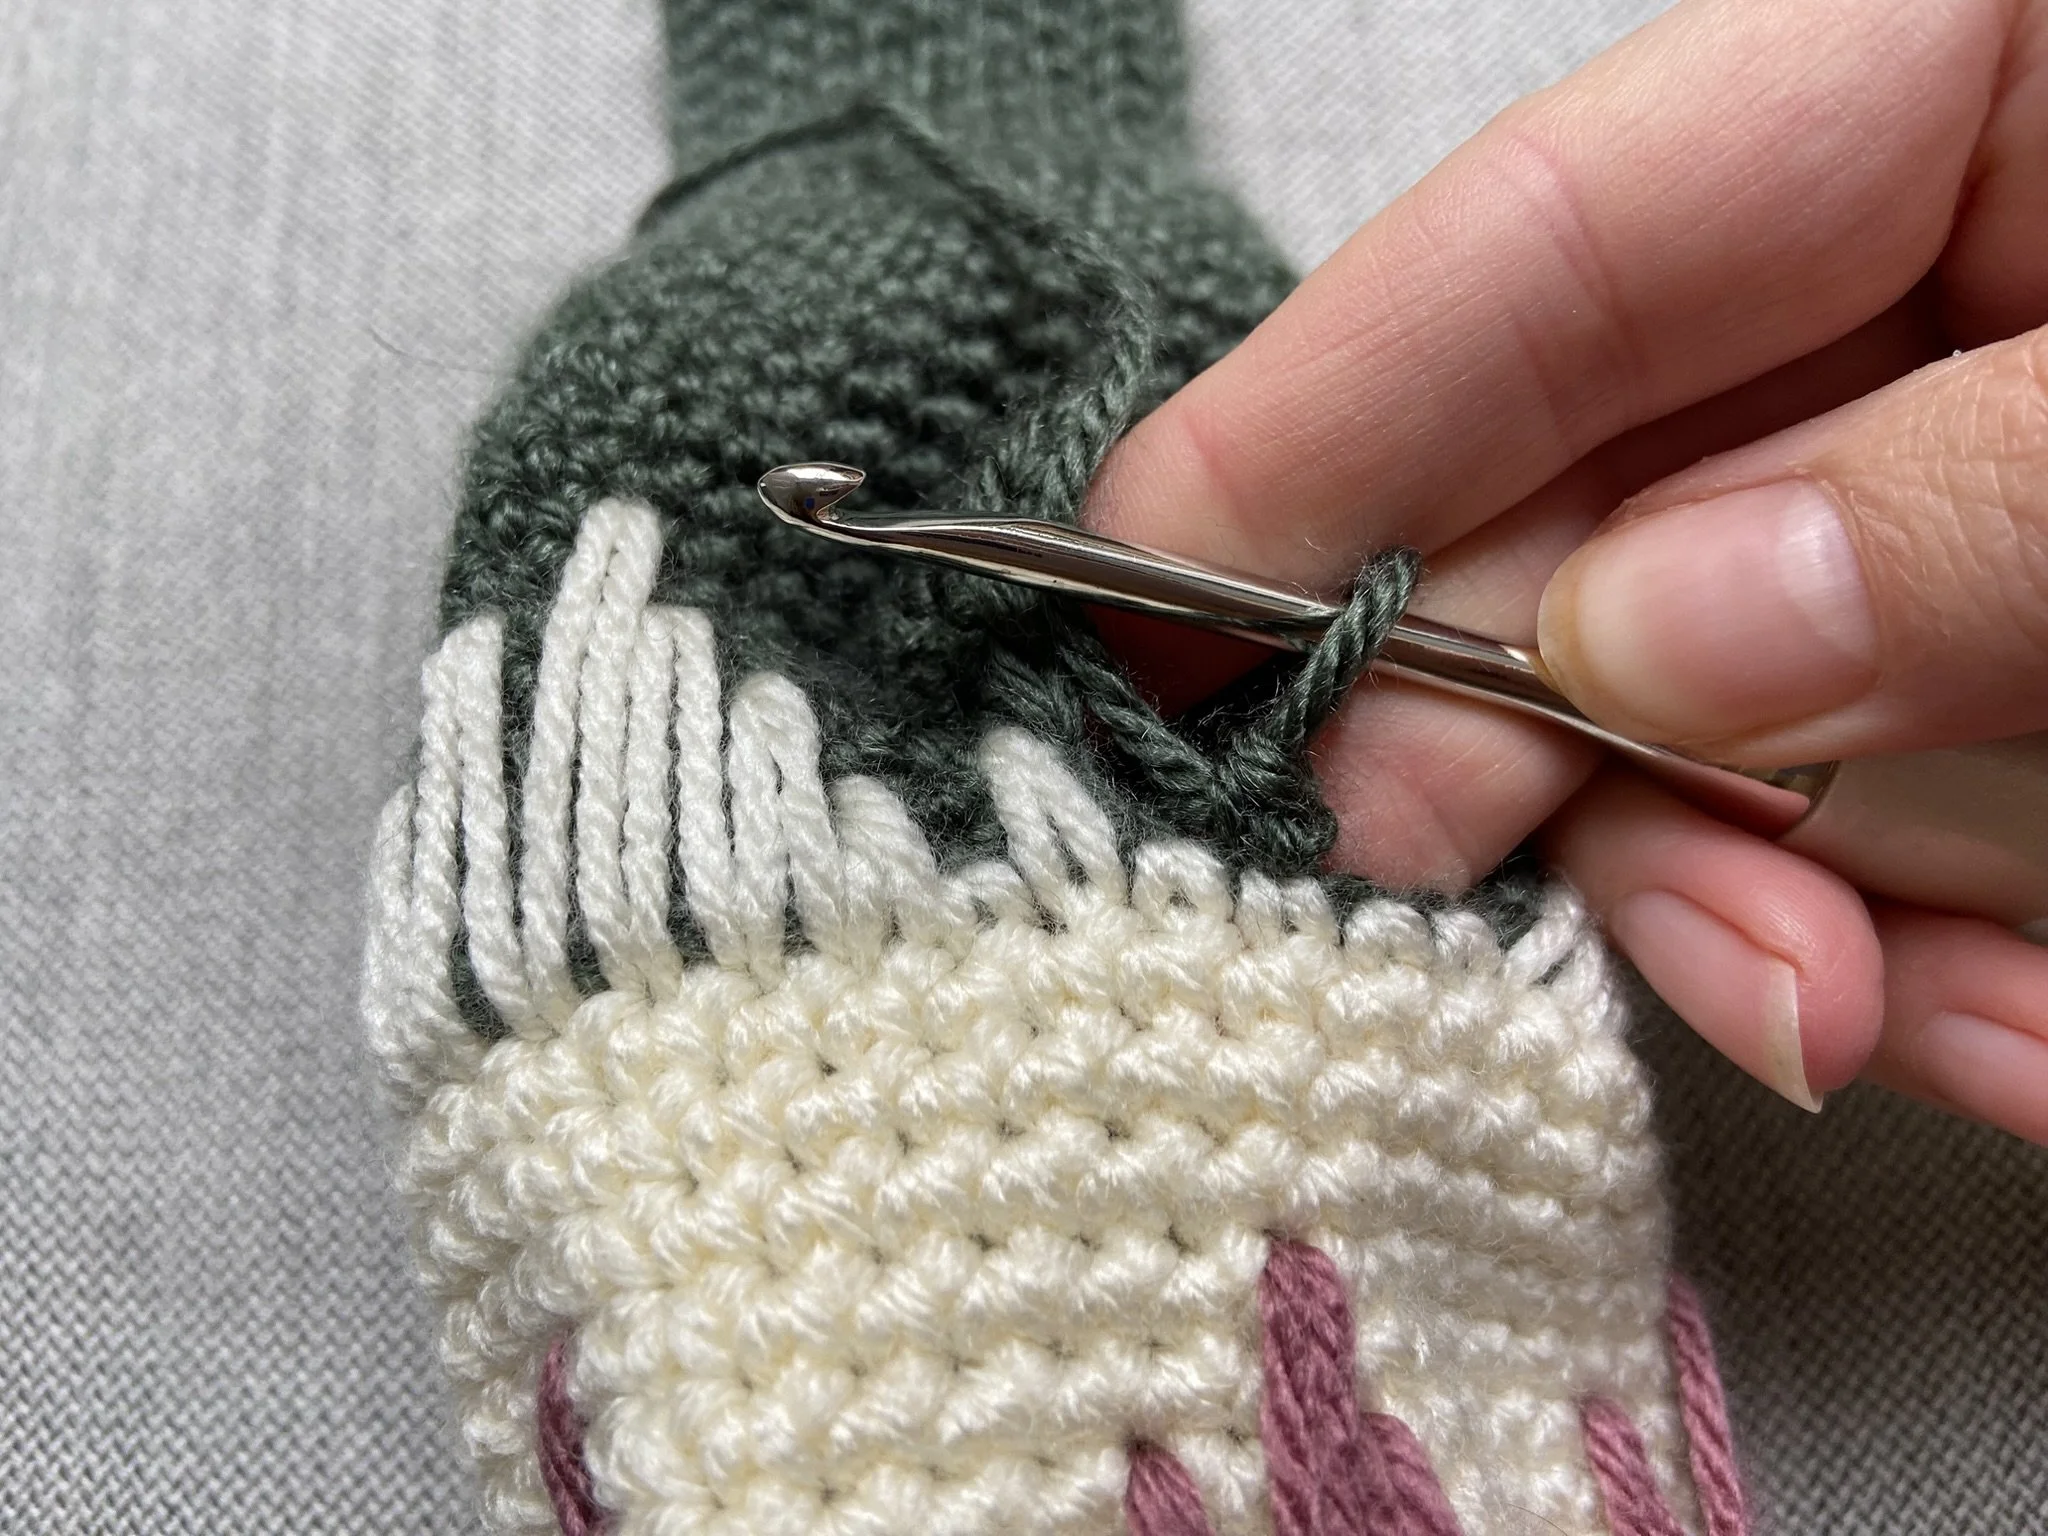
This pattern is also available as a free video tutorial over on my YouTube channel, if video is more of a helpful medium for you check it out here.
This pattern is great for a beginner who might be ready to try out some new skills (e.g. The spike stitch).
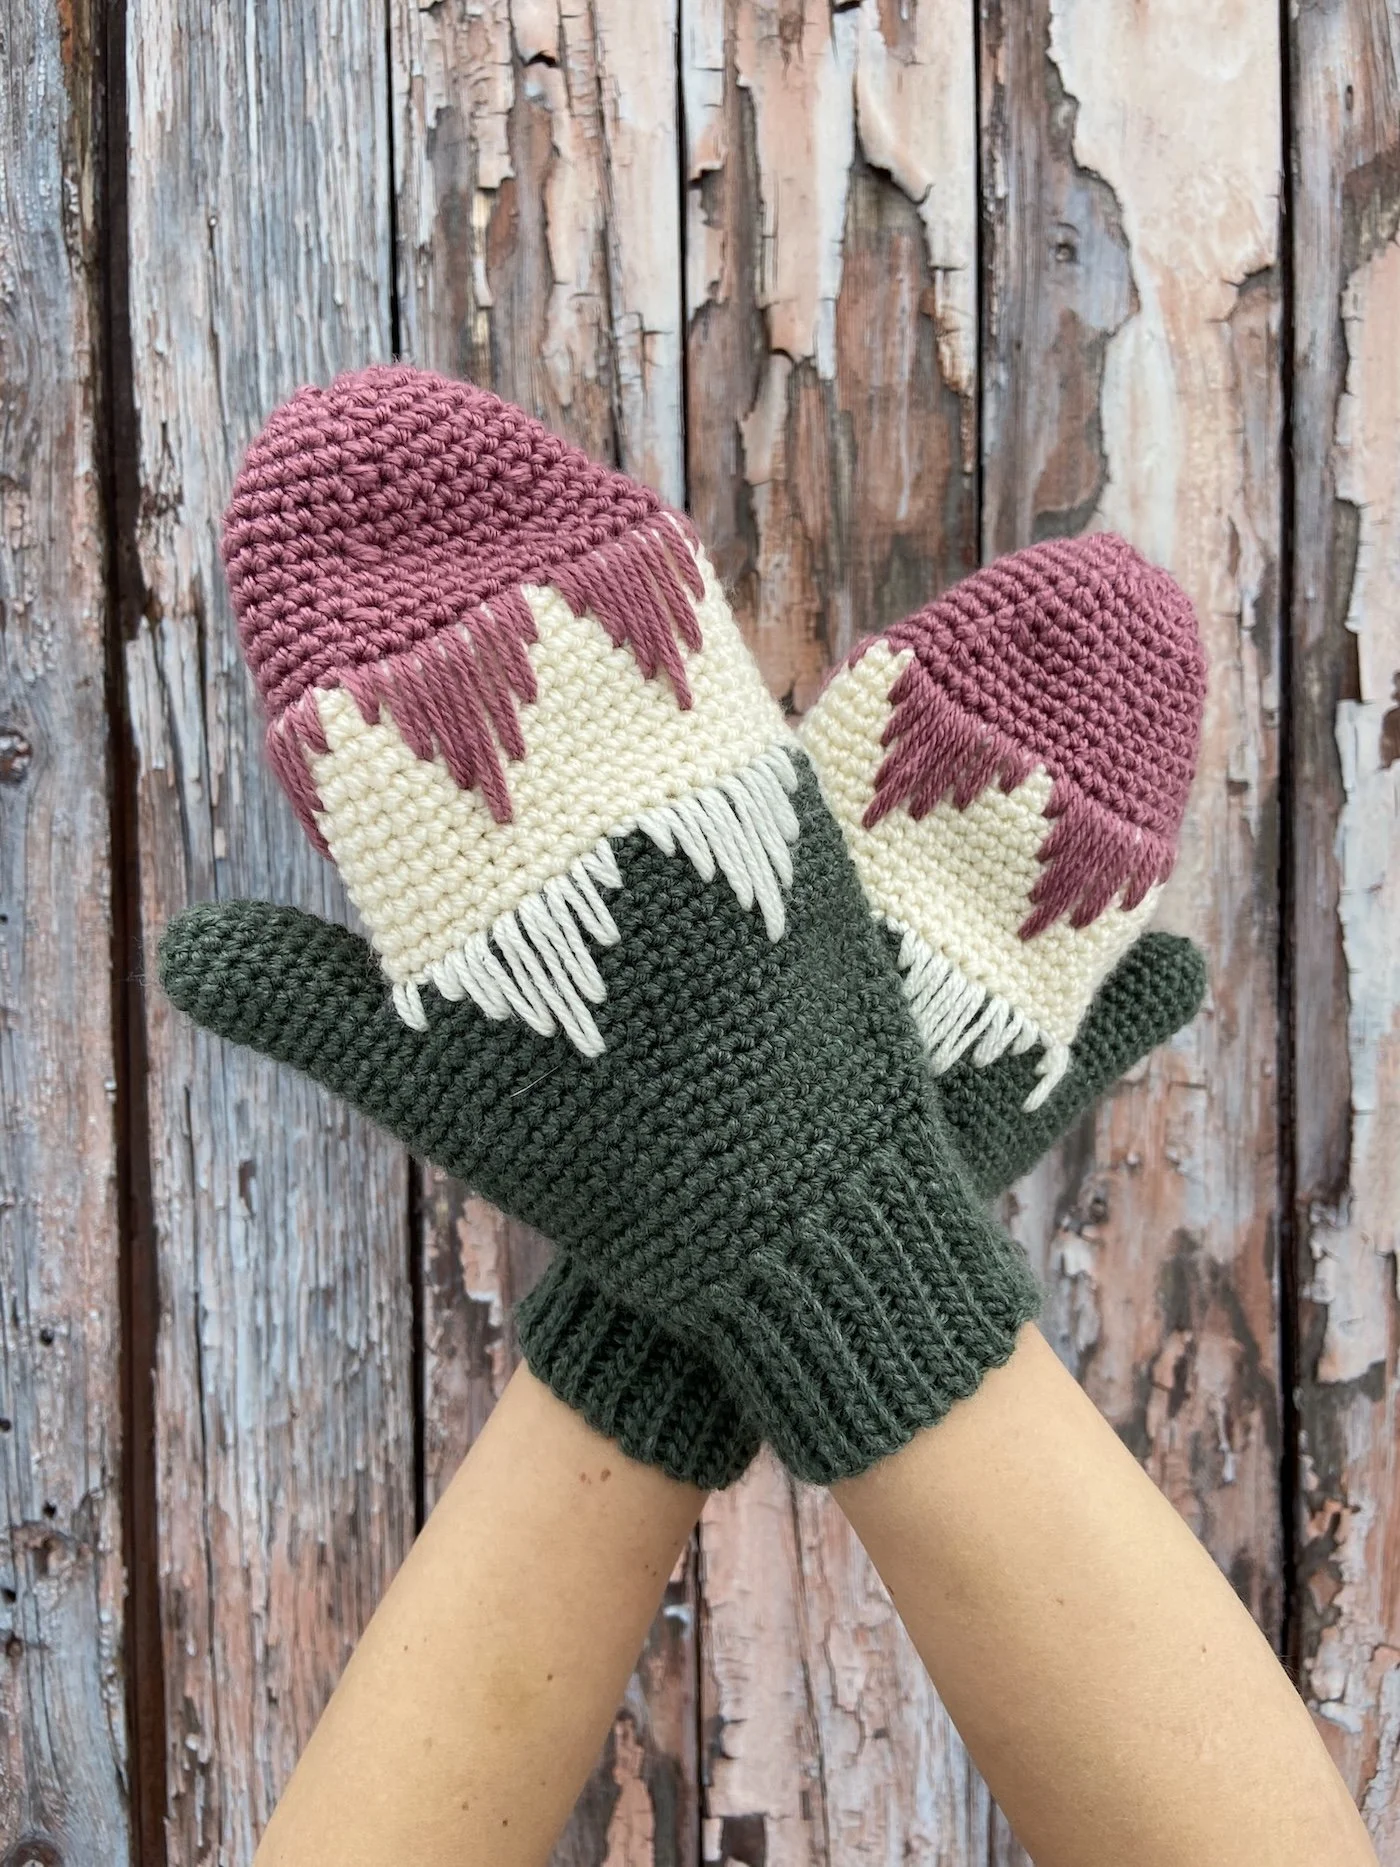
For my Mya Mittens I used Lion Brand Basic Stitch yarn in the colours Pine Heather (Colour A), Ivory (Colour B) and Deco Rose (Colour C). This pattern, along with the Mya Hat are part of a kit from Lion Brand. Click here to get the kit which includes the PDF versions of both the mittens & hat!
Not sure what yarn you want to use? My top three rules are that it must fit your budget, you must like the feel of it against your skin and it MUST be the same weight as the pattern - in this case worsted! Want to know everything I suggest when it comes to choosing yarn for crochet wearables? Check out my blog post all about it here or my YouTube video on this topic here.
Now let’s get crocheting!
Size
Finished Hand Circumference
• 22.6 cm (8.9 inches)
Finished Wrist Circumference (unstretched)
• 13.2 cm (5.2 inches)
Finished Length (not including cuff)
• 20.3 cm (8 inches)
There is only one adult woman’s size for the mittens, however size modifications can be made in a few ways: 1. Changing the number of stitches of the hand by +/-8 (changes circumfernce by almost 5cm (2 inches)). 2. Adding or removing length to the cuff by changing the number of chains you make in row 1, 3. Adding or removing length to the hand by doing more or fewer rounds in total, and 4. Changing the weight of yarn/gauge - but you will have to do the math to figure it out!
Materials
• 3.75 mm crochet hook
• Approximately the following amounts of worsted weight yarn: Colour A (cuff, bottom of hand & thumb): 130 metres (140 yards), Colour B (mid hand) & C (top of hand): 50 metres (55 yards) each. Sample uses Lionbrand Basic Stitch in the colours A: Pine Heather, B: Ivory, C: Deco Rose, click here to shop
• Measuring tape or gauge square
• Yarn needle & scissors
Gauge
• Hand: 9 stitches x 11 rounds in a blocked 5 cm (2 inch) square of SC in the round (not sure how to gauge in the round? No problem - here’s how!)
• Cuff: 5 stitches x 7 rows in an unstretched 2.5 cm (1 inch) square of SL ST BLO, worked flat
Legend
2SC: Work 2 stitches in the same space, increase
2tog: Work 2 stitches together, decrease
BLO: Back loops only
CH(s): Chain(s)
rep: Repeat
SC: Single crochet
SK: Skip
SL ST: Slip stitch
SP-#: Spike stitch, # indicates how many rows down the spike stitch is worked into
ST(s): Stitch(es)
<Stitch counts> are only listed when they change throughout the pattern! CHs at the start of rows/rounds do not count as stitches throughout.
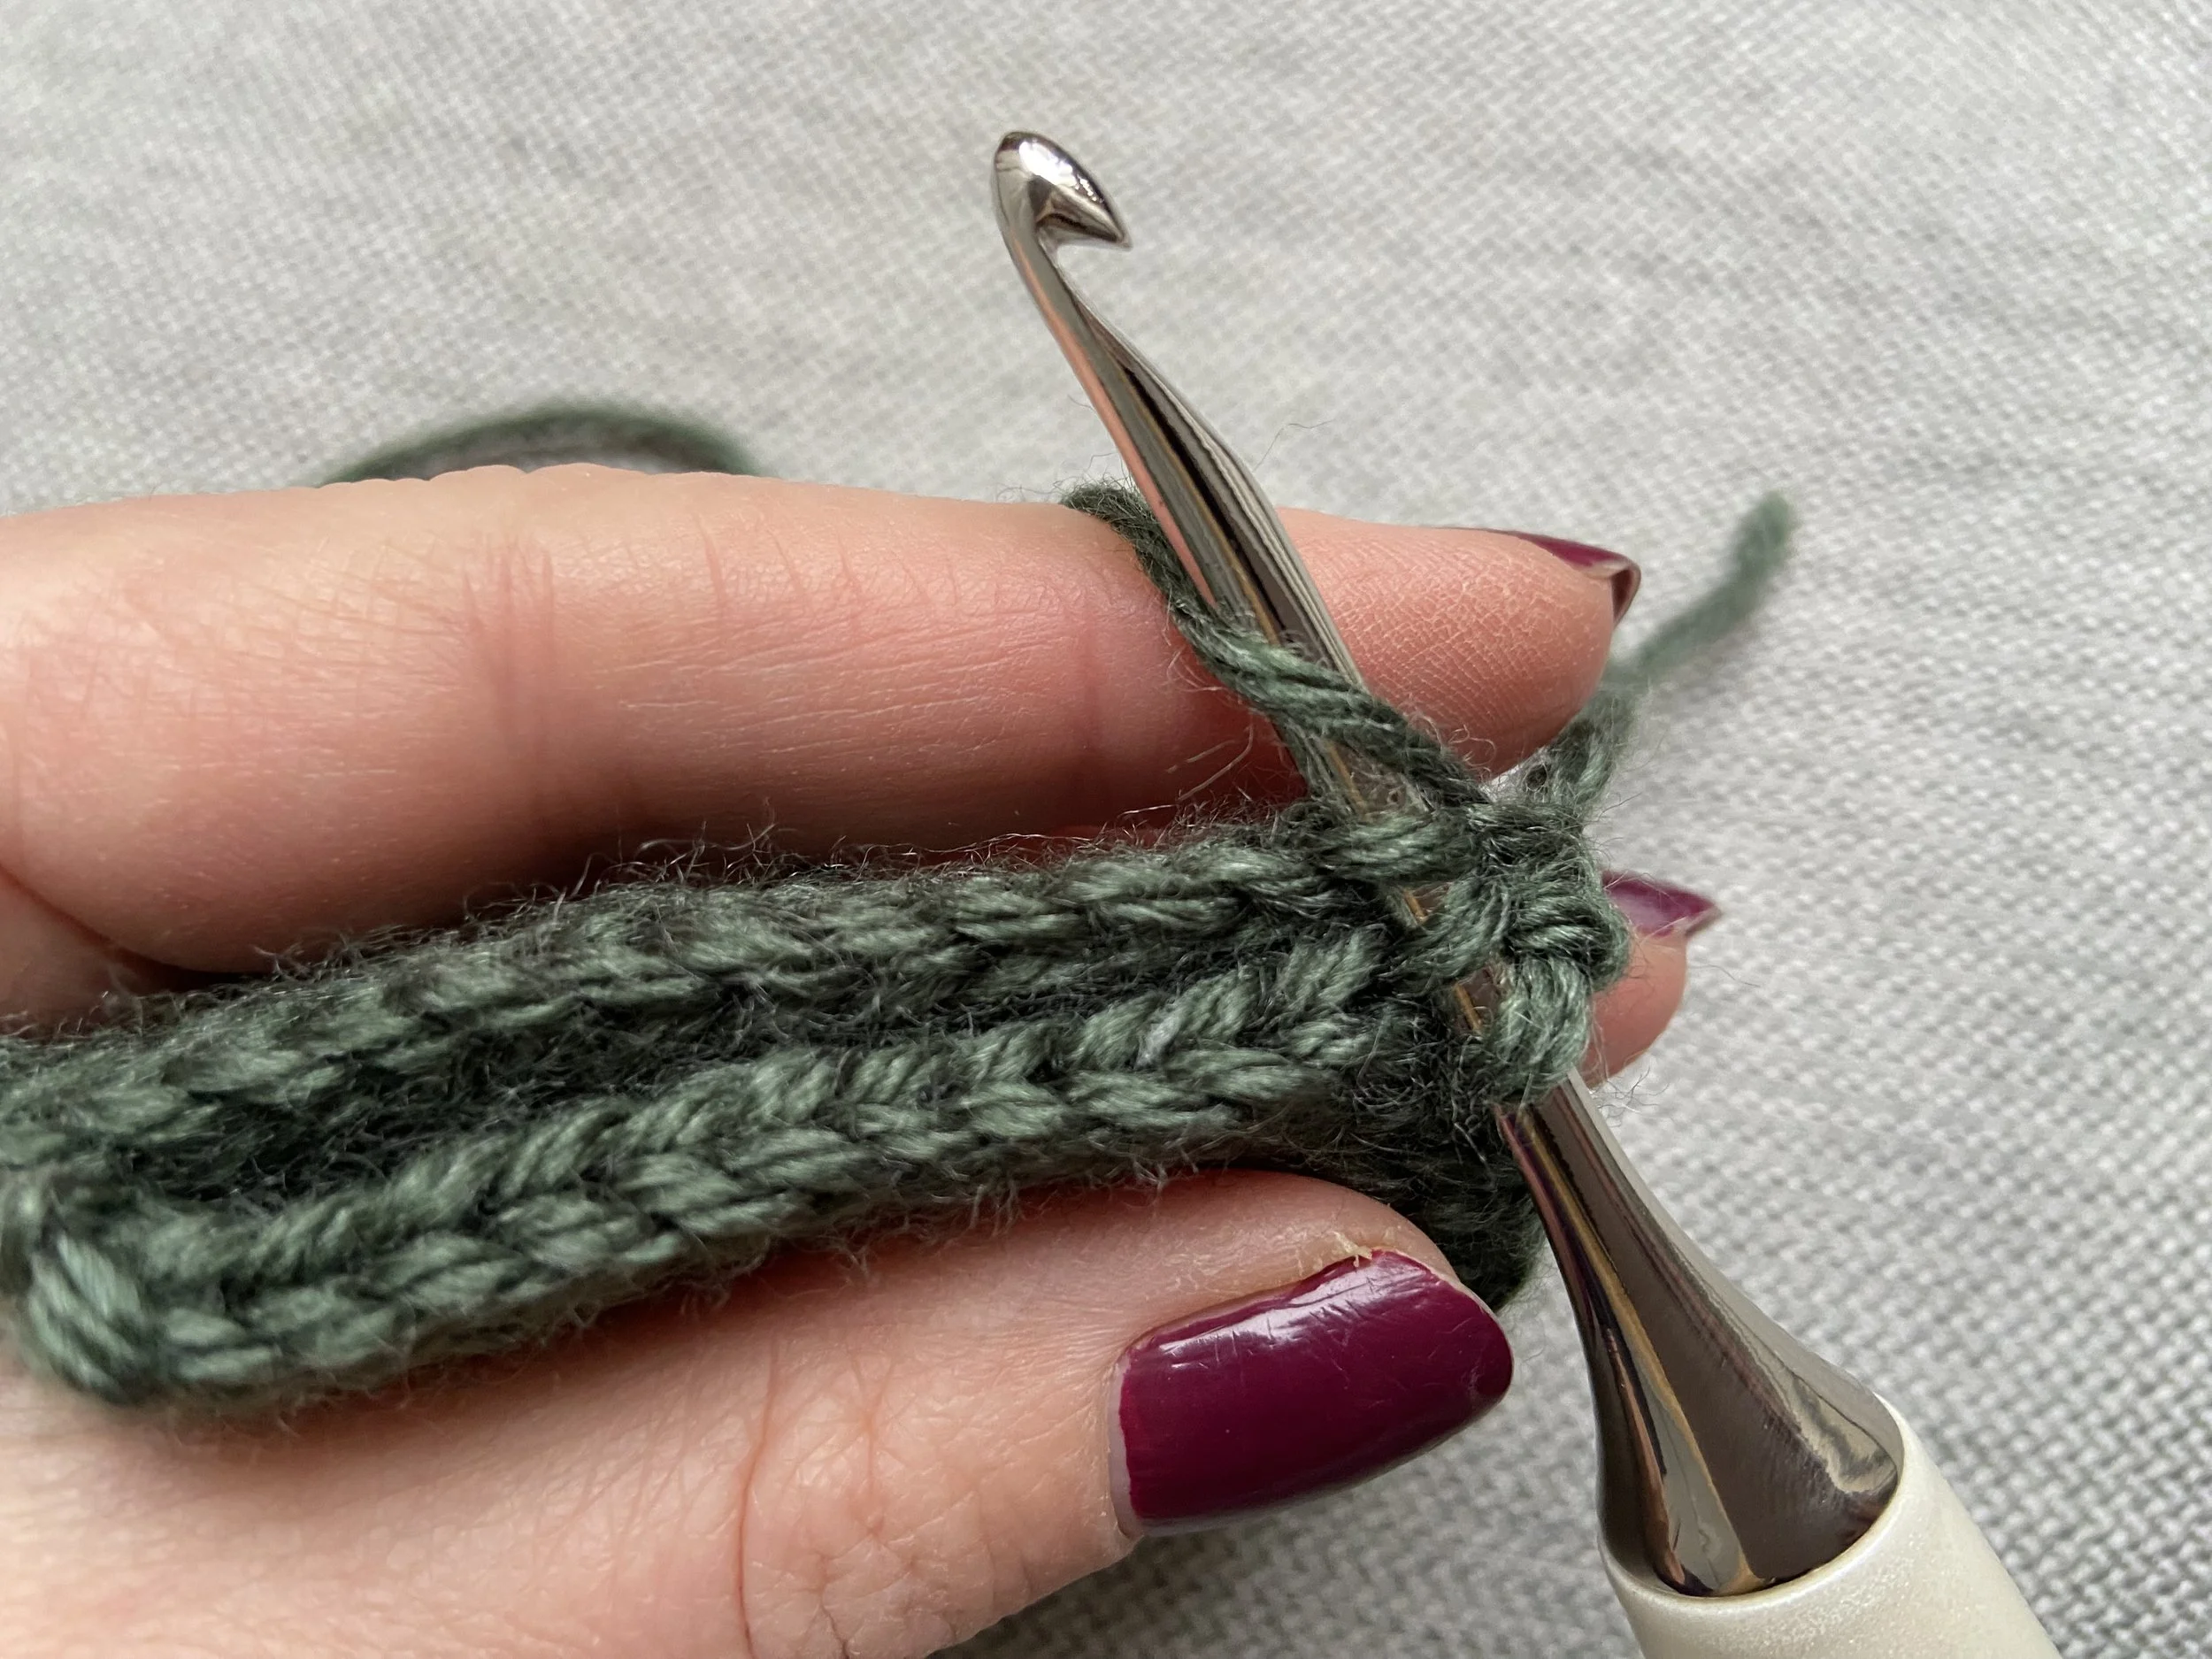
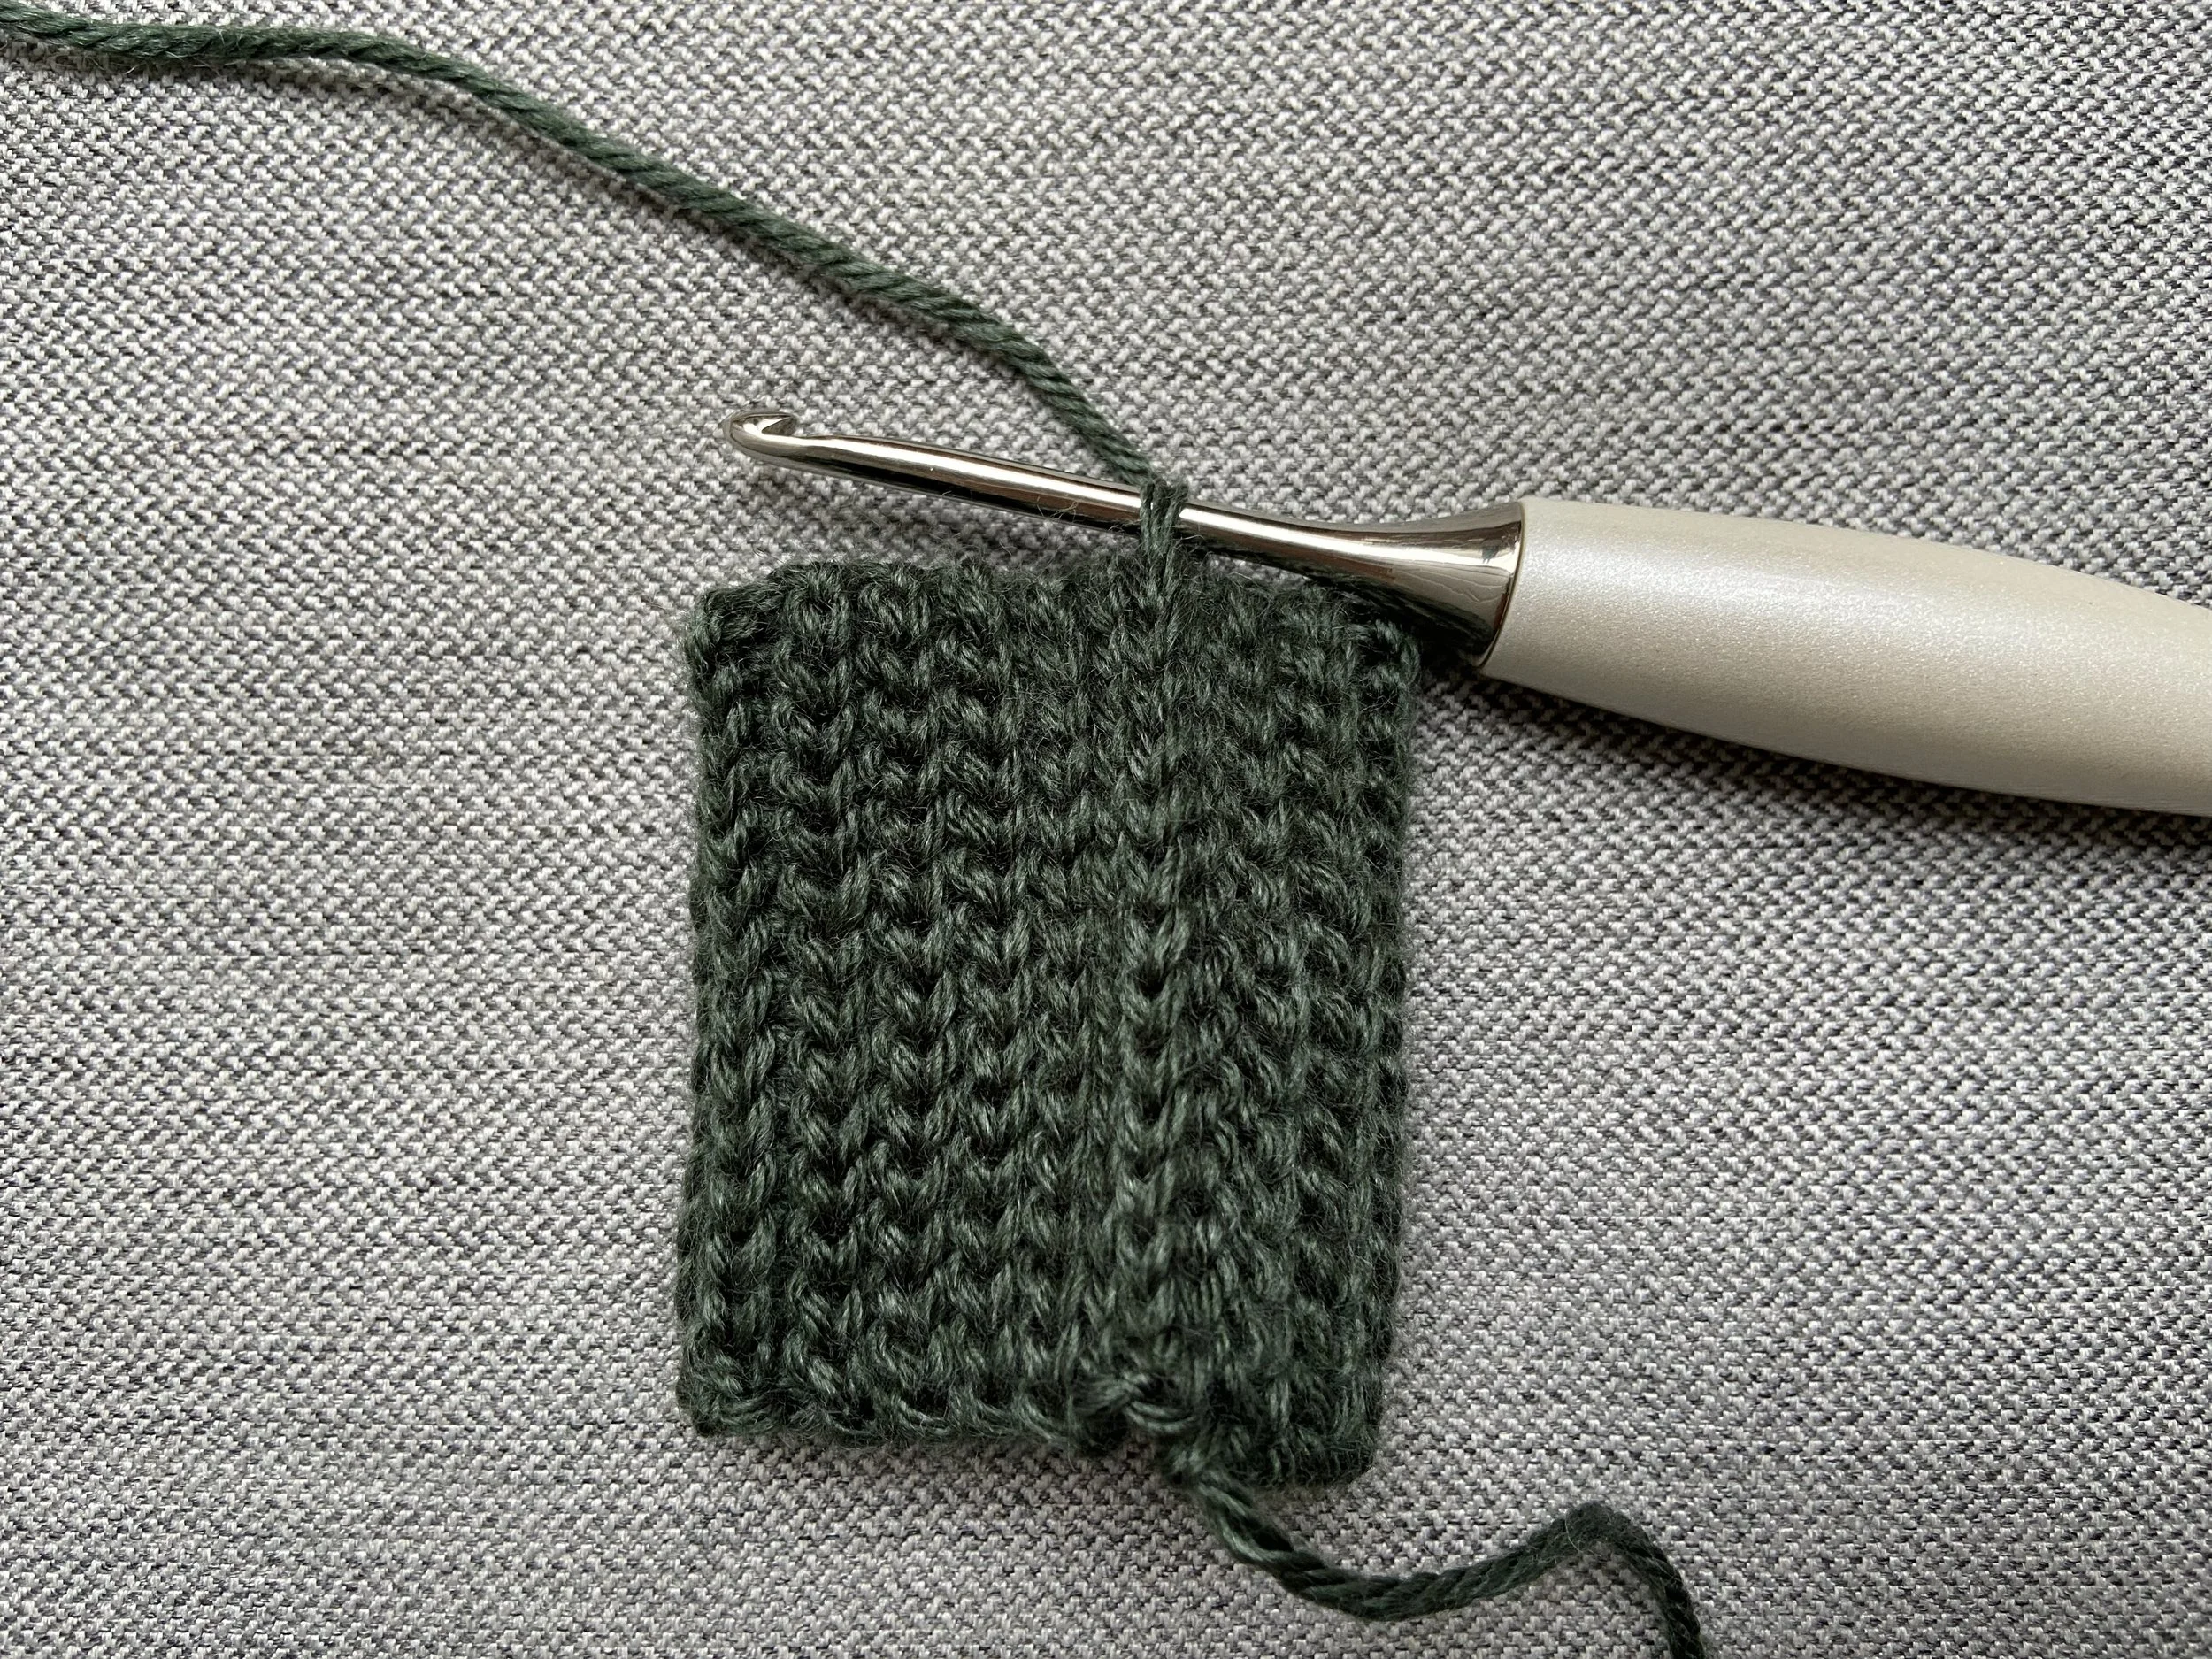
Cuff
Row 1
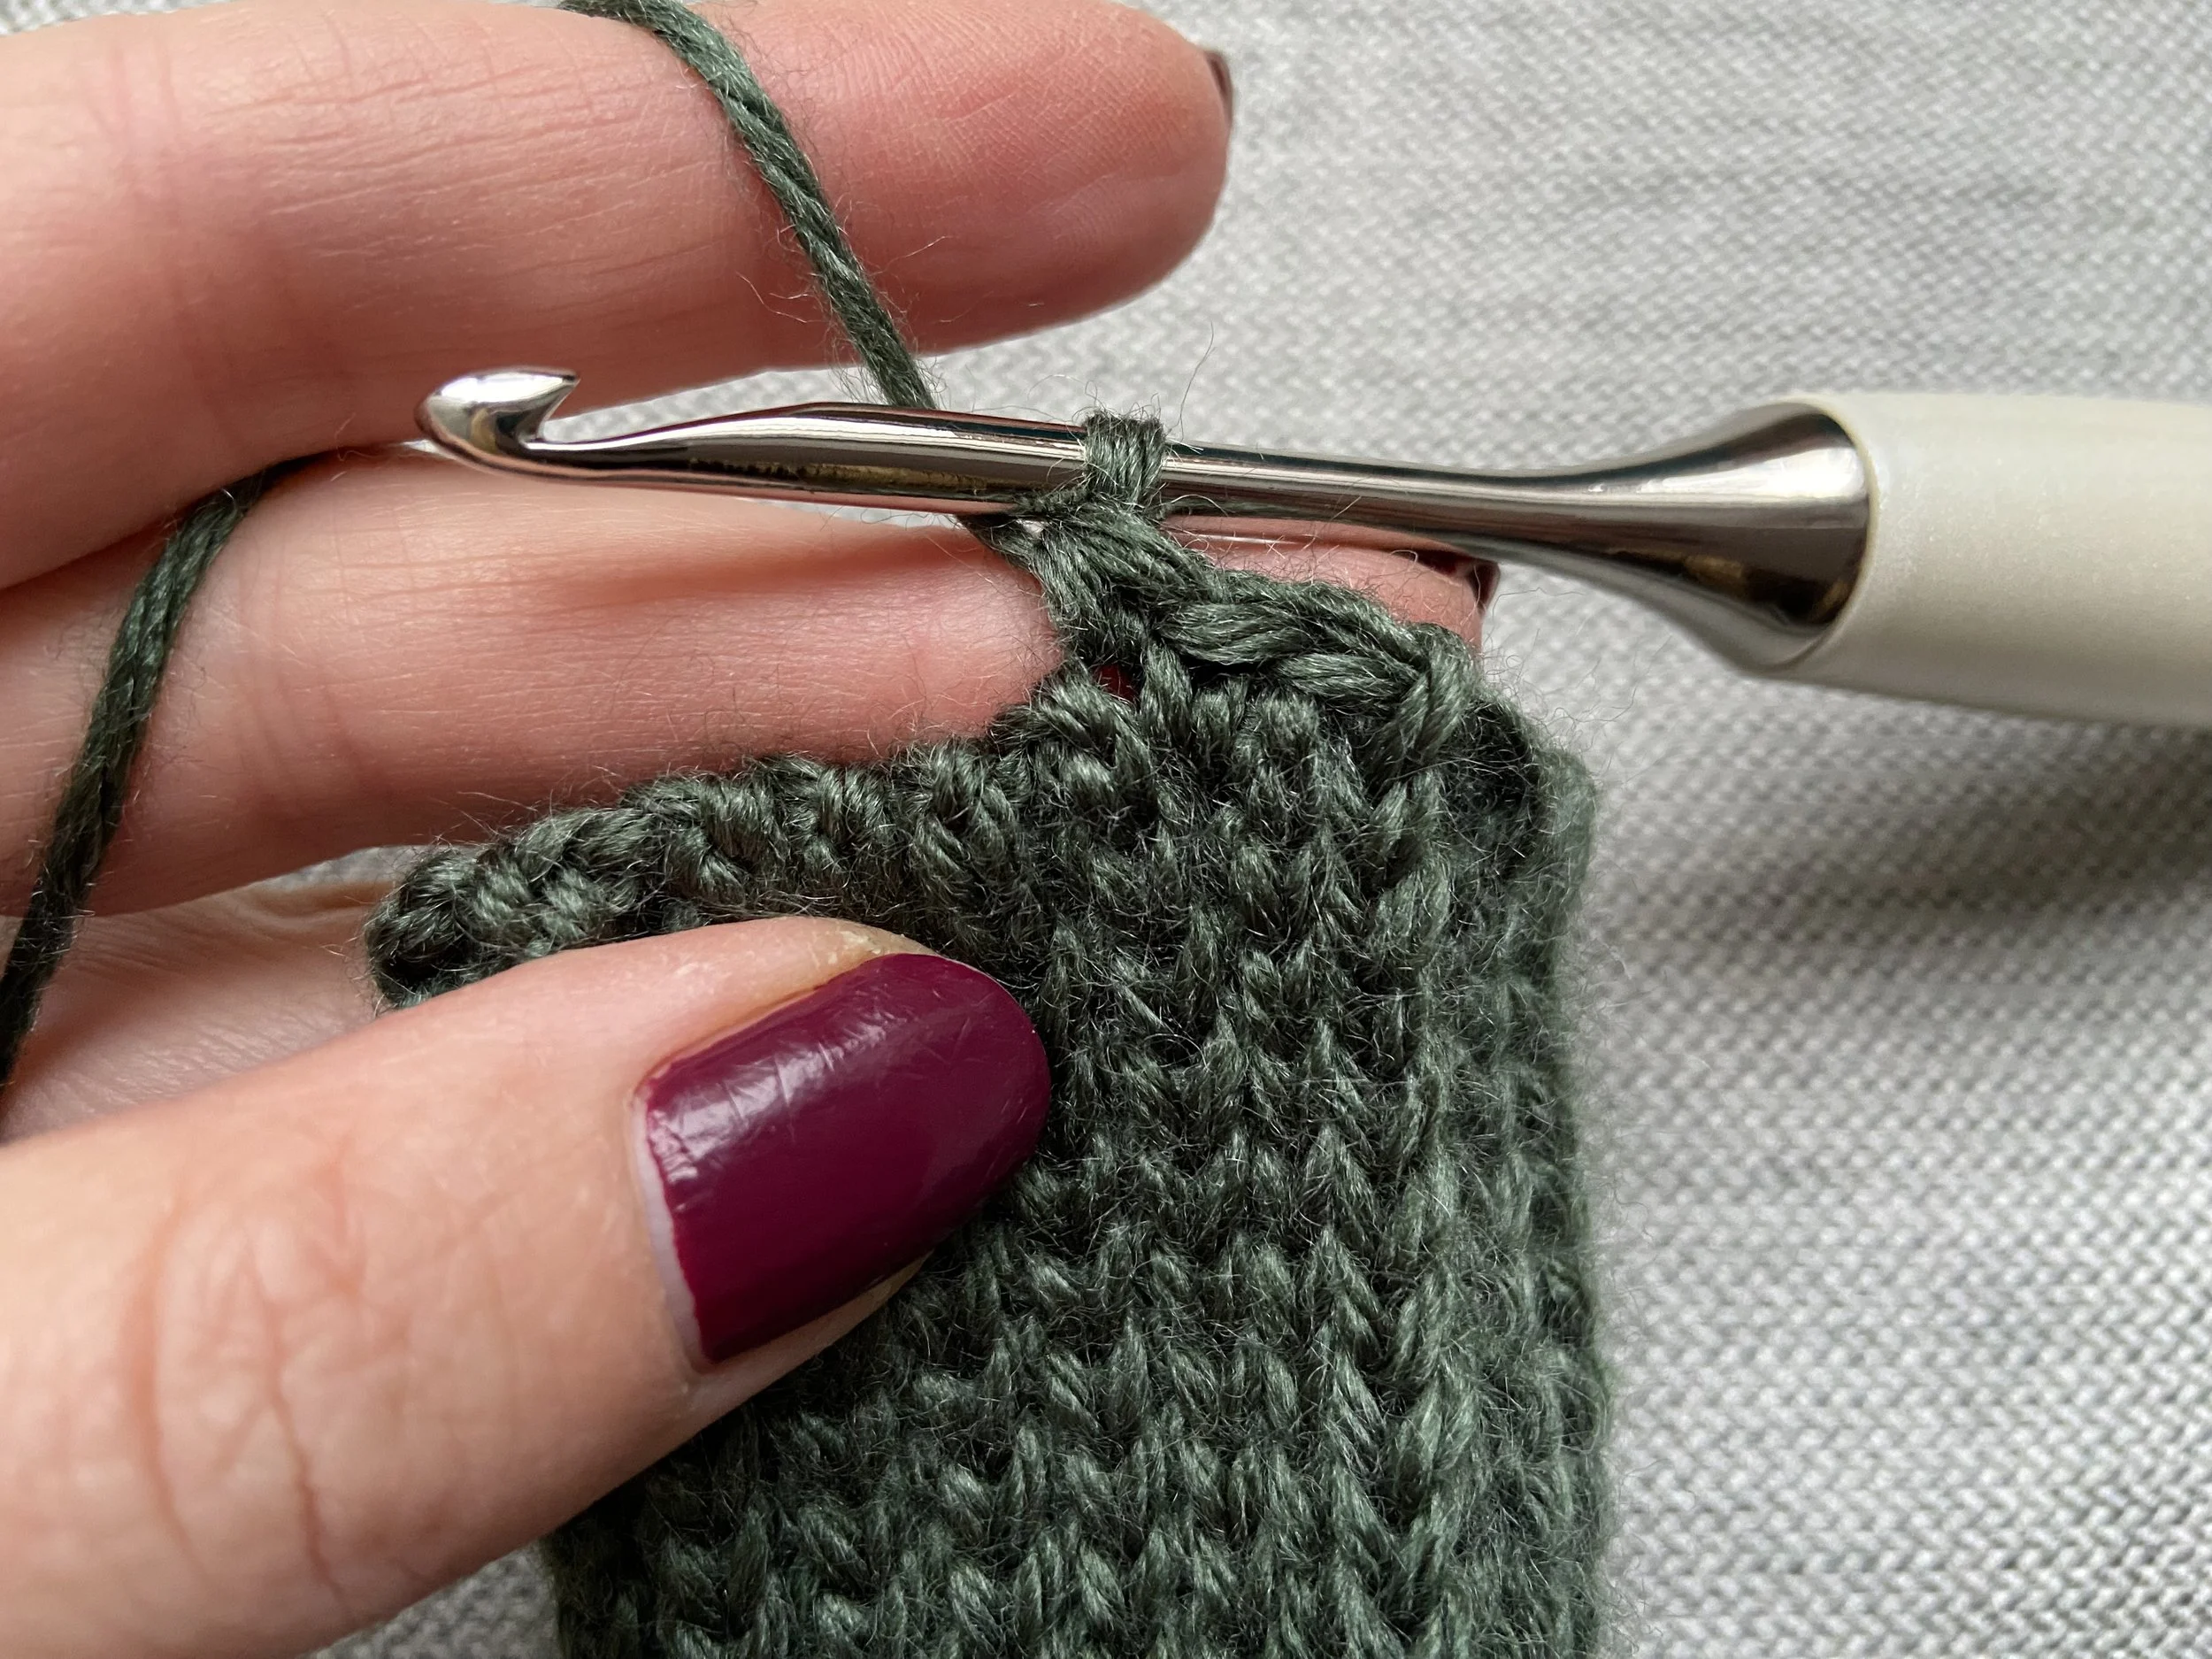
With Colour A, CH 15. SL ST into the back bump of the 2nd CH from hook and each CH across. <14>
Row 2
CH 1, turn. SL ST BLO across.
Rows 3-35
Rep Row 2 until you have a total of 35 rows.
Row 36/Seaming Cuff
SL ST through the BLO of the last round and the BLO of the CHs from Row 1 to seam together the cuff. Do not fasten off.
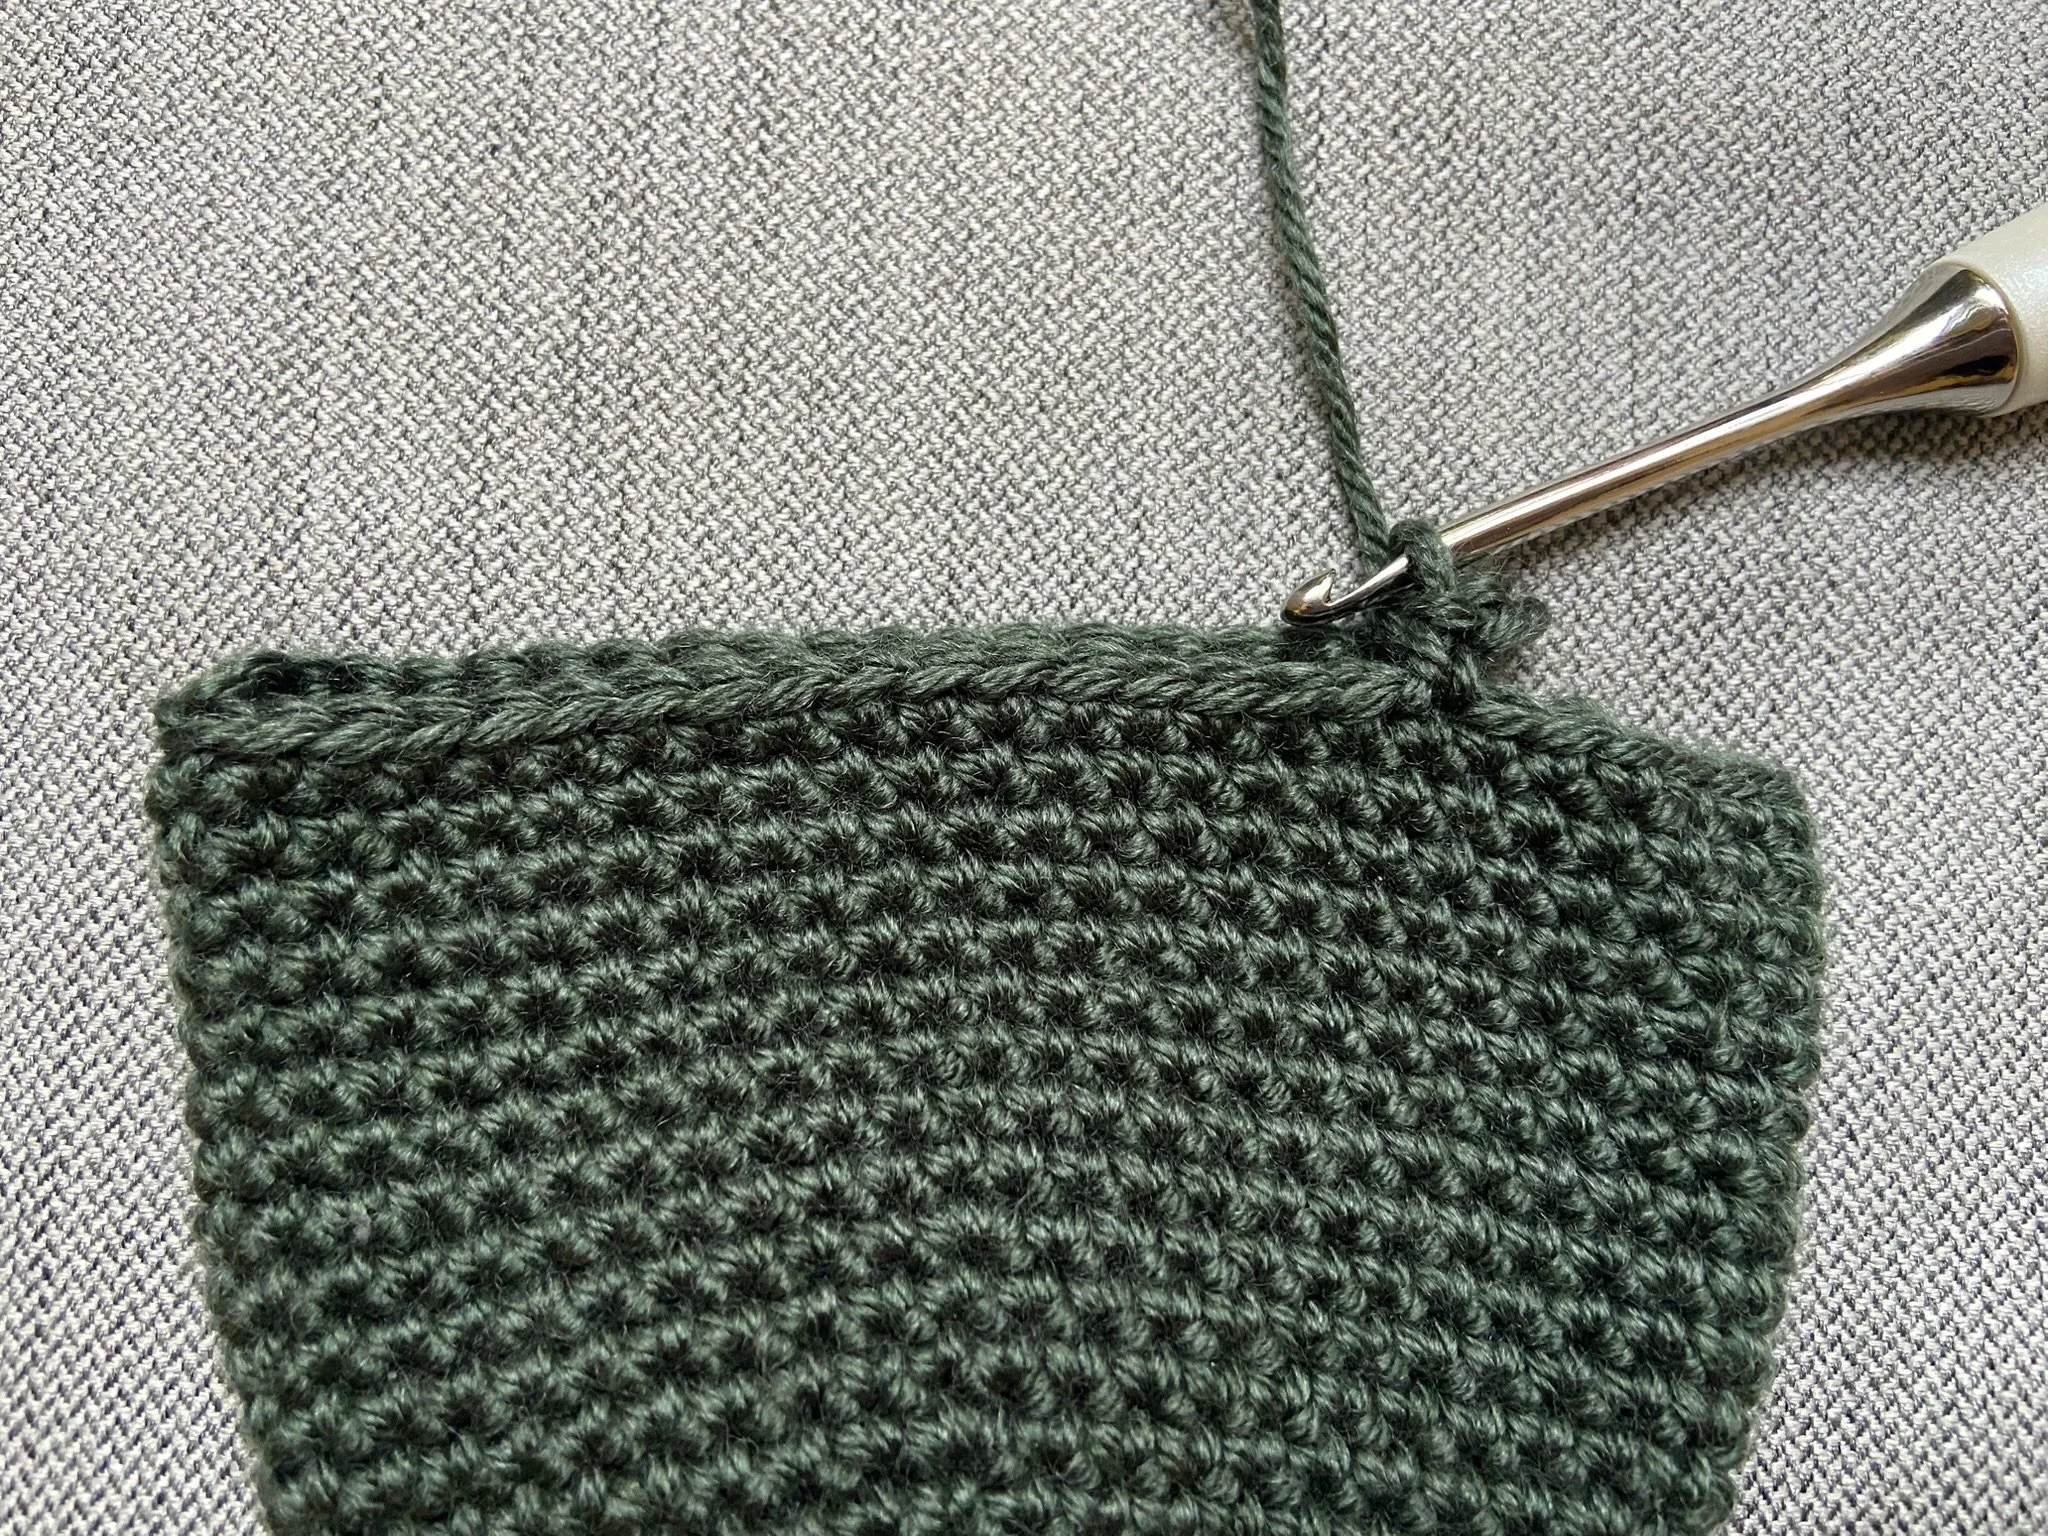
Hand
Round 1
CH 1. Work 1 SC into the side of every row of the cuff around. Join with a tight SL ST. <36>
Round 2
CH 1, do not turn on this or any round of the mitten. SC around. Join with a tight SL ST.
Round 3
CH 1. *SC 8, 2SC*, rep * around. Join with a tight SL ST. <40>
Rounds 4 & 5
Rep Round 2 twice.
Round 6
CH 1. *SC 9, 2SC*, rep * around. Join with a tight SL ST. <44>
Rounds 7 & 8
Rep Round 2 twice.
Round 9
CH 1. *SC 10, 2SC*, rep * around. Join with a tight SL ST. <48>
Rounds 10-18
Rep Round 2 nine times.
Splitting Hand & Thumb
Round 19
CH 1. SC 18, CH 4, SK 12, SC remaining 18 STs. Join with a tight SL ST. Fasten off Colour A. <40>
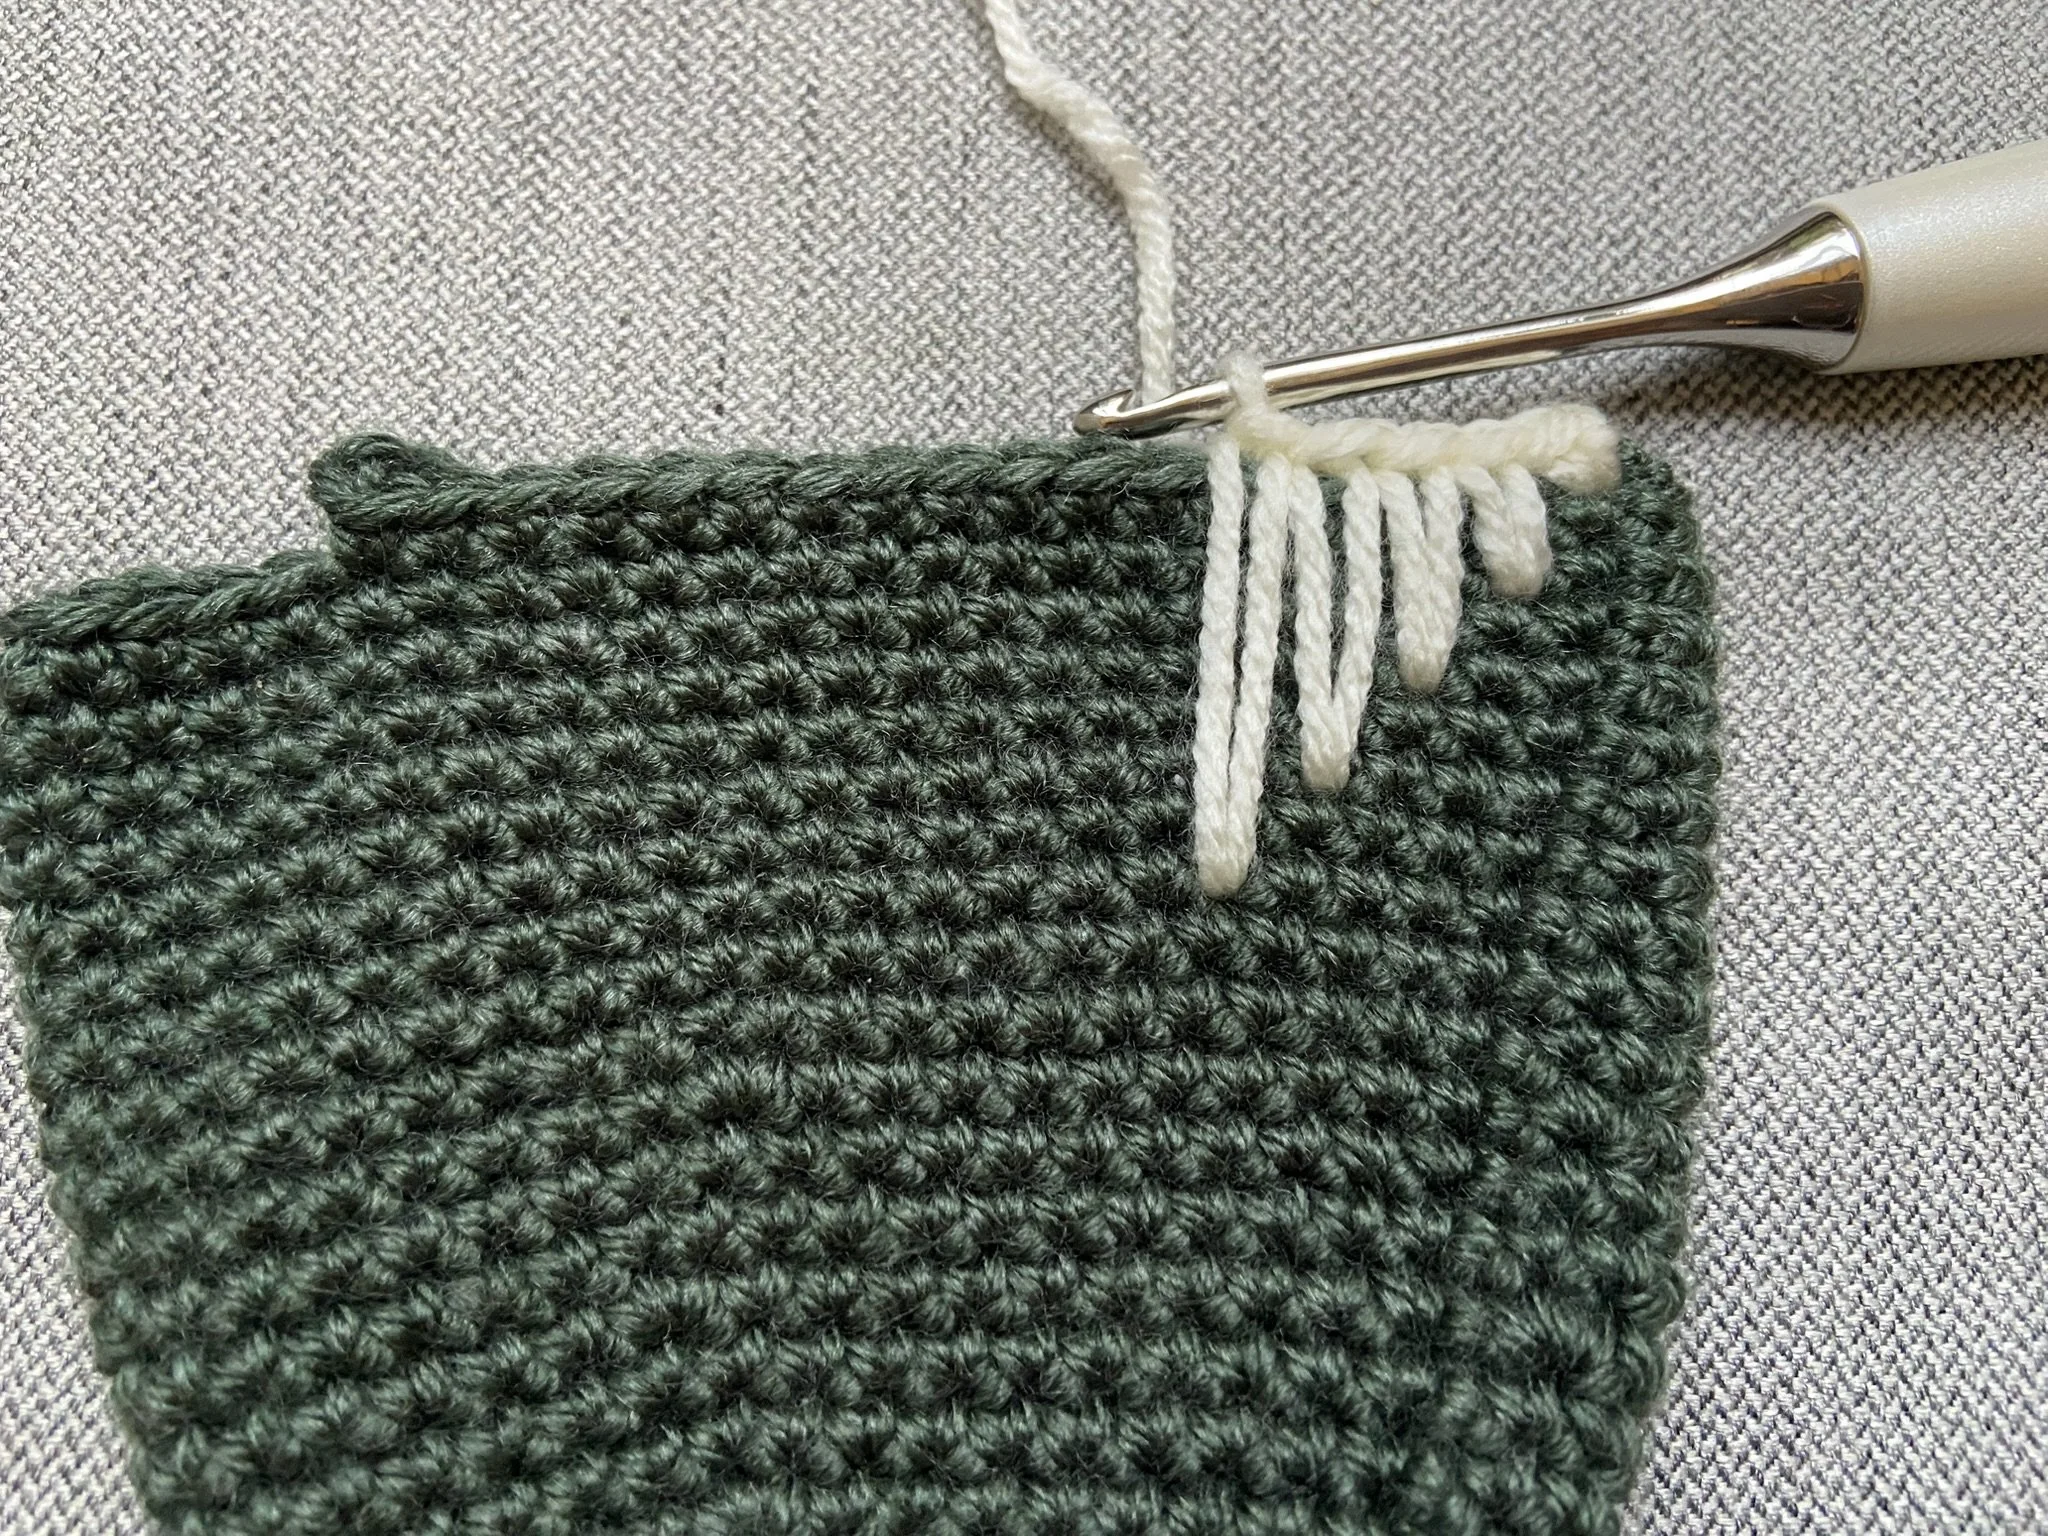
Round 20
Attach Colour B, CH 1. *SC 1, SP-2, SP-4, SP-6, SP-8, SP-6, SP-4, SP-2*, rep * once, SC, SP-2, SC into each of the 4 CHs, SP-4, SP-2, rep * twice. Join with a tight SL ST.

Rounds 21-31
Rep Round 2 eleven times. Fasten off Colour B.
Round 32
Attach Colour C. CH 1. *SC 1, SP-2, SP-4, SP-6, SP-8, SP-6, SP-4, SP-2*, rep * 4 more times around. Join with a tight SL ST.
Round 33
Rep Round 2 once.
Round 34
CH 1. *SC 6, SC2tog*, rep * around. Join with a tight SL ST. <35>
Rounds 35 & 36
Rep Round 2 twice.
Round 37
CH 1. *SC 5, SC2tog*, rep * around. Join with a tight SL ST. <30>
Rounds 38 & 39
Rep Round 2 twice.
Round 40
CH 1. *SC 4, SC2tog*, rep * around. Join with a tight SL ST. <25>
Round 41
Rep Round 2 once.
Round 42
CH 1. *SC 3, SC2tog*, rep * around. Join with a tight SL ST. <20>
Round 43
CH 1. *SC 2, SC2tog*, rep * around. Join with a tight SL ST. <15>
Round 44
CH 1. *SC 1, SC2tog*, rep * around. Join with a tight SL ST. Fasten off leaving at least a 10cm (4 inch) tail. <10>
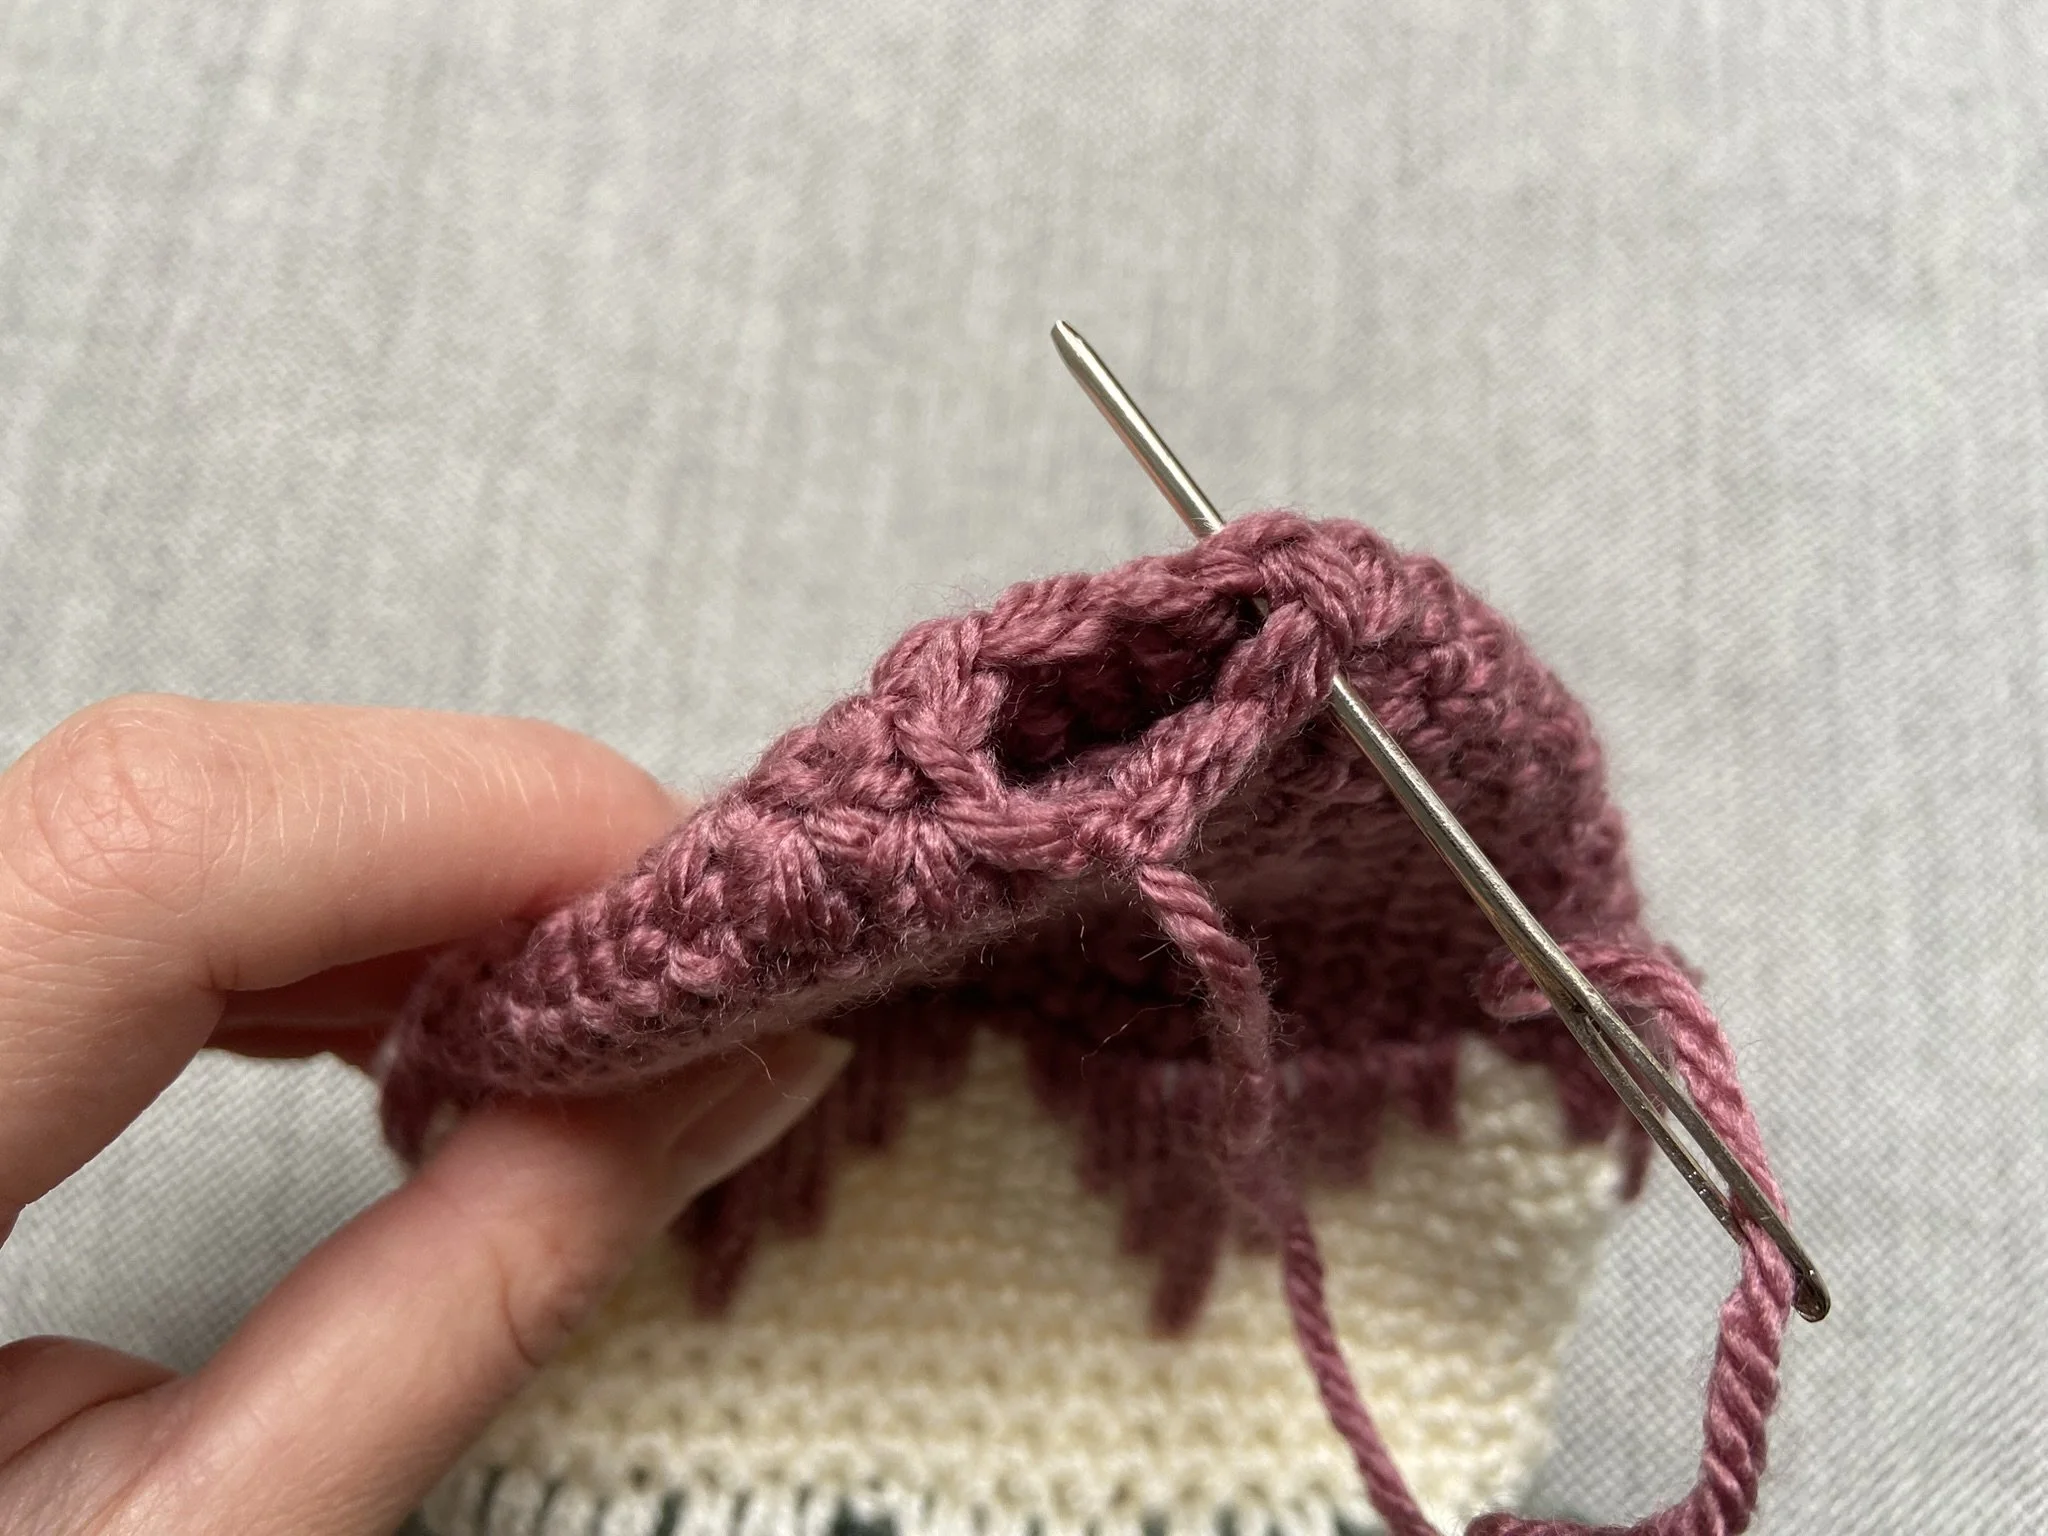
Closing Top
Weave the long tail through every other stitch of last round, pull tight to close the hole and secure end with a tight knot on the inside of your mitten.
Thumb
Round 1
Attach Colour A between thumb & hand. CH 1, SC around thumb opening working 1 SC into each CH & each SC around. Join with a tight SL ST. <16>
Round 2
CH 1. SC around. Join with a tight SL ST.
Rounds 3-9
Rep Round 2 seven times.
Round 10
CH 1. *SC 2, SC2tog*, rep * around. Join with a tight SL ST. <12>
Round 11
CH 1. *SC 1, SC2tog*, rep * around. Join with a tight SL ST. Fasten off leaving at least a 10cm (4 inch) tail. <8>
Closing Top
Weave the long tail through every other stitch of last round, pull tight to close the hole and secure end with a tight knot on the inside of your mitten. Weave in ends.
Second Mitten
Repeat all instructions for 2nd mitten!
Thank you so much for making the Mya Mittens! Tag me @ilovetinderbox on your favourite social media platform (I’m on almost all of them!) so I can see your finished product. If you have any questions please email me courtney@ilovetinderbox.com
Until the next one, happy crocheting!
Courtney