Hey hey fellow crocheter!
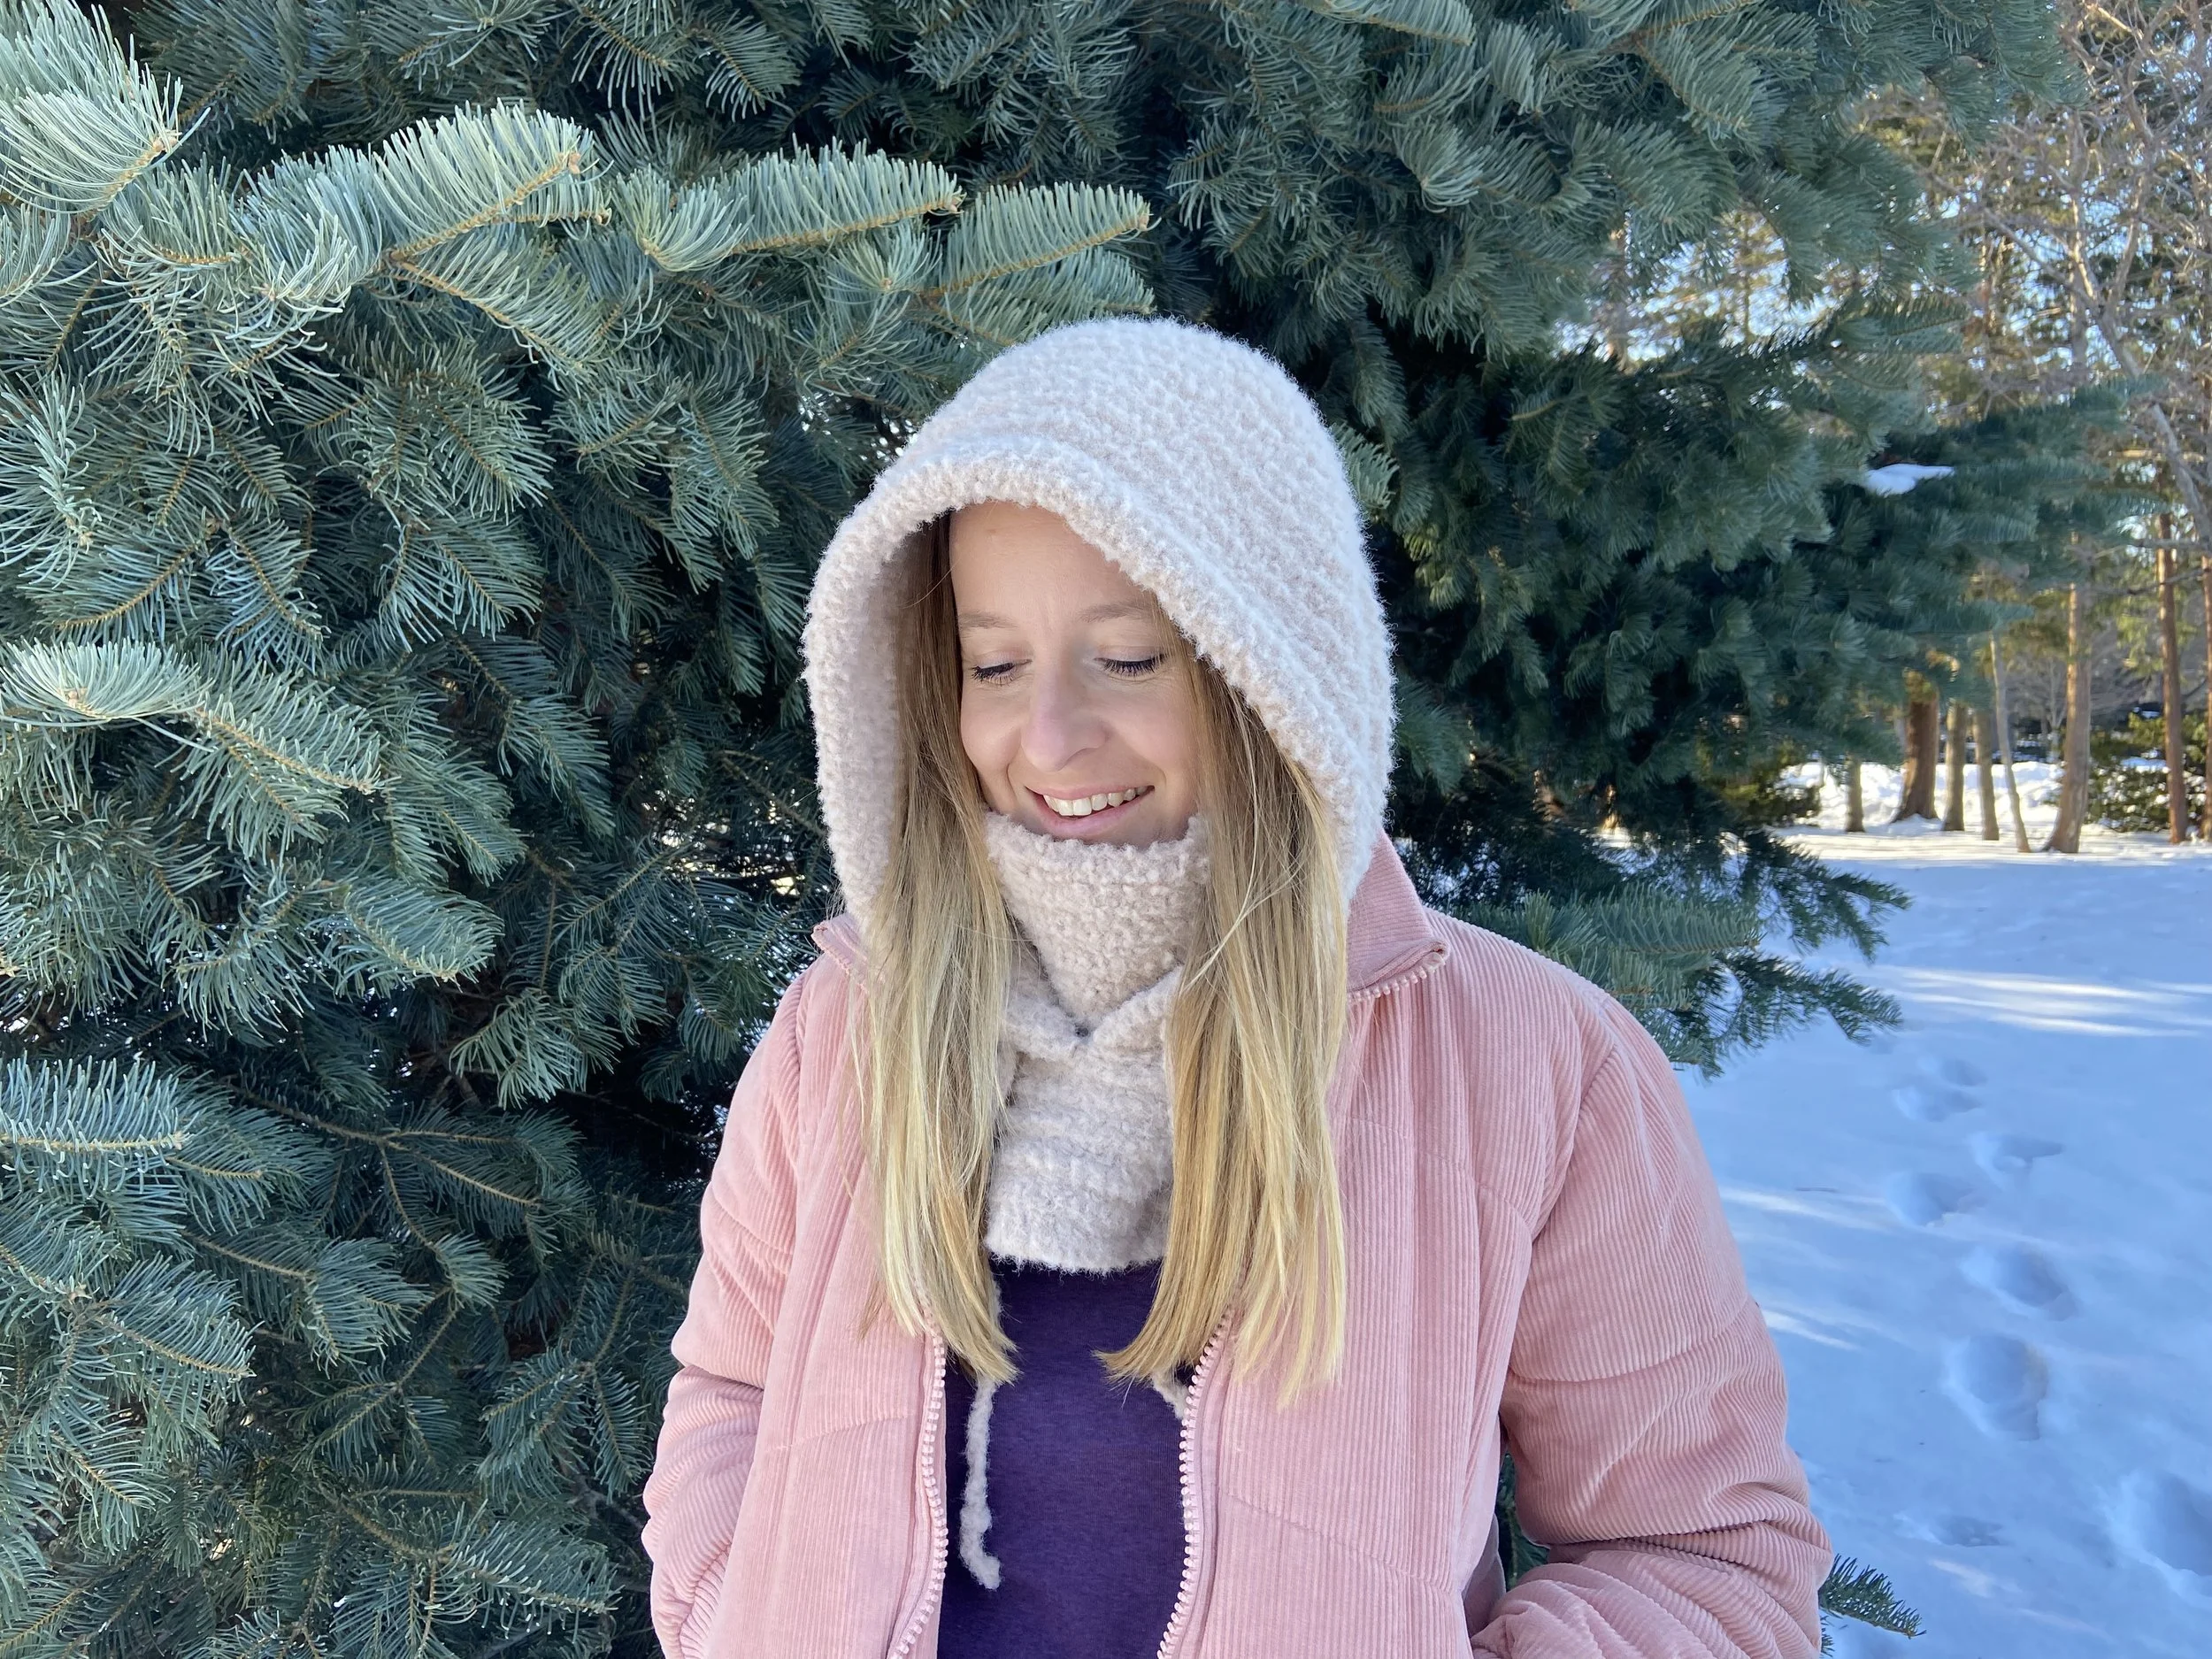
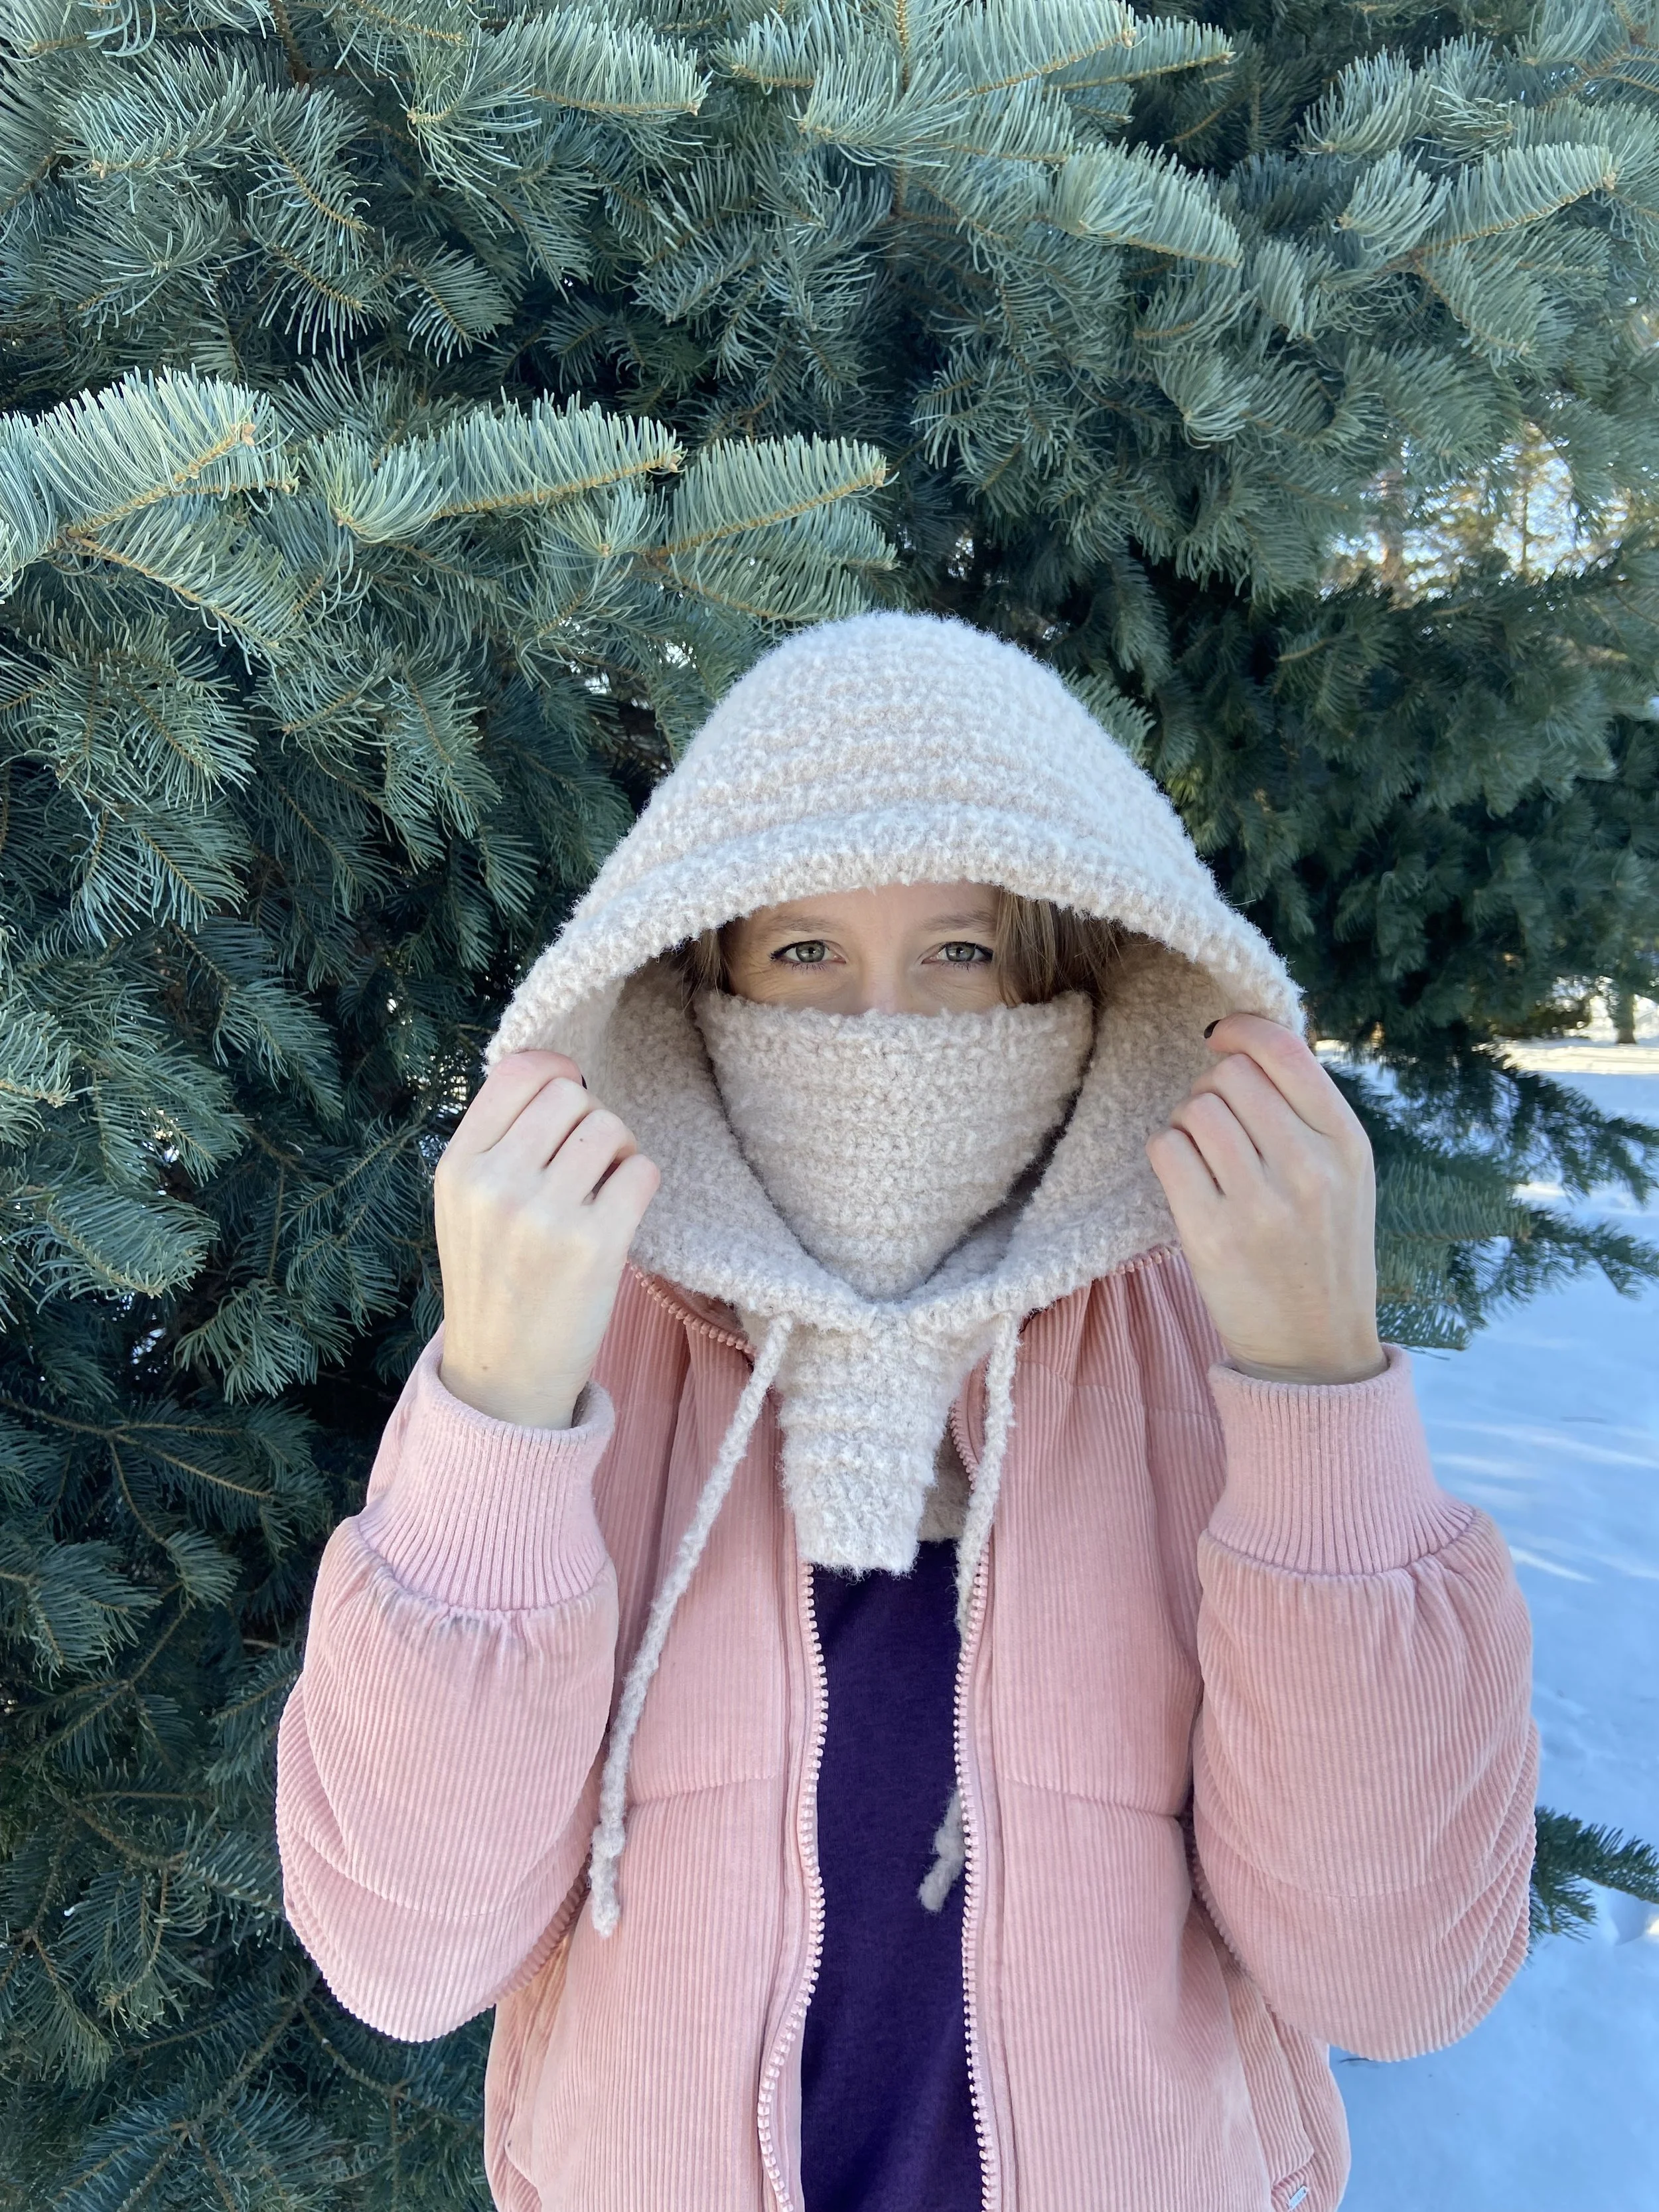
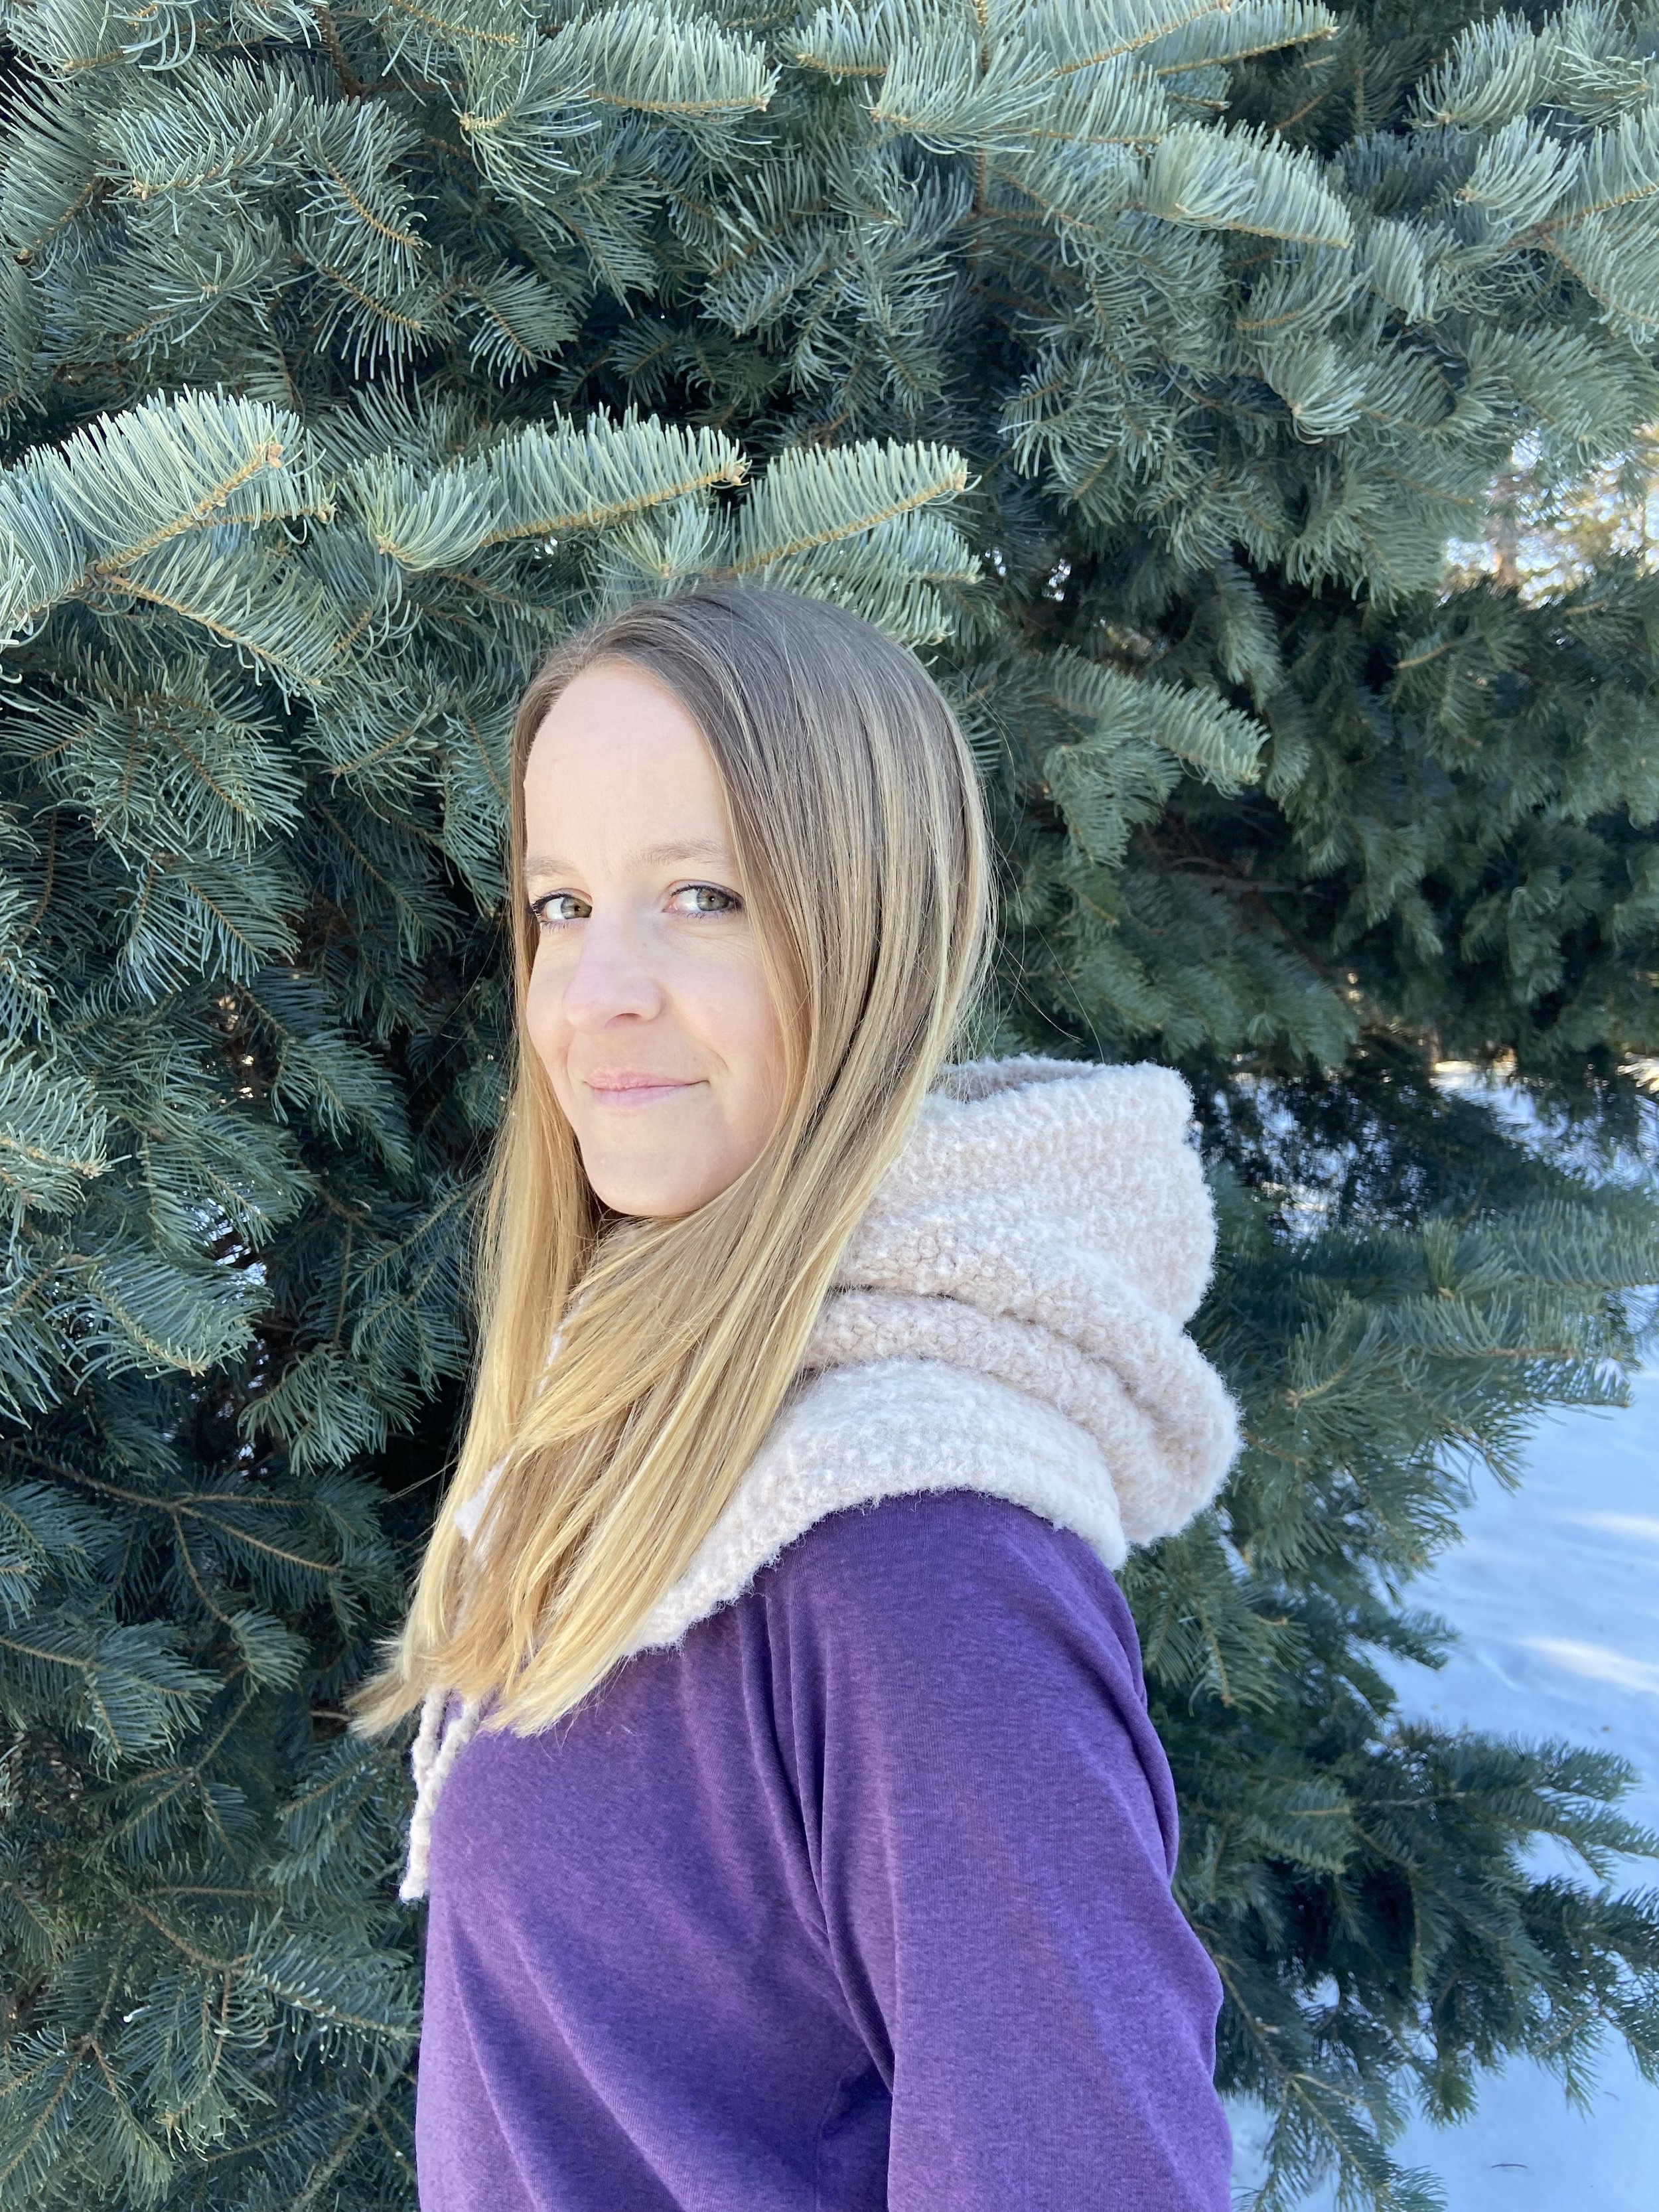
This design has been a long time in the making and I am so excited that the Willow Hooded Cowl crochet pattern is now available - and it’s in full for free here on the blog!
This project is great for an intermediate crocheter - the hardest skill is working through the sides of rows & tops of stitches at the same time to seam portions as you go. If you feel comfy doing that then this is the pattern for you!
And if you’re getting stuck at any point or are more of a visual learner there’s also a full free video tutorial on my YouTube channel to help you out! Click here to check it out.
This pattern is also available in the kit from Lion Brand available here.
If you’re looking for a smoother, ad-free version of this pattern, it is available in my shop & Ravelry store here:
https://www.ilovetinderbox.com/shop/willow-hooded-cowl
https://www.ravelry.com/patterns/library/willow-hooded-cowl
If you have any questions about this pattern please email me at: courtney@ilovetinderbox.com as comments on this post and DMs on social media may get missed!
Want to know when I release new (& free) patterns? Sign up for my email list here.
For my Willow Hooded Cowl I used Lion Brand’s Feels Like a Dream yarn in the colour Oatmeal - it’s. a deliciously soft and fuzzy yarn, perfect for a cozy project like Willow. Want to use the same yarn as me? Click here!
Not sure what yarn you want to use? My top three rules are that it must fit your budget, you must like the feel of it against your skin and it MUST be the same weight as the pattern - in this case bulky! Want to know everything I suggest when it comes to choosing yarn for crochet wearables? Check out my blog post all about it here.
Alright, let’s get crocheting!
Materials
• 4.25 mm crochet hook
• Approximately 540 metres (590 yards) of bulky weight yarn. Sample made using Lion Brand Feels Like a Dream Yarn - 3 skeins, in tbe colour Oatmeal, click here to shop
• 4 stitch markers with two being distinctly different from the other two
• Optional: Ribbon or string 110cm (44 inches) in length
• Measuring tape or gauge square
• Yarn needle
• Scissors
Gauge
• 16 stitches x 12 rows in a blocked 10 cm (4 inch) square of HDC worked in turned rows. Not sure how to get gauge perfect every time? Check out this blog post about fine tuning your gauge to get it right.
Legend
2HDC: Work 2 stitches in the same space, increase
2tog: Work 2 stitches together, decrease
3tog: Work 3 stitches together, decrease
CH(s): Chain(s)
Dec: Decrease
HDC(s): Half double crochet(s)
rep: Repeat
SL ST: Slip stitch
ST(s): Stitch(es)
Notes
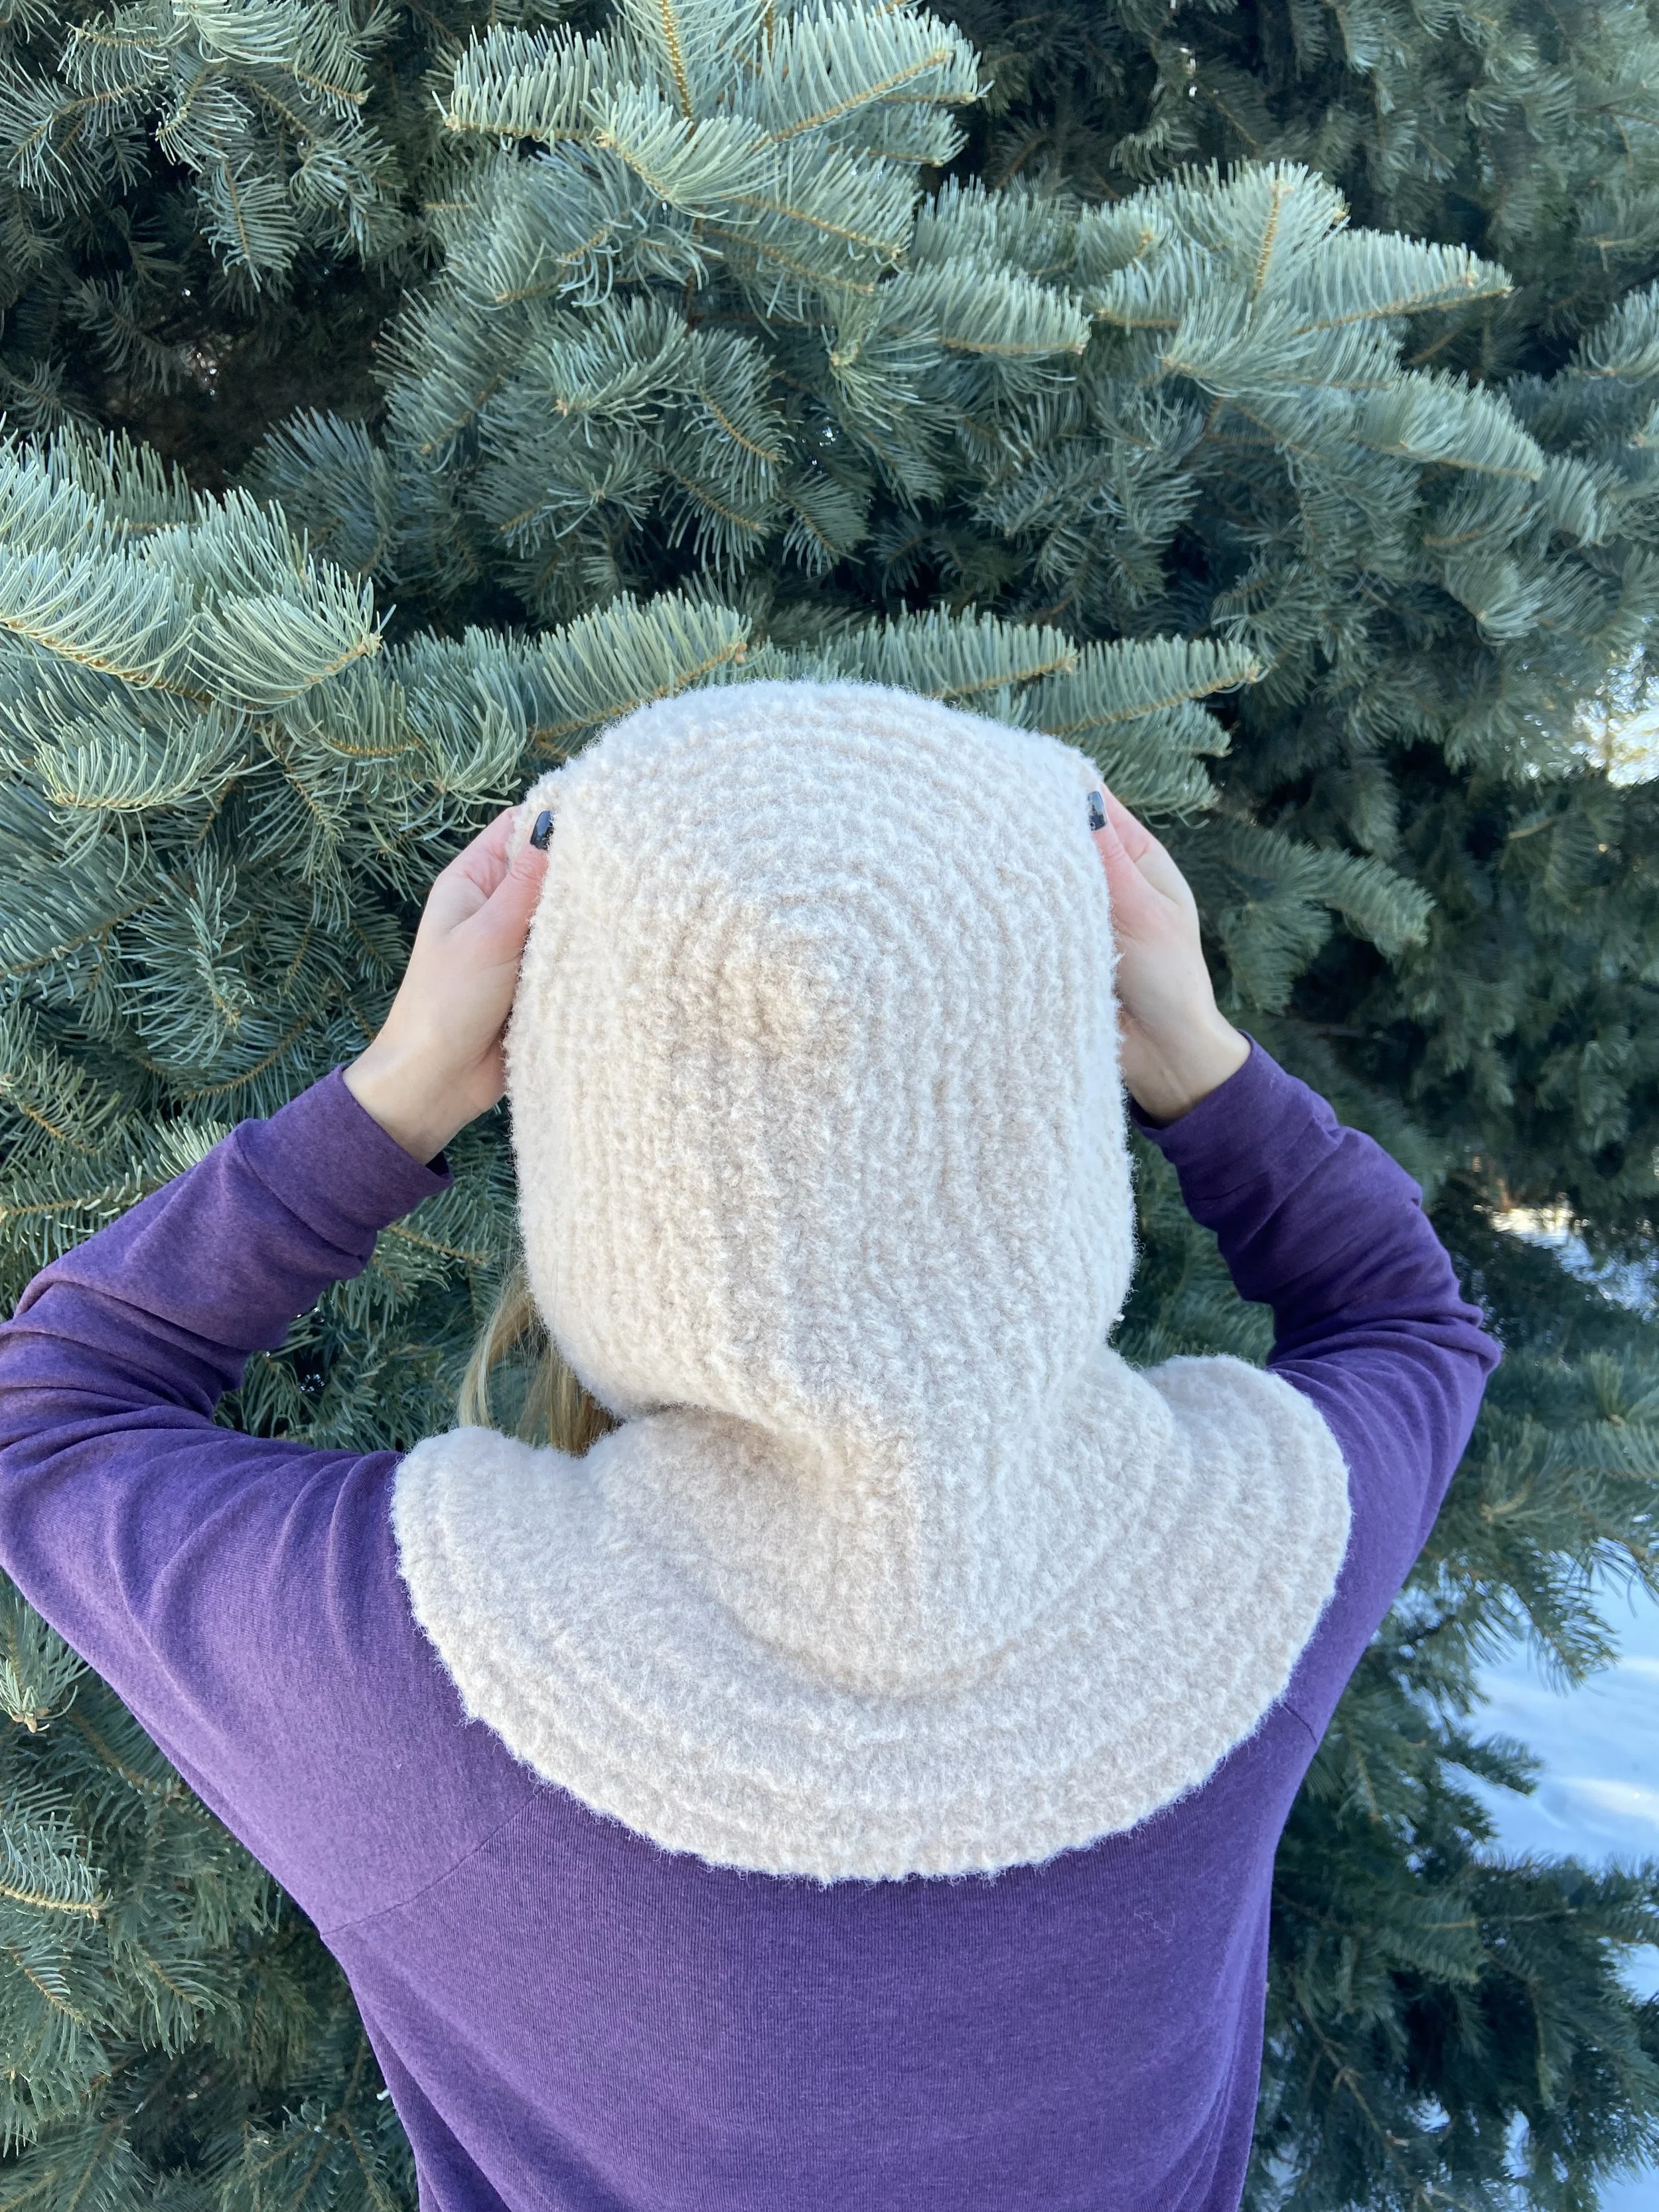
The hood of this hooded cowl is made first, then put aside. You then begin the cowl and the hood is seamed onto the cowl using a round of stitches. A small yoke is then created for added warmth.
<Stitch counts> are only listed when they change.
This pattern is written in US crochet terms, with Canadian spelling, eh?
Make Tie
Create a 110 cm (44 inch) length of CHs, the number of CHs is not important, just the length is! Alternatively, cut a ribbon, string or shoelace that is the correct length!
Hood
Row 1
CH 113, turn. HDC into the back bump of the 3rd CH from hook and each CH across. <111>
Row 2
CH 2, turn. HDC across.
Rows 3 - 5
Rep Row 2 three times.
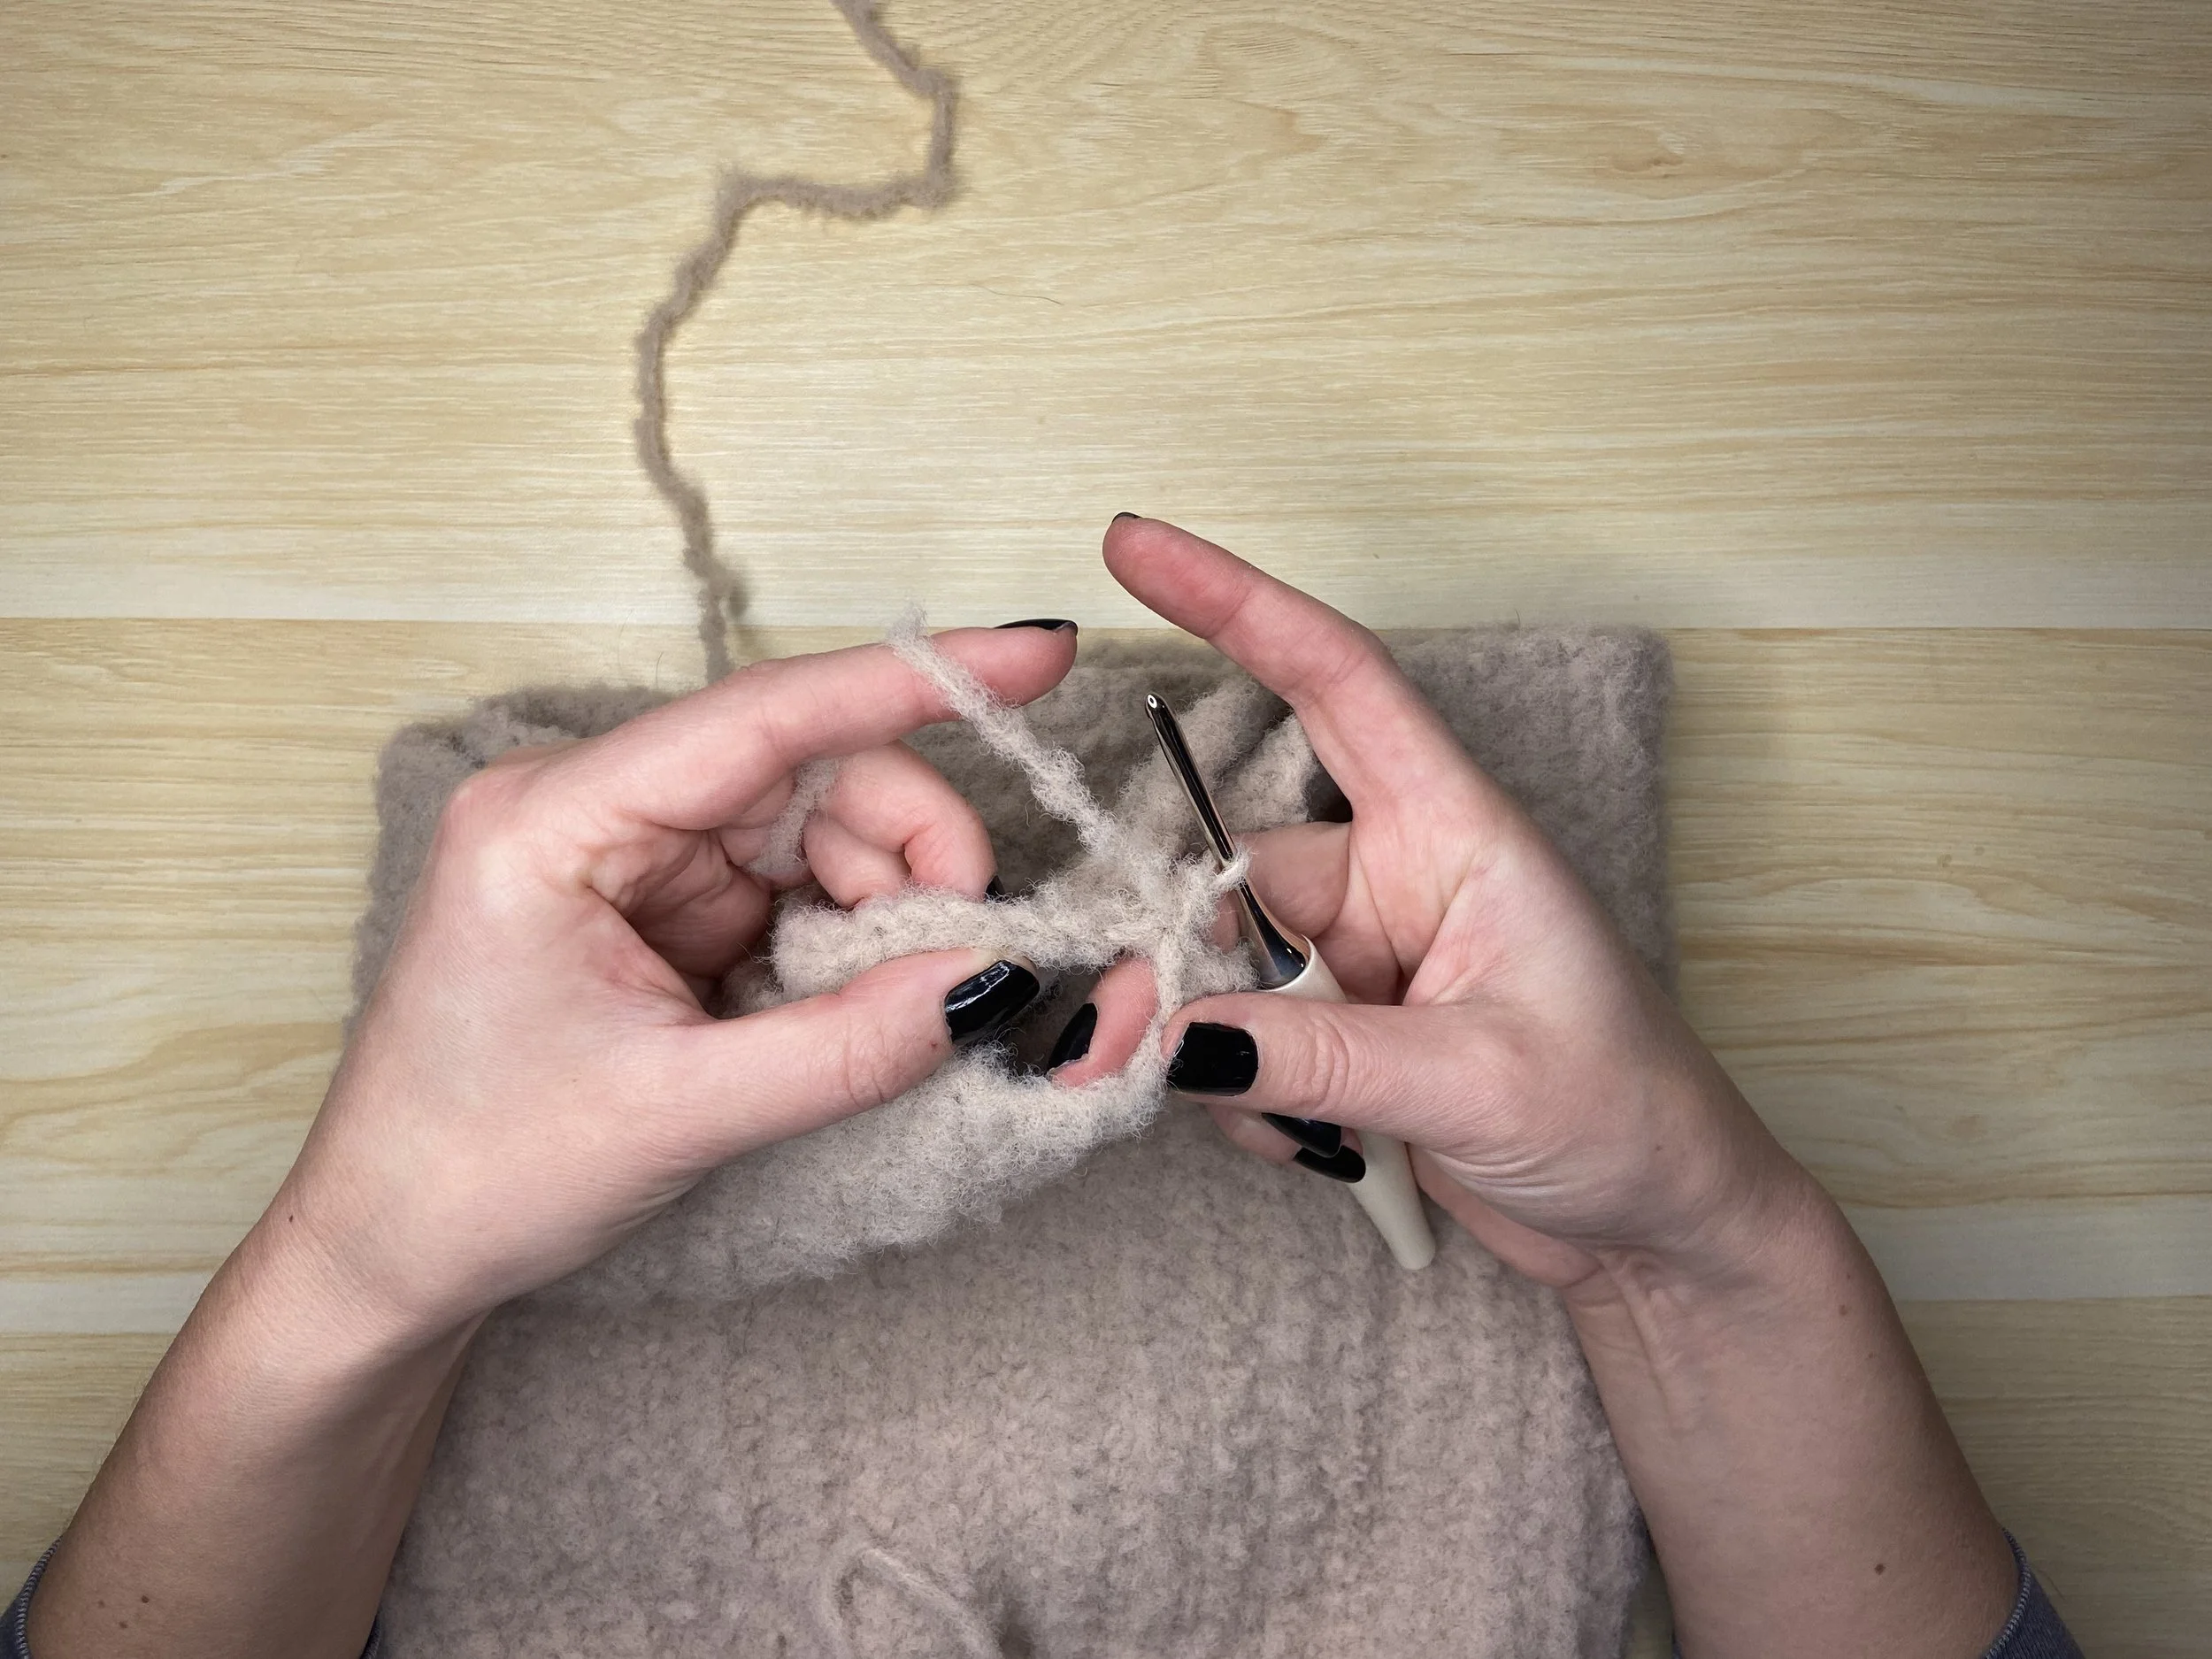
Insert Tie
Push one end of your tie out between the 3rd and 4th ST at either end of Row 2 ensuring both ends of the tie come out of your piece on the same side (See Image).
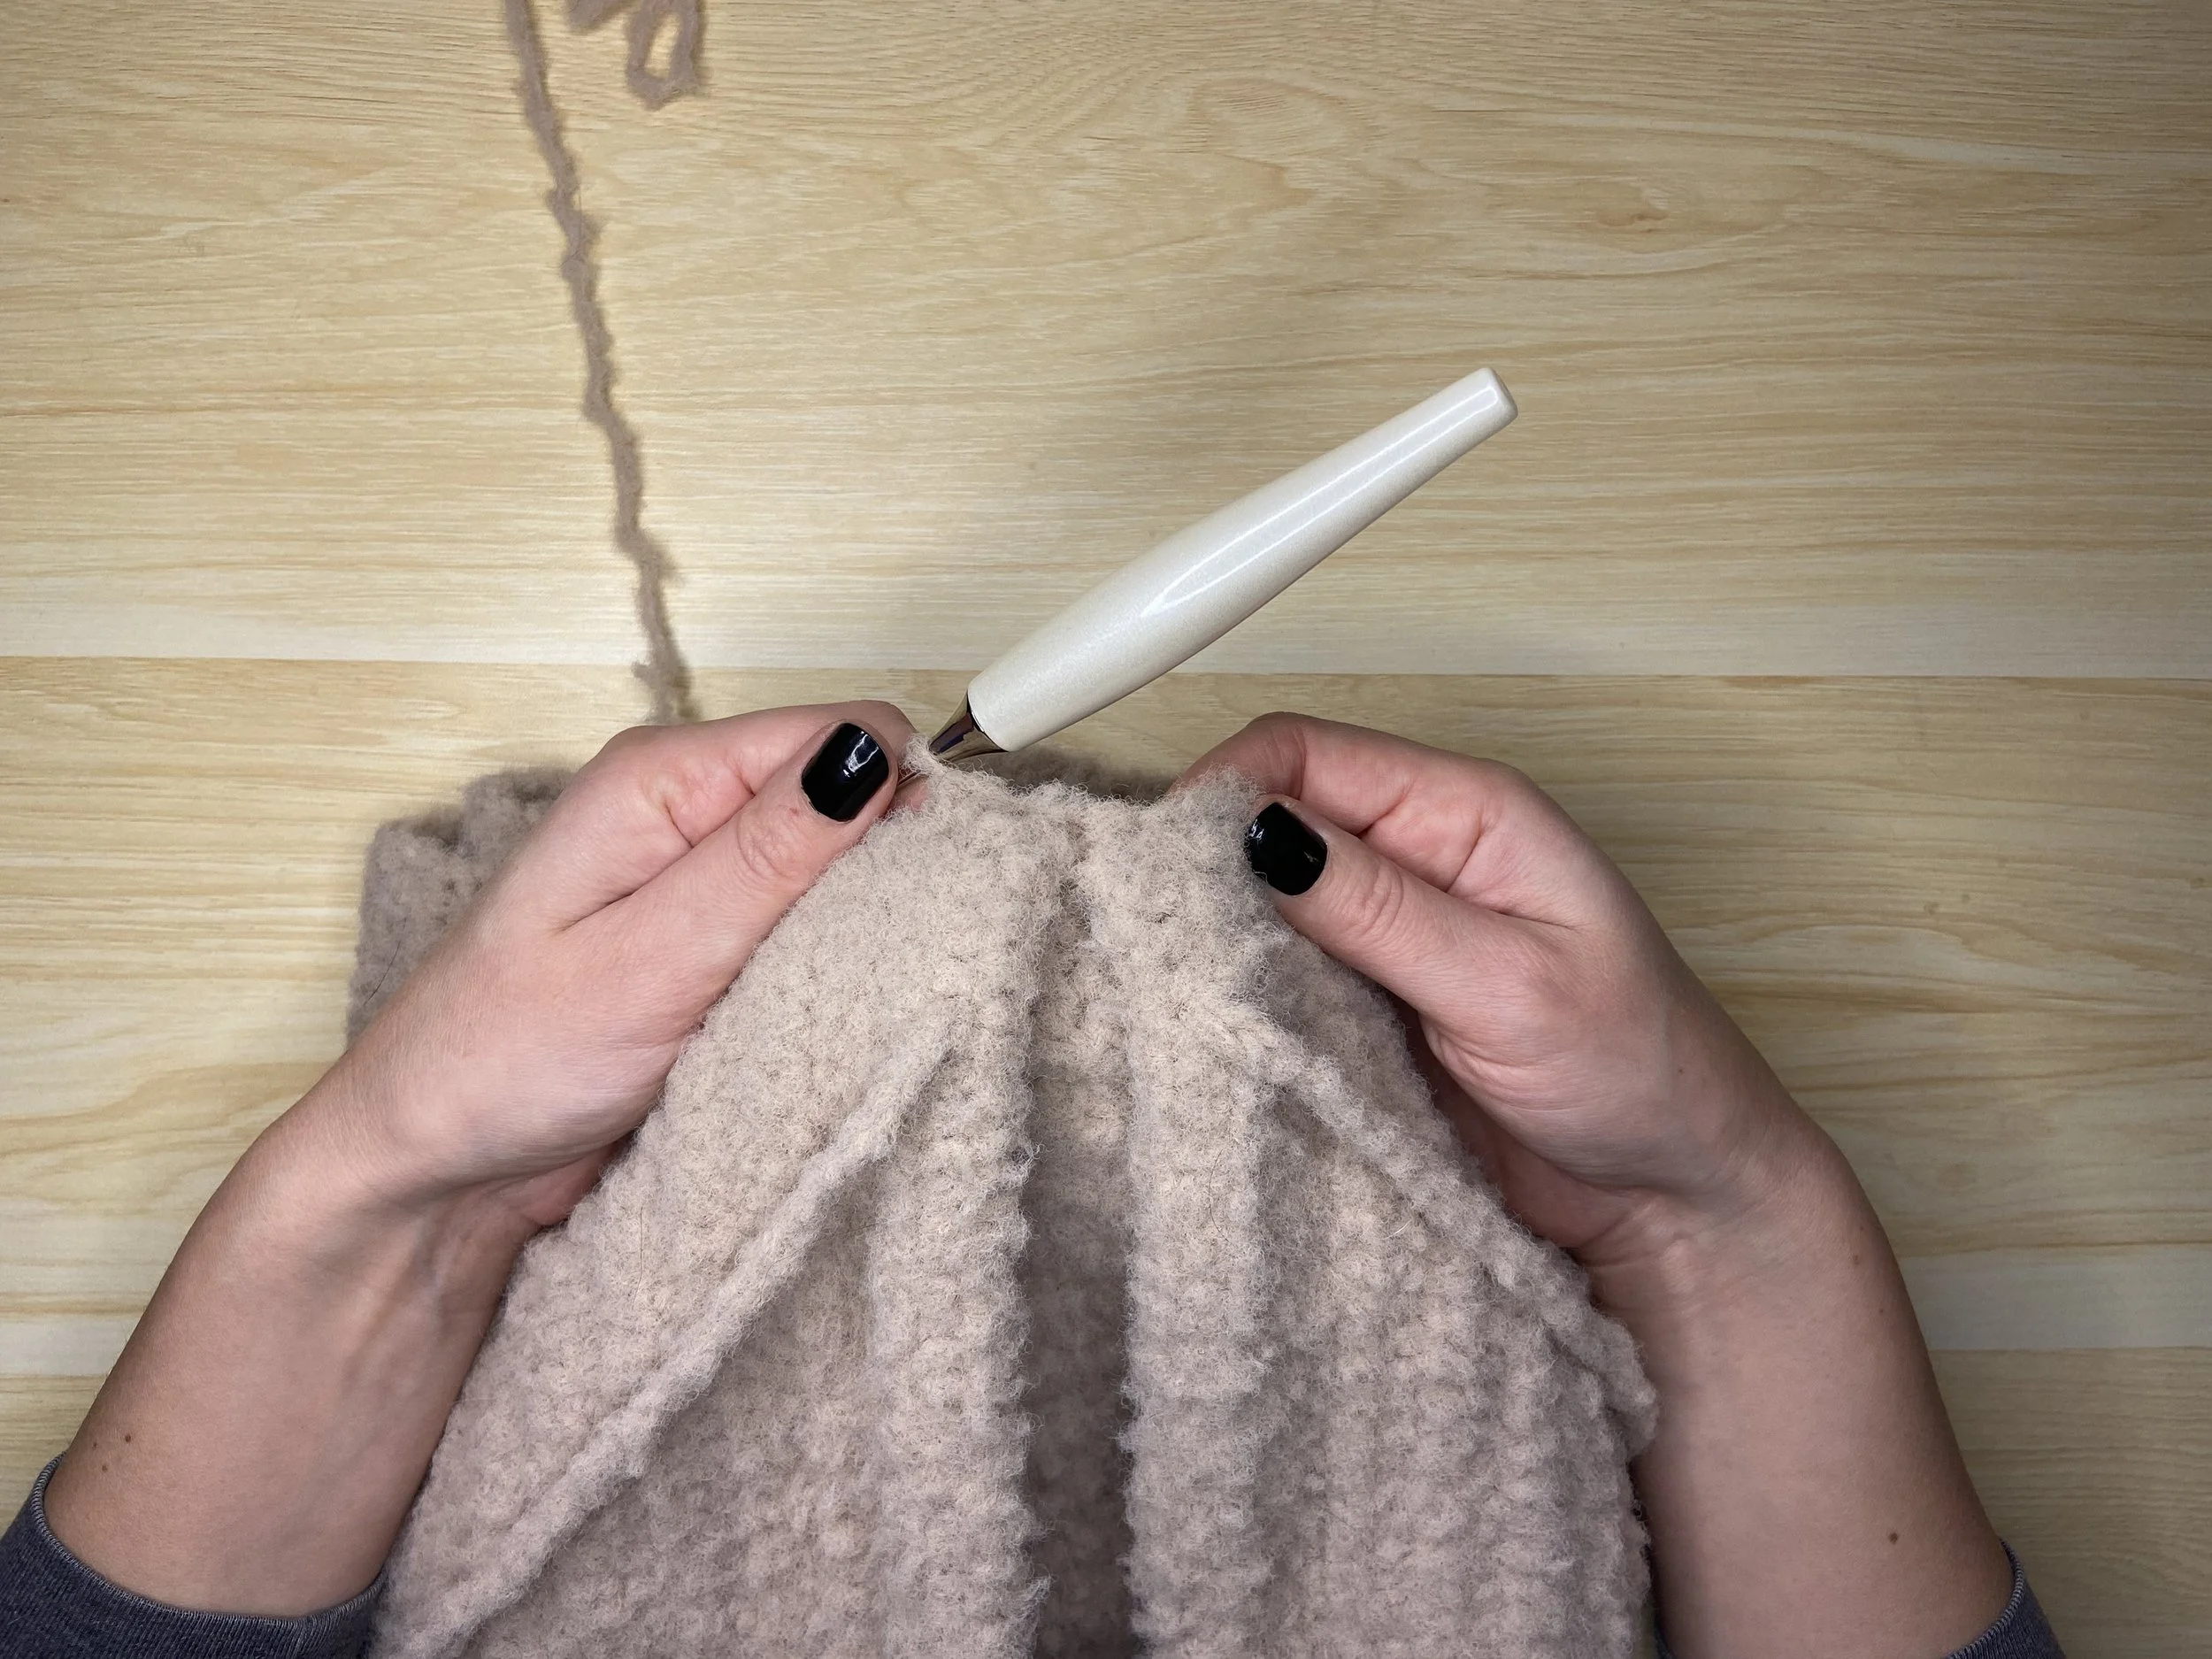
Row 6 (Traps Tie)
CH 2, turn. Fold your work in half lengthwise over the tie, HDC through both the top of the last row and the bottom of the foundation CHs from Row 1 across (See Images).
Rows 7 - 22
Rep Row 2 sixteen more times.
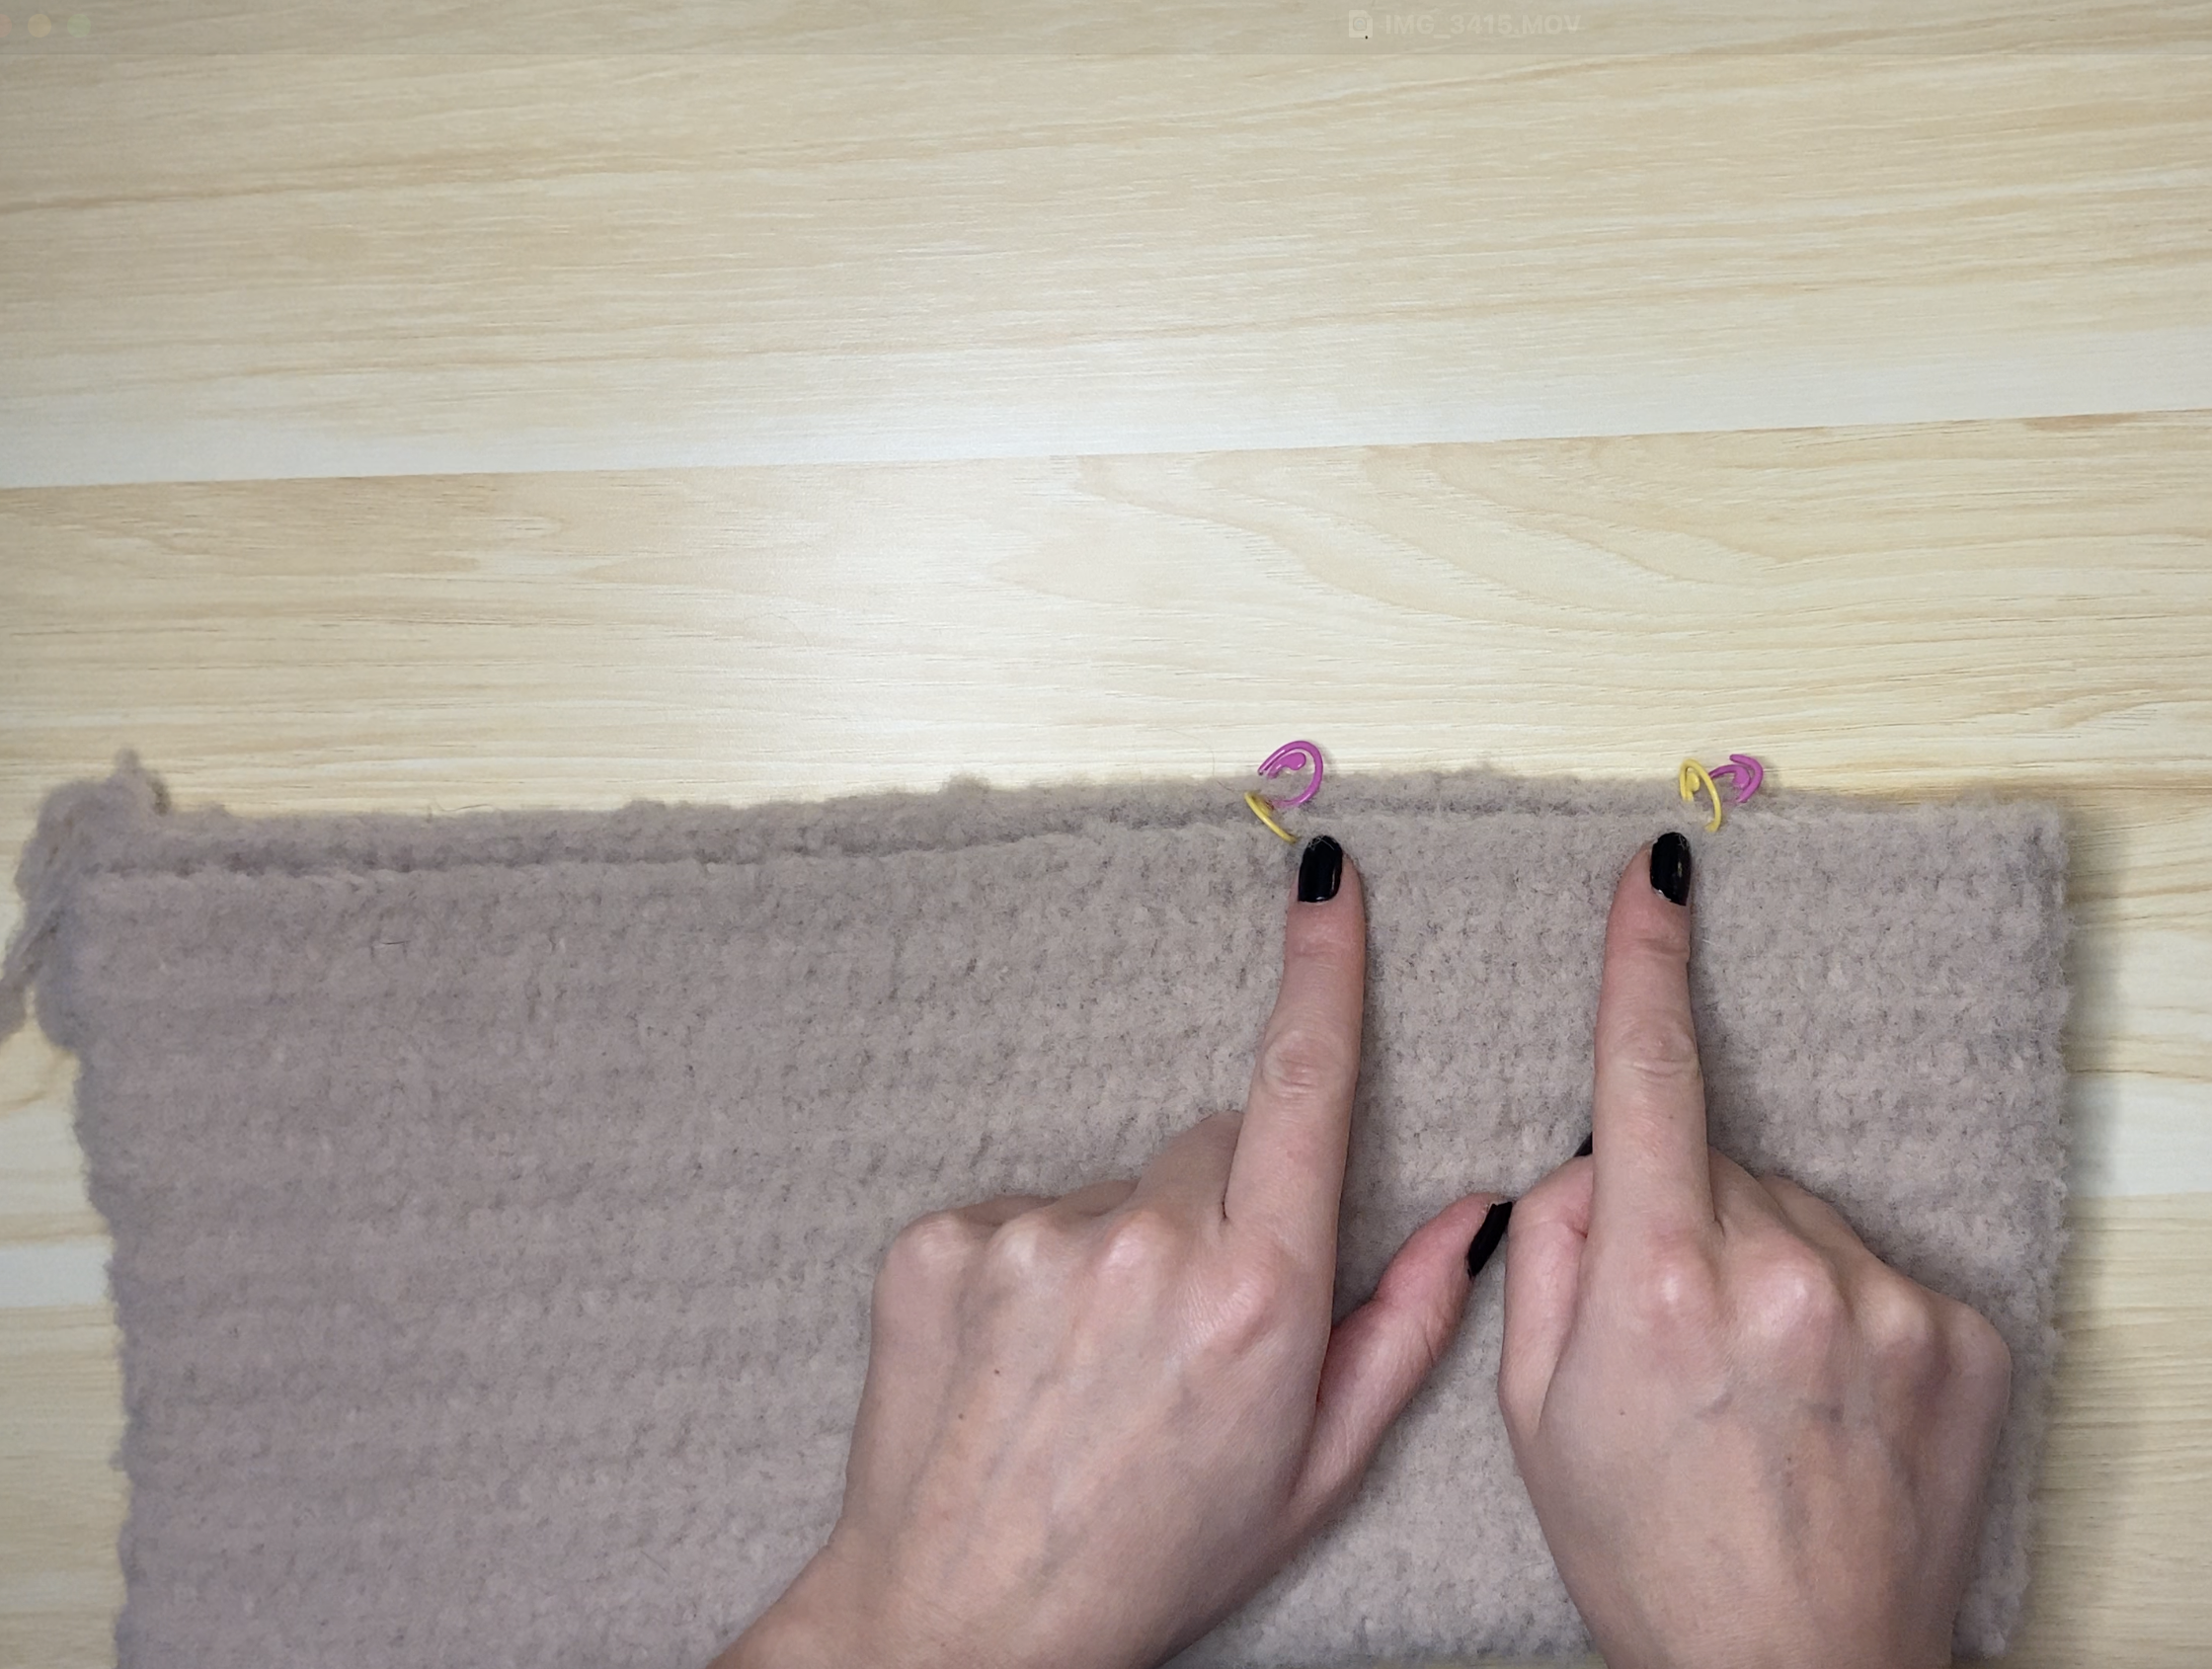
Place Markers
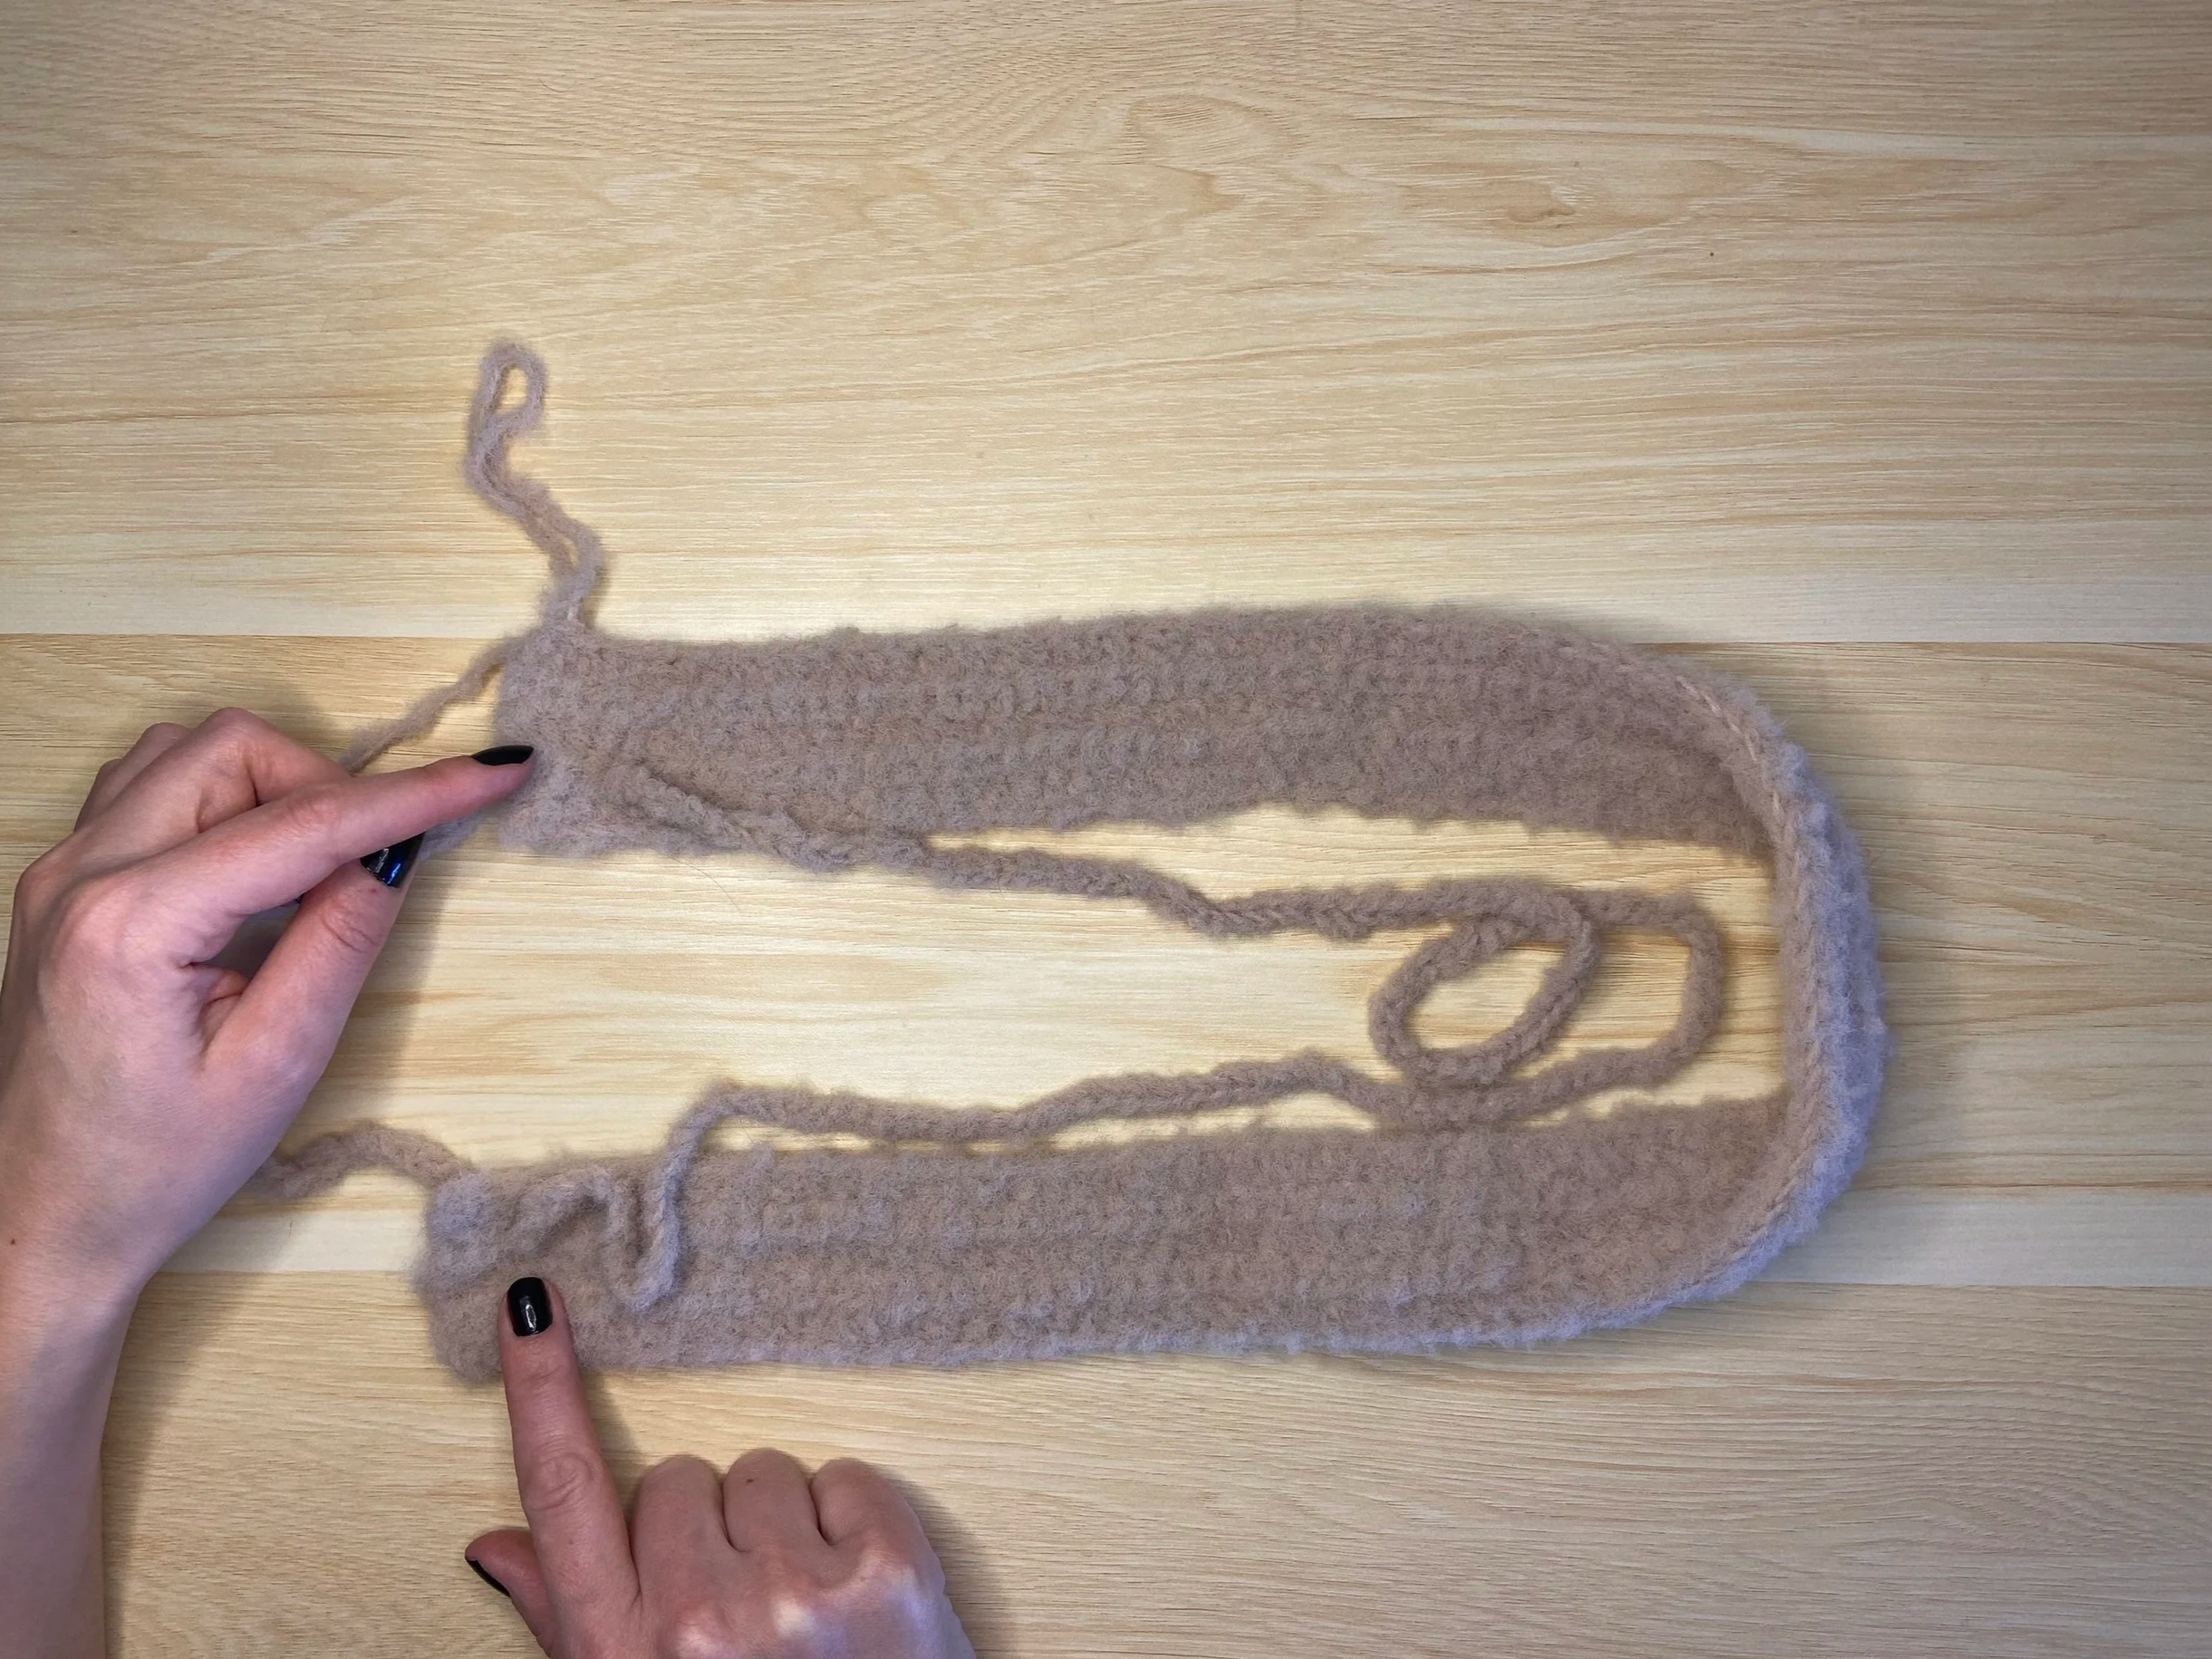
Place the first set of matching markers in the 34th and 46th ST in from one end of piece, and place the second set in the 34th and 46th ST in from the other end of piece (See Image).
Row 23
CH 2, turn. *HDC across to 1st/next marker, remove marker & HDC2tog (marked ST & next ST), replace marker into HDC2tog ST*, rep * once, **HDC across to 1 ST before 3rd/next marker, remove marker & HDC2og (ST before marked ST & marked ST), replace marker into HDC2tog ST**, rep ** once, HDC across remaining STs. <107; reps dec by 4>
Row 24
CH 2, turn. HDC across replacing markers into same ST when you reach each of them.
Rows 25 - 38
Rep alternating Rows 23 & 24 seven more times each. <79>
Row 39
CH 2, turn. HDC across to marker, remove marker, HDC2tog twice, remove all remaining markers, HDC 1, HDC3tog once, HDC 1, HDC2tog twice, HDC across remaining STs. <73>
Note
The next two rows are short rows that are used to fill in this little gap at the back of the hood caused by the decreases.
Row 40
CH 2, turn. HDC first 35 STs leaving all other STs unworked. <35>
Row 41
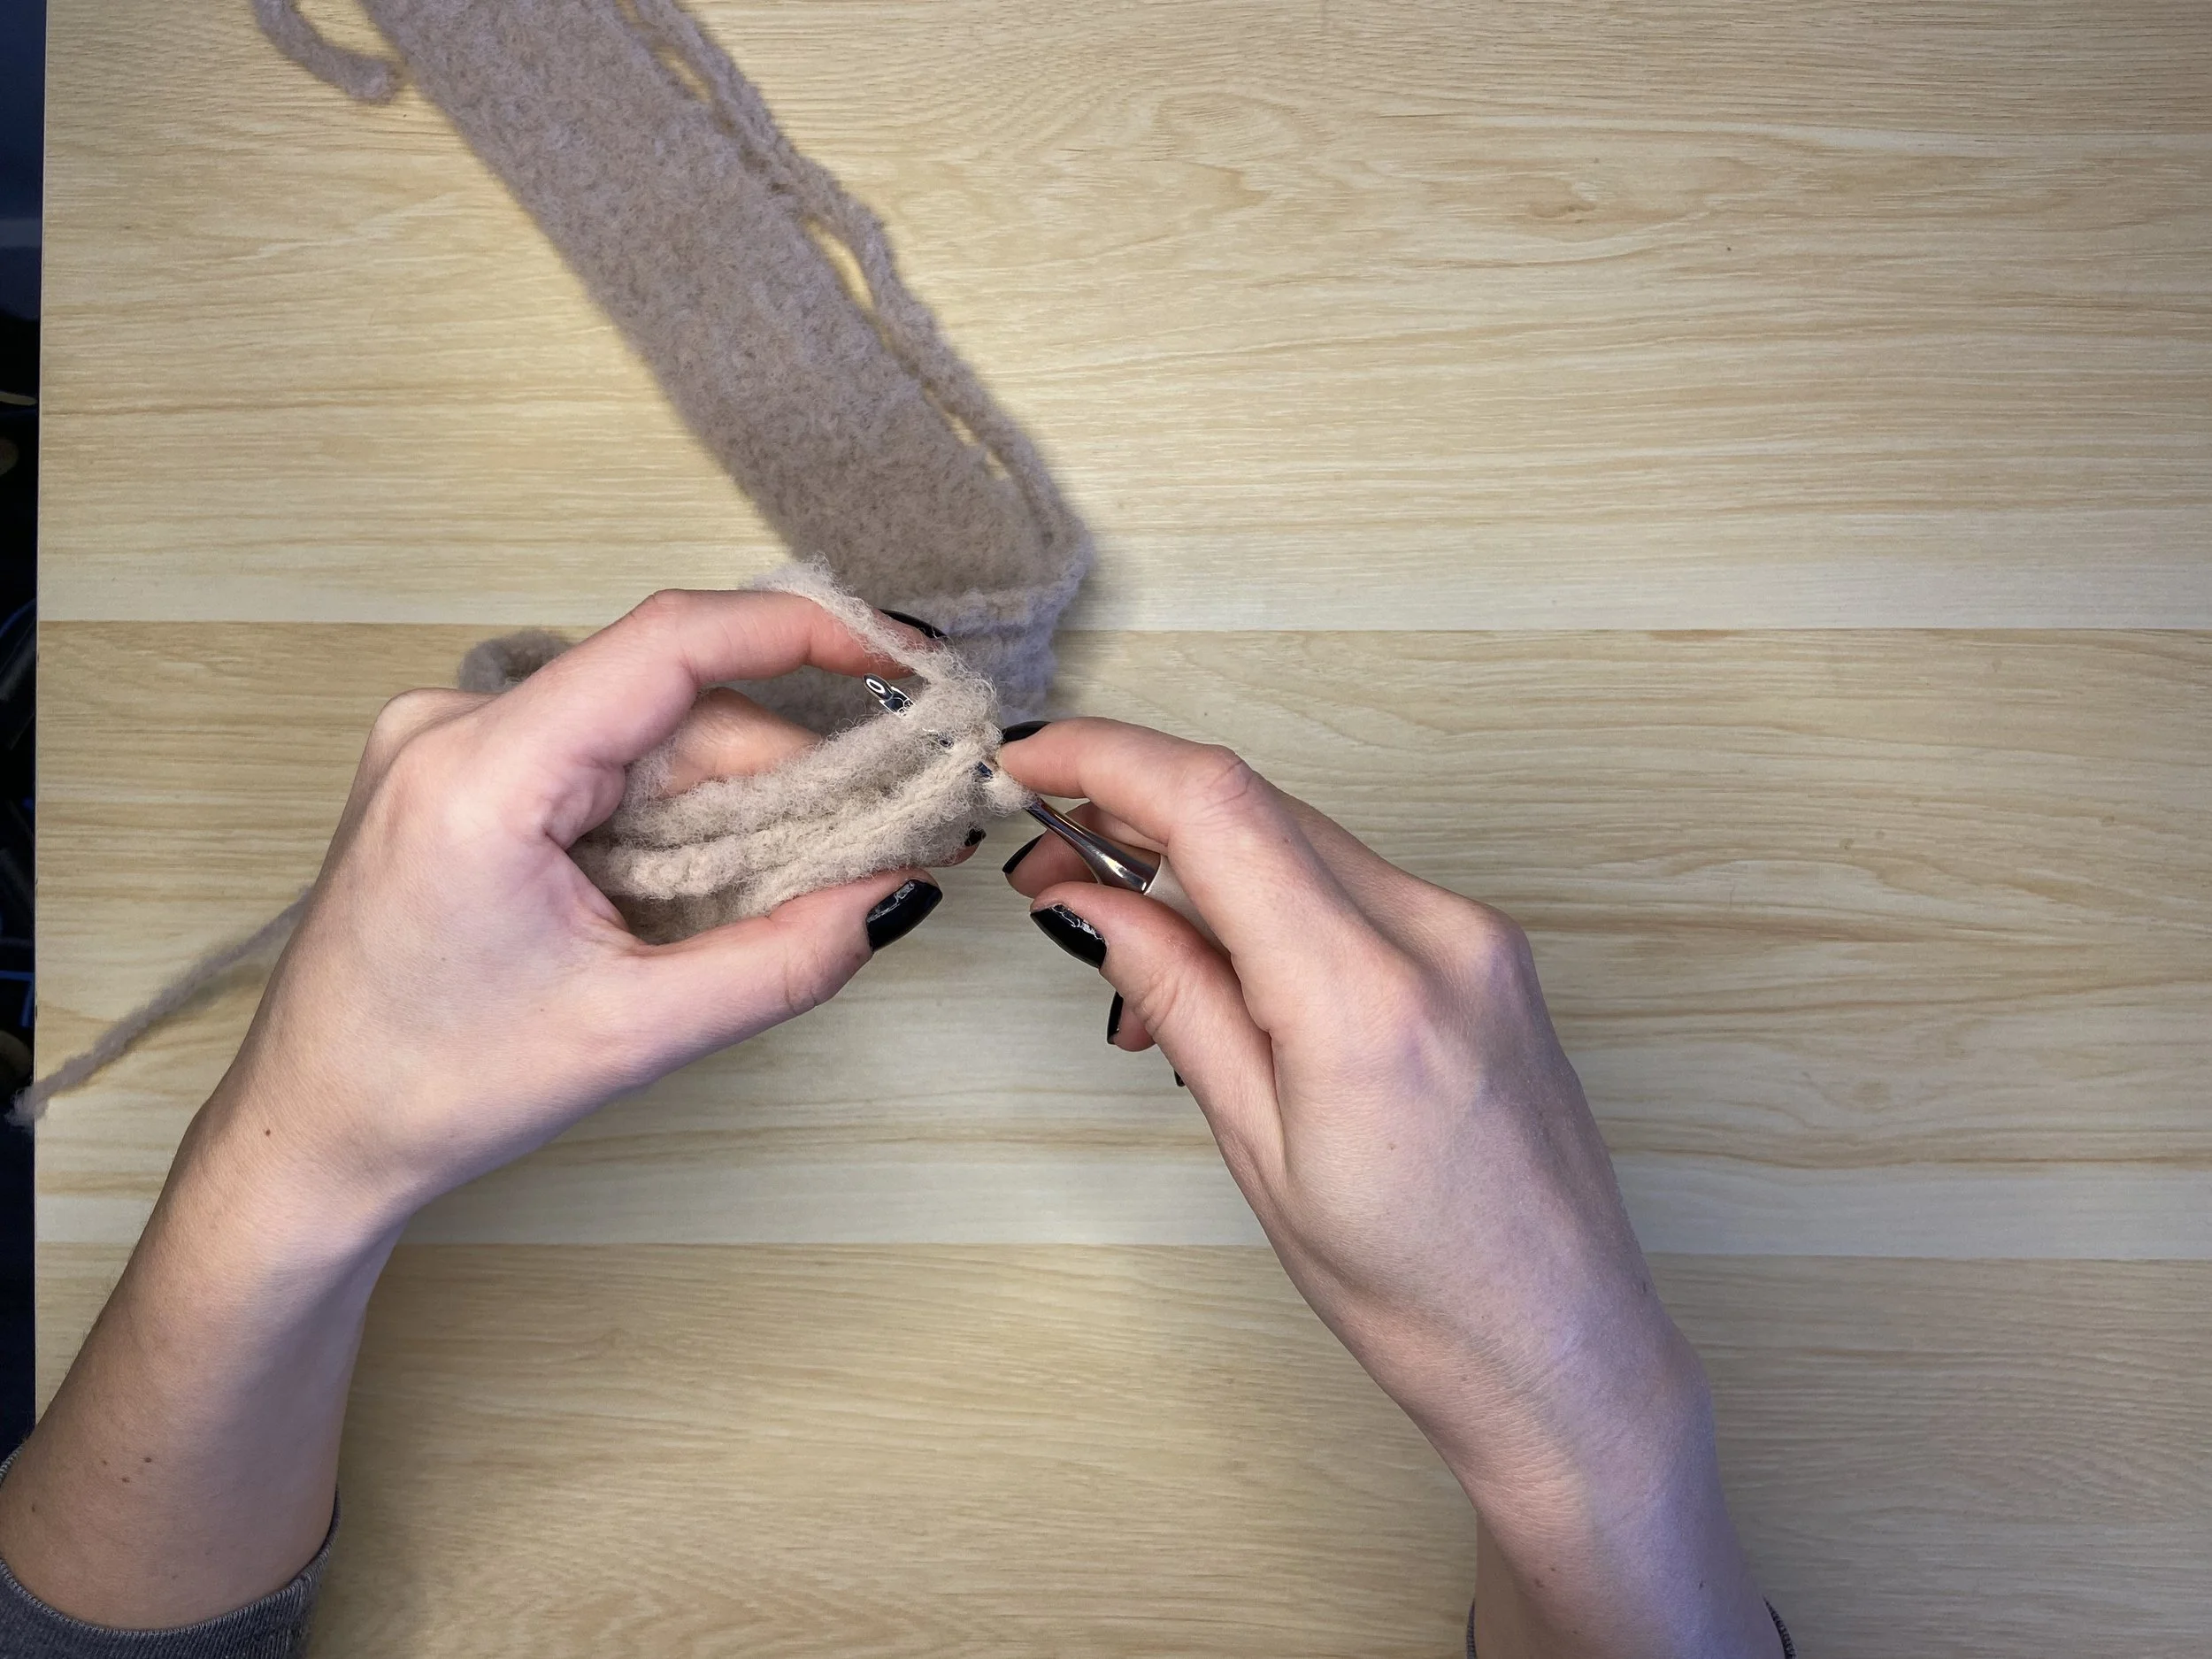
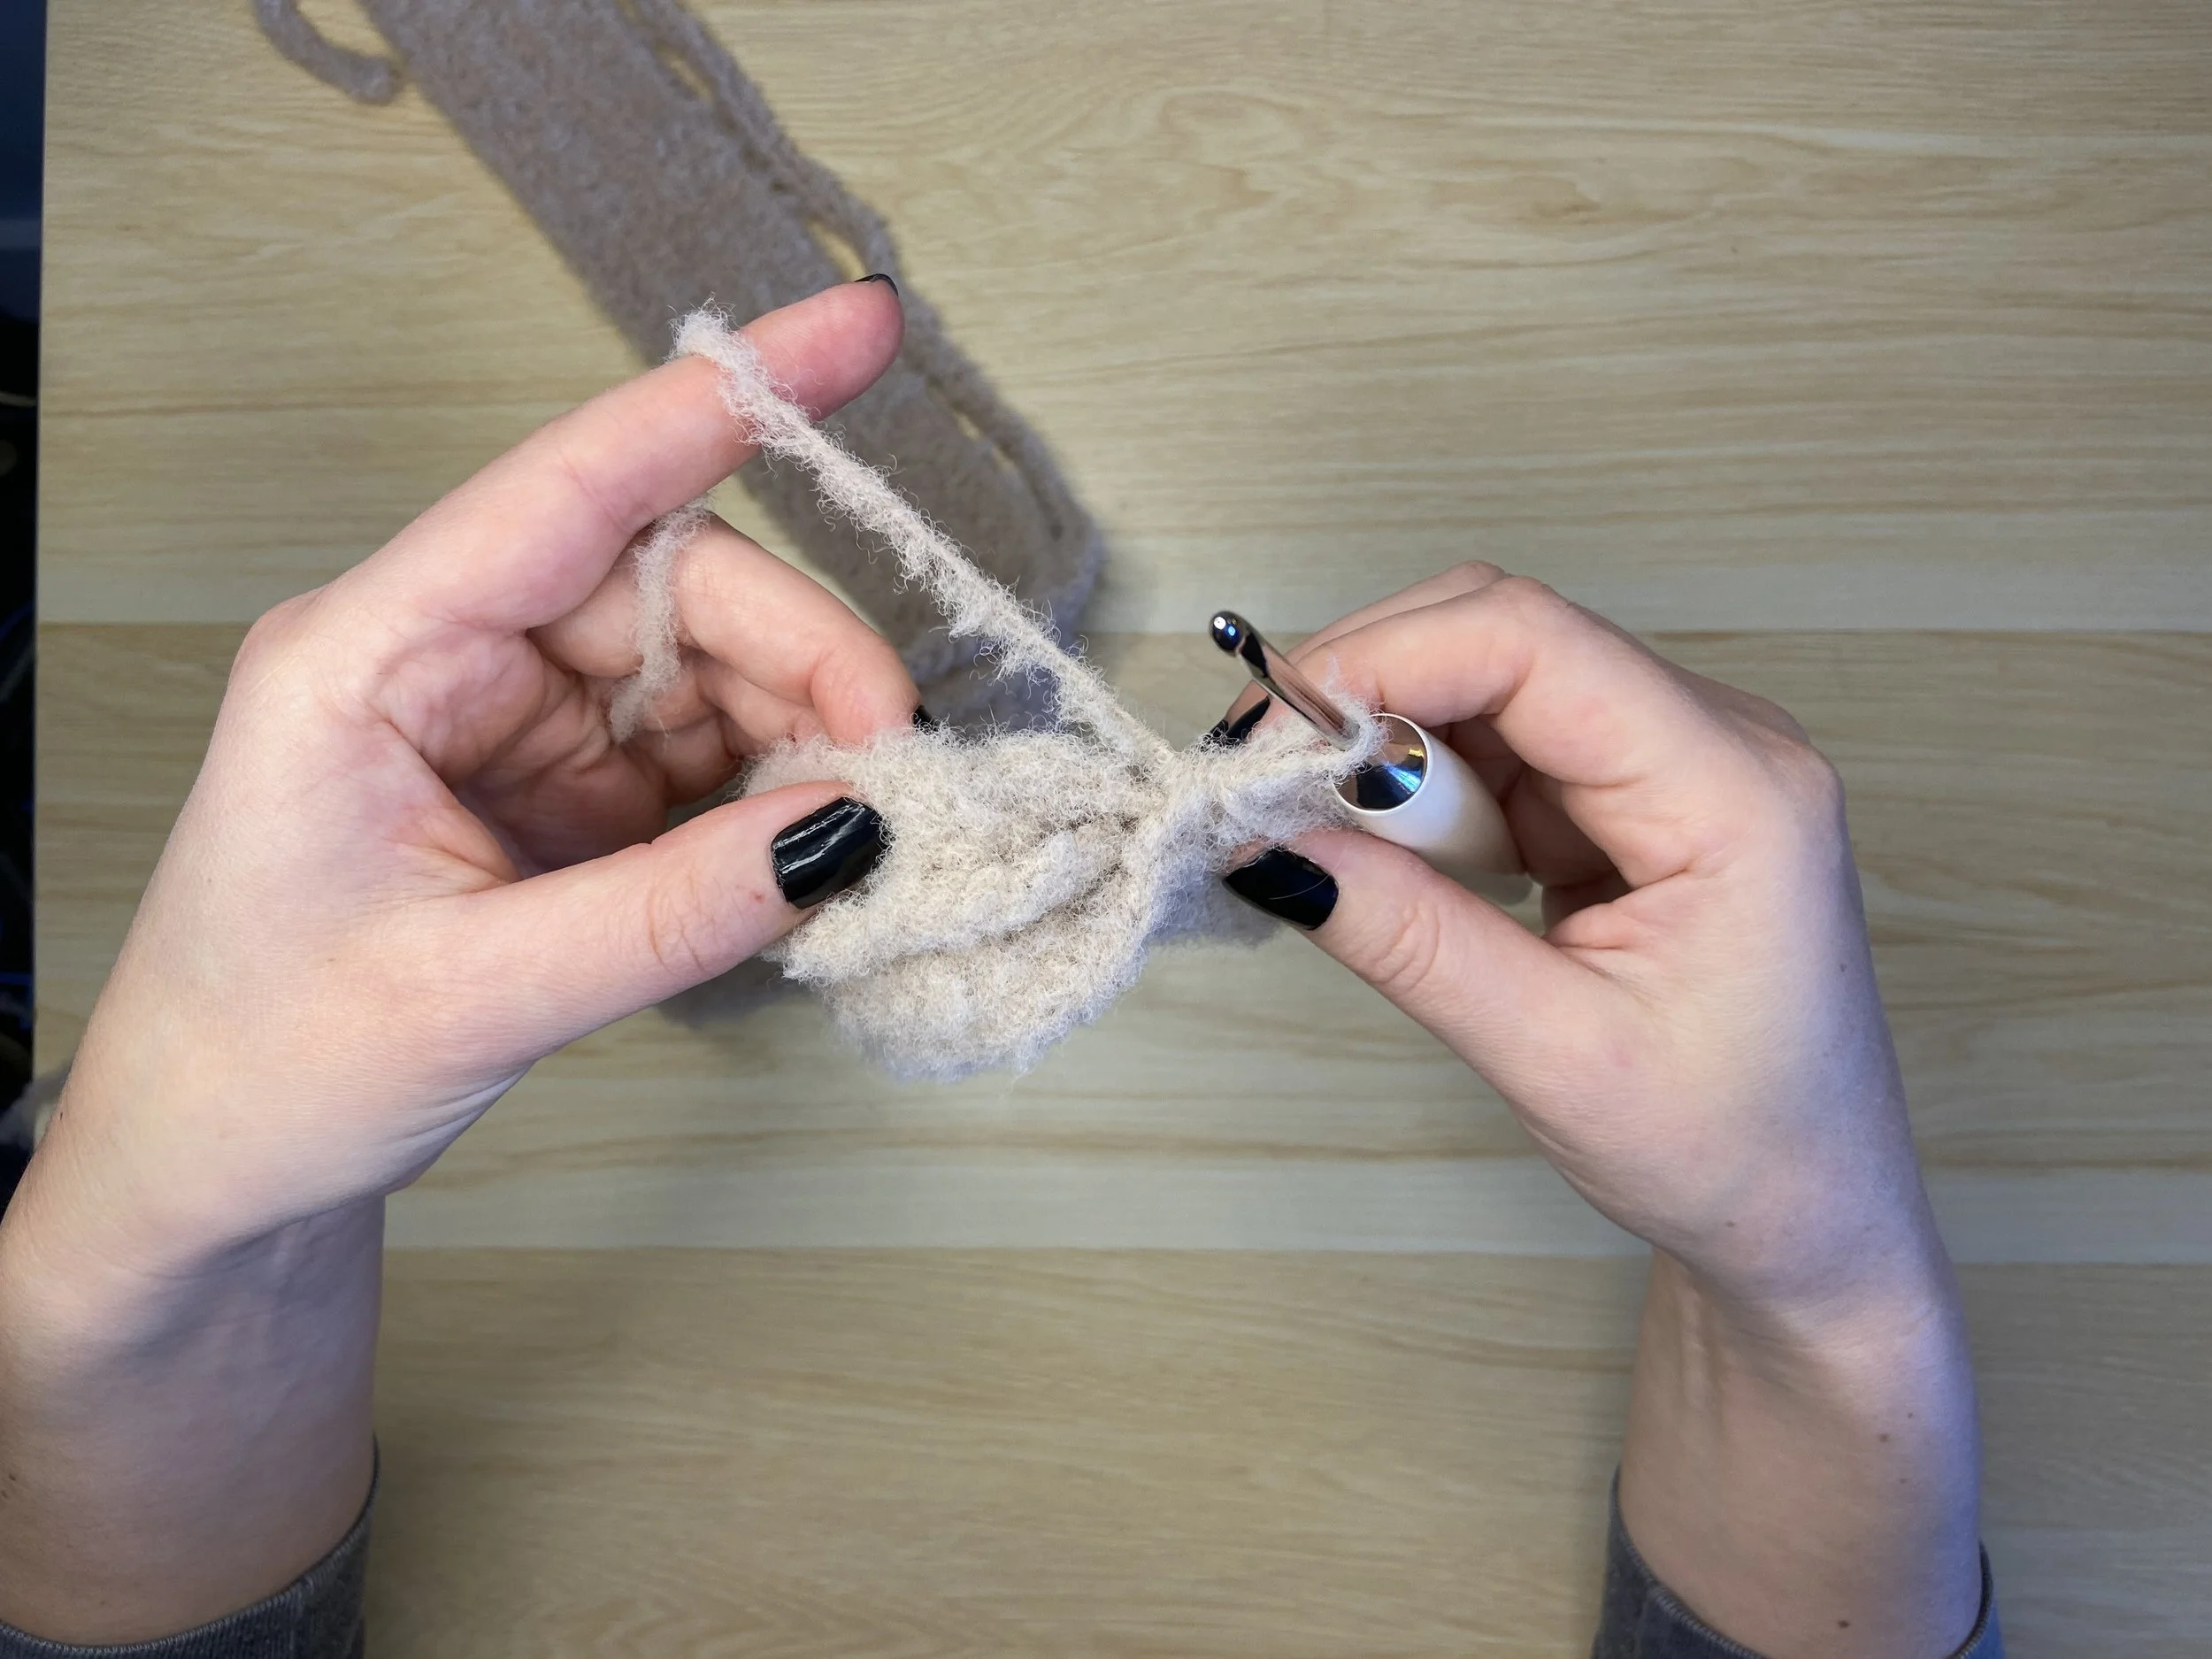
CH 2, turn. HDC across Row 40. Fasten off leaving a 50 cm (20 inch) tail.
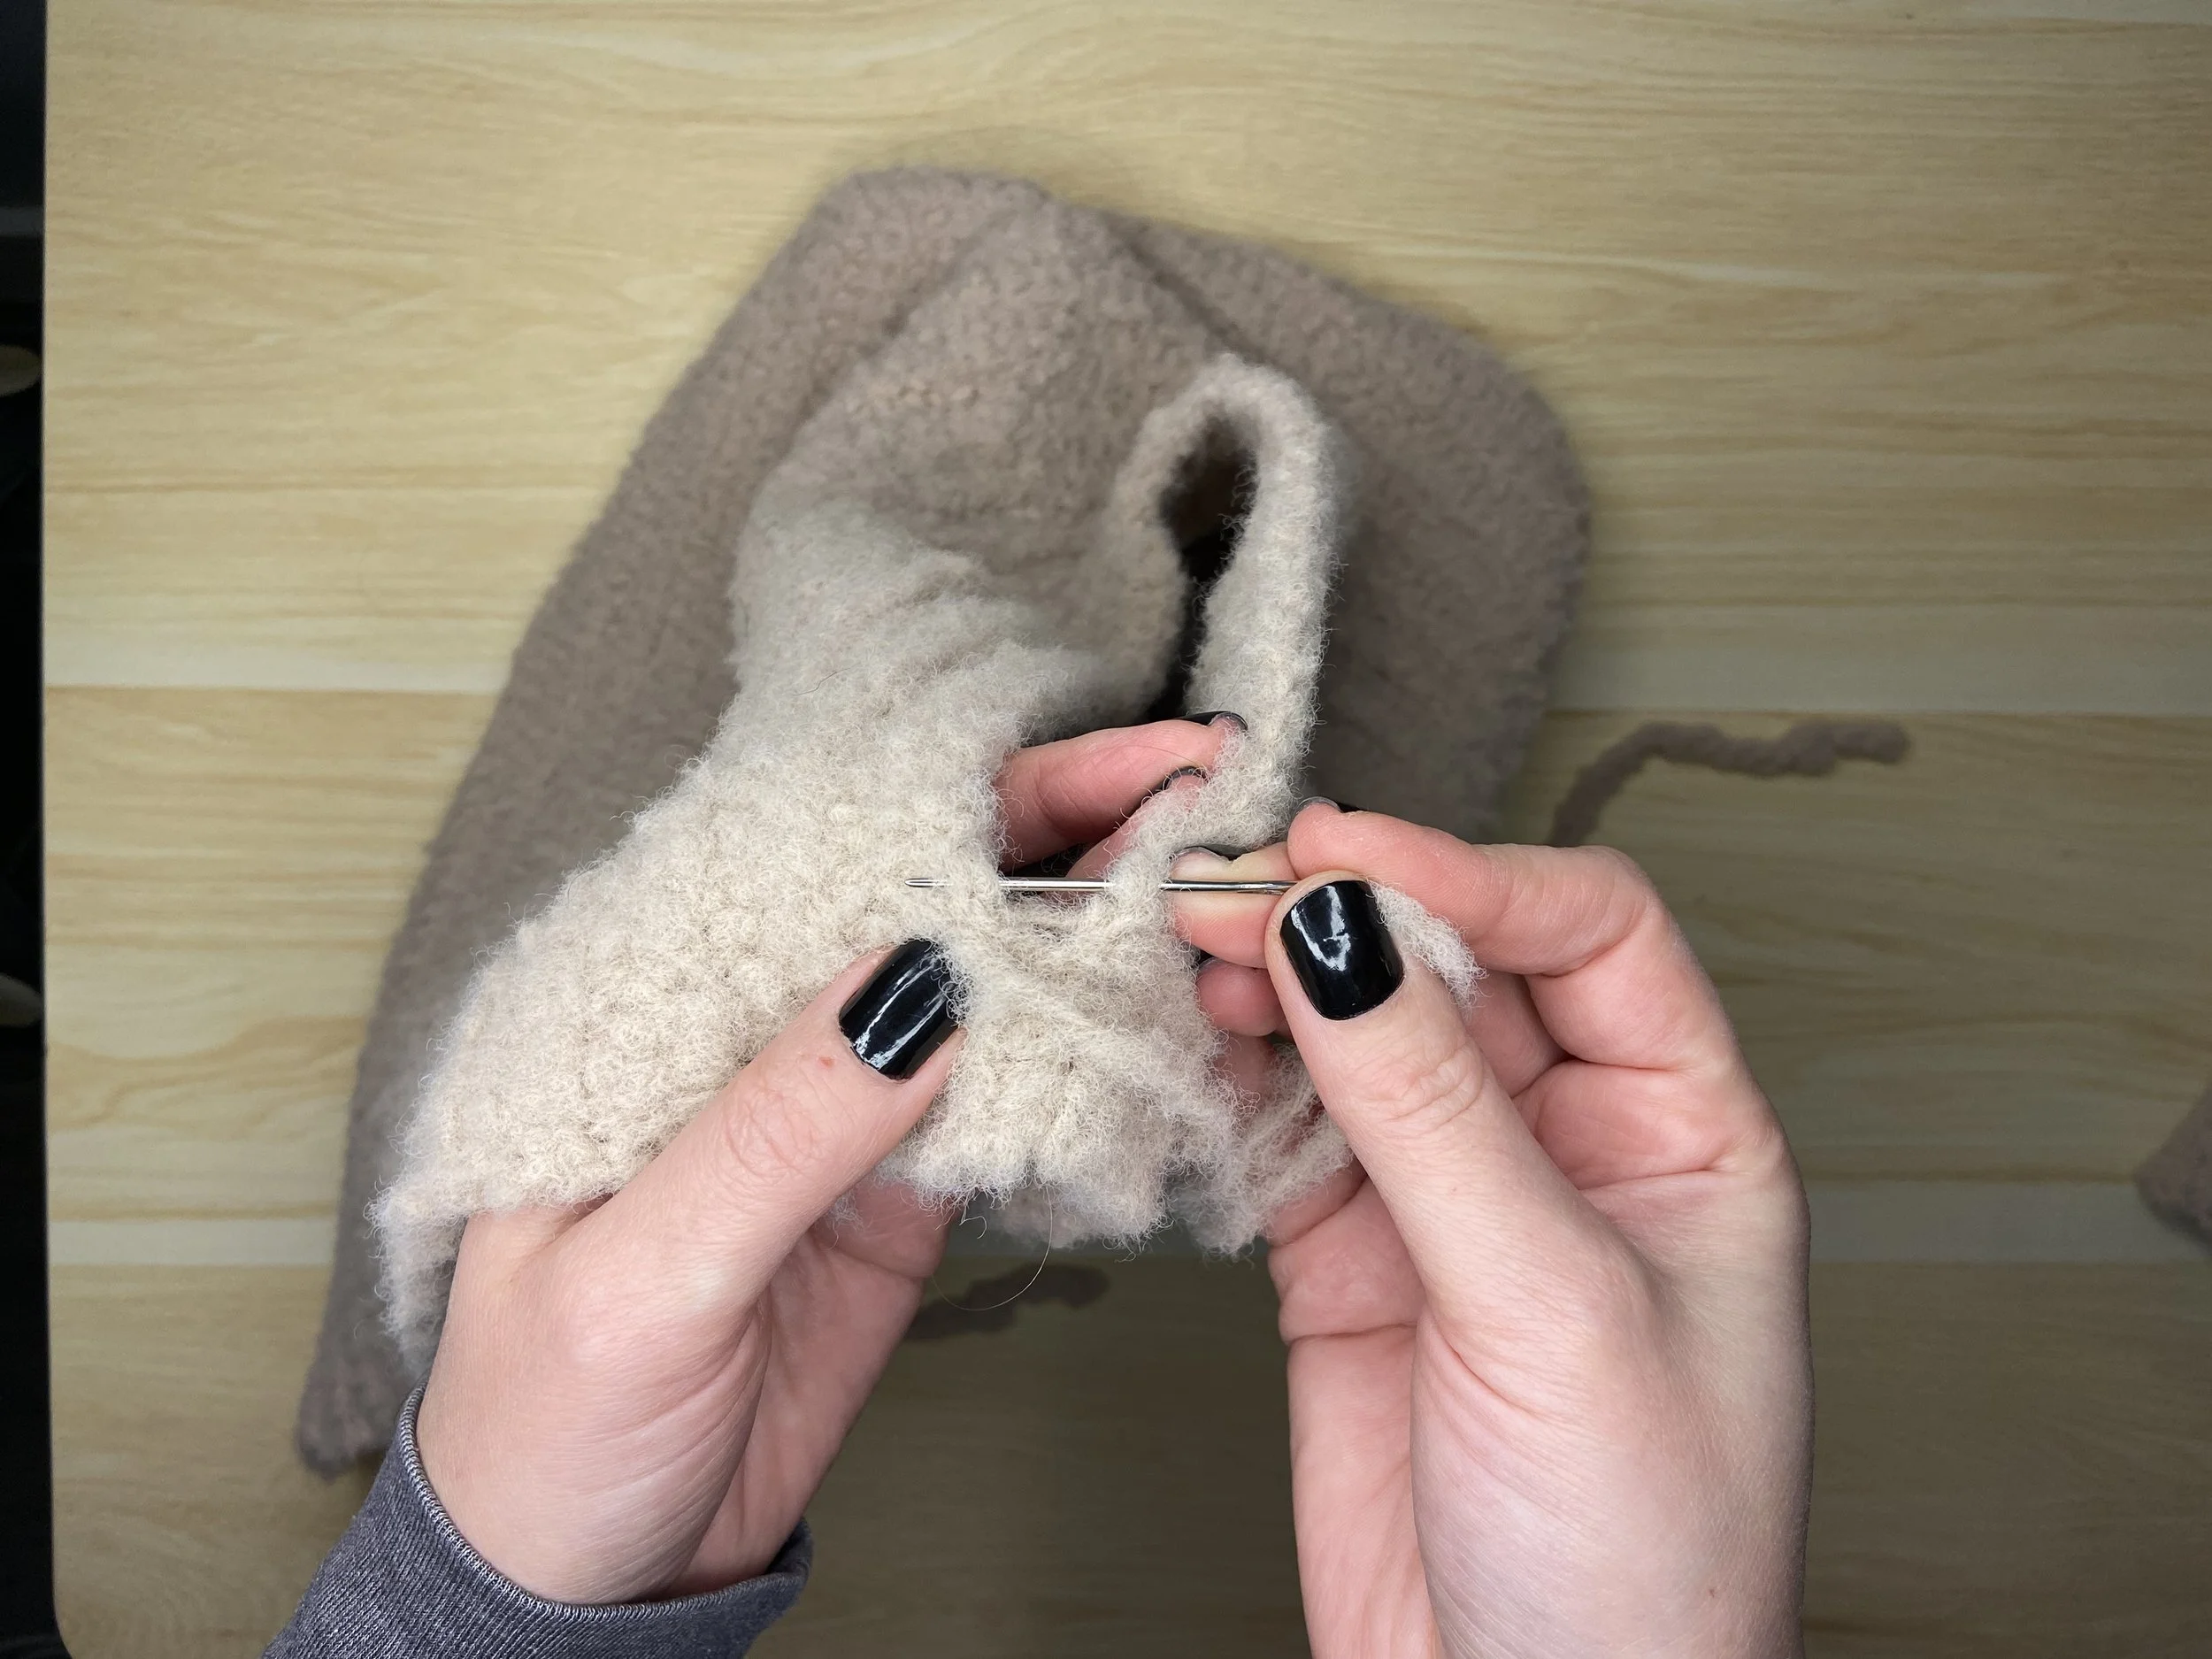
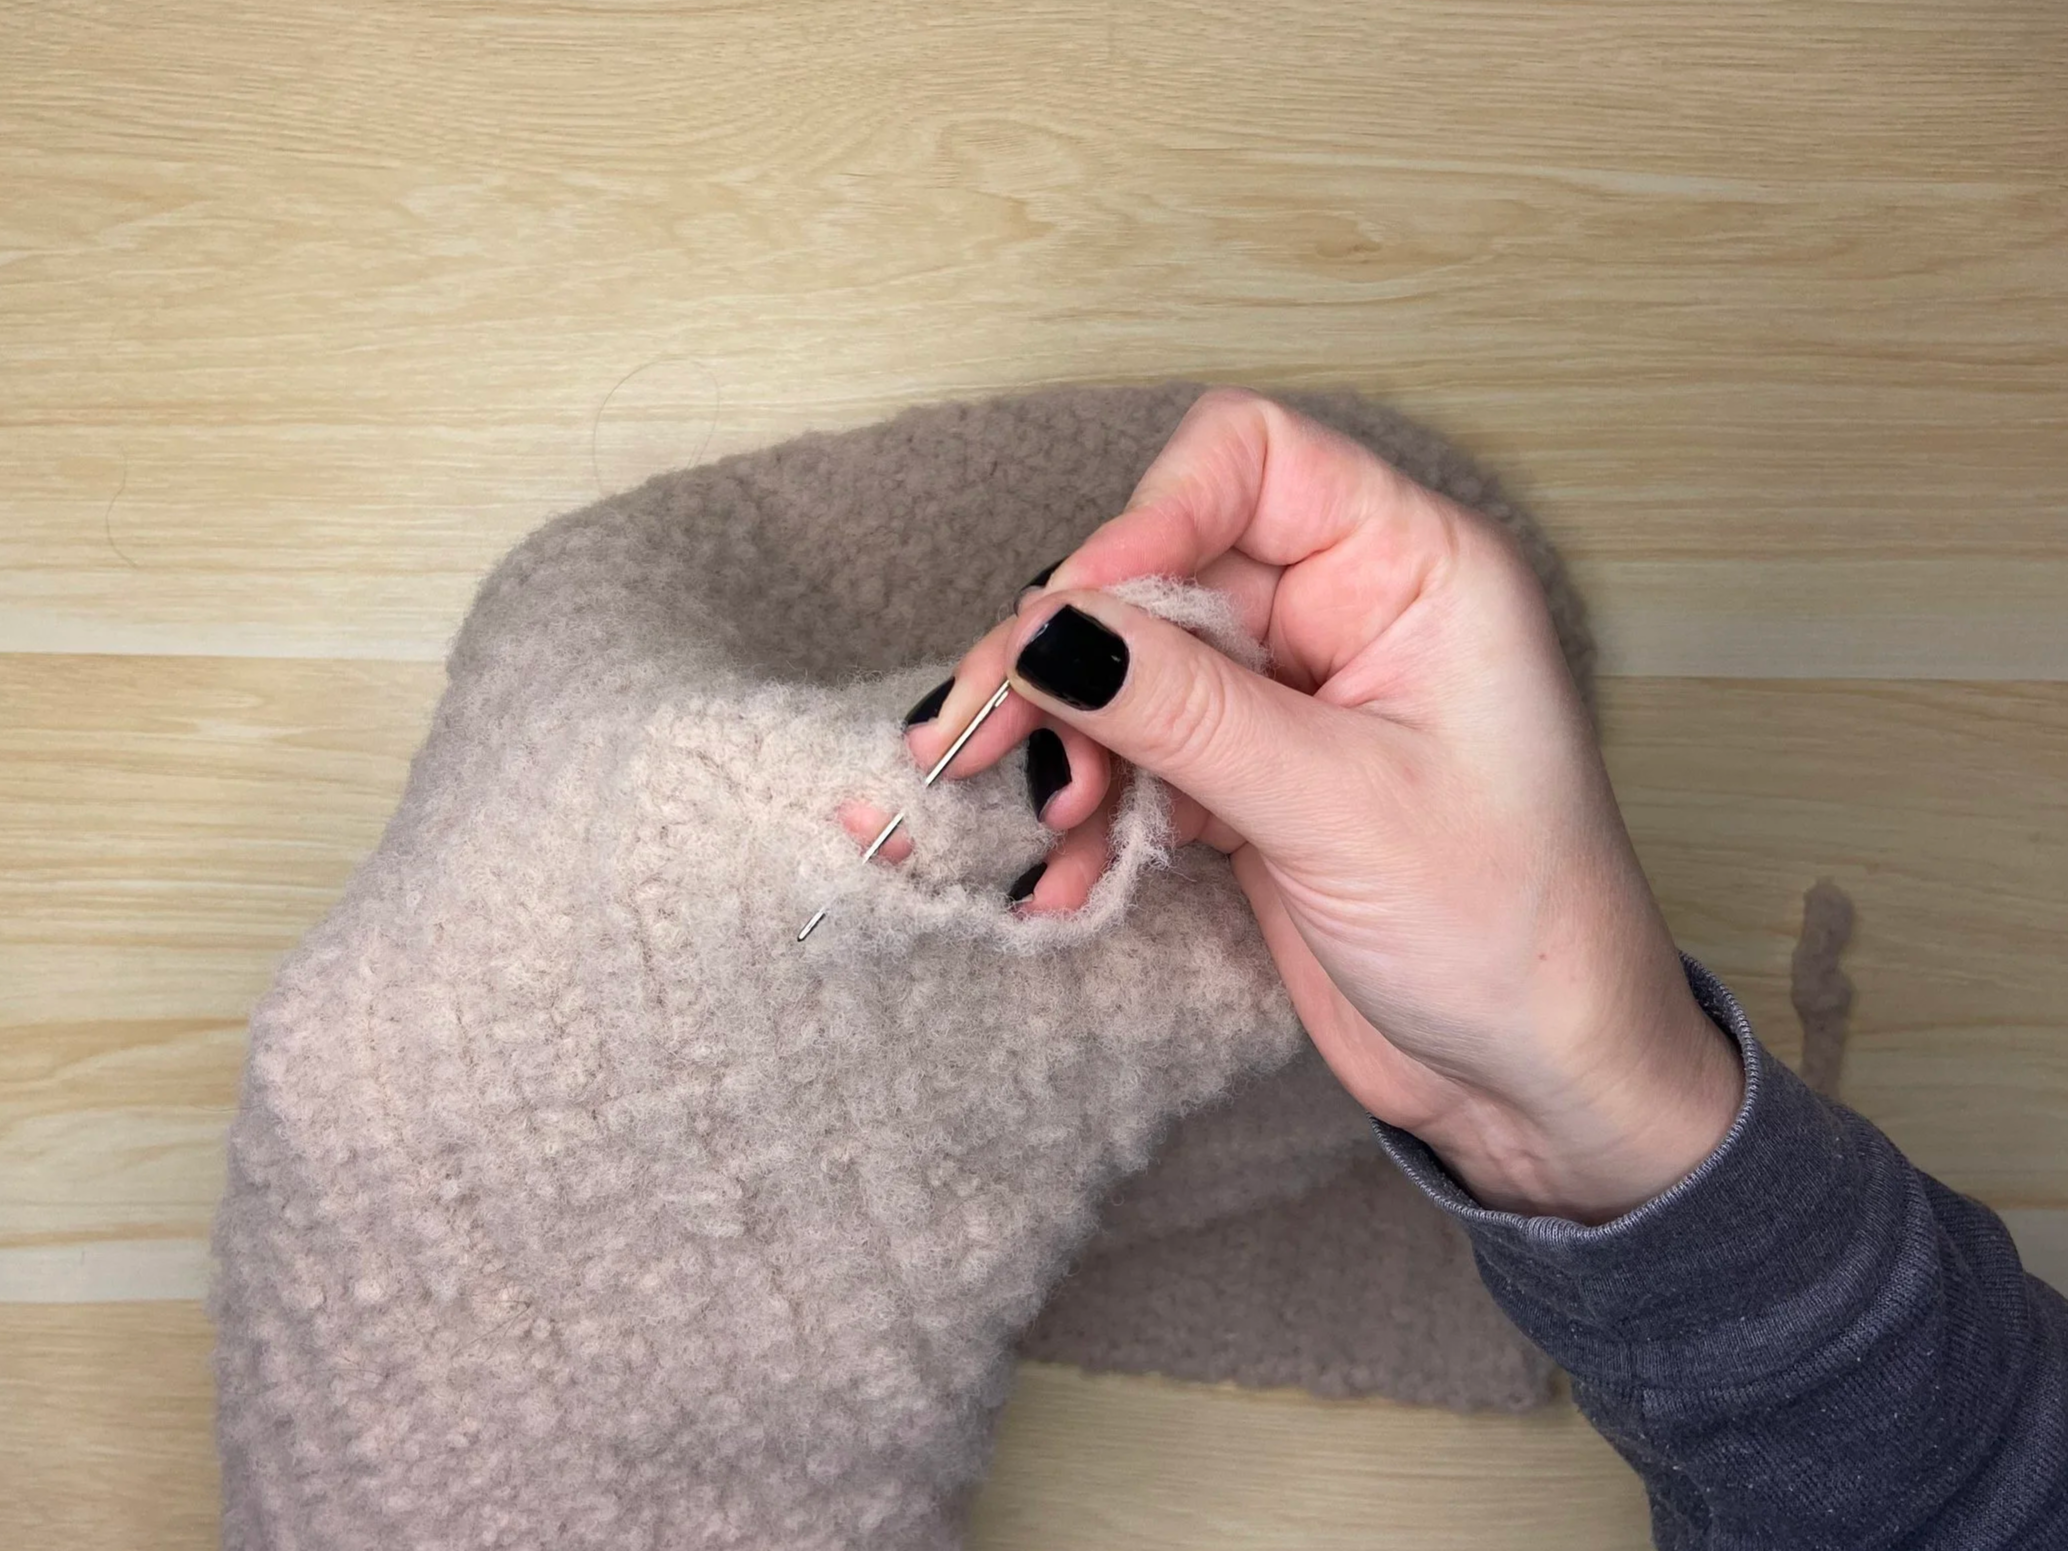
Seam Hood
Using the long tail, seam together the back of the hood including the little hole/gap created at the ends of Row 40 & 41 (See Images). Put hood aside for now.
Cowl
Round 1
CH 81. Join in the round with a SL ST. CH 2, HDC into the back bump of each CH around. Join with a SL ST. <81>
Round 2
CH 2, turn. HDC around. Join with a SL ST.
Rounds 3 - 22
Rep Round 2 twenty times.
Round 23
CH 2, turn. *HDC 2, 2HDC*, rep * around. Join with a SL ST. <108>
Connecting Hood & Cowl
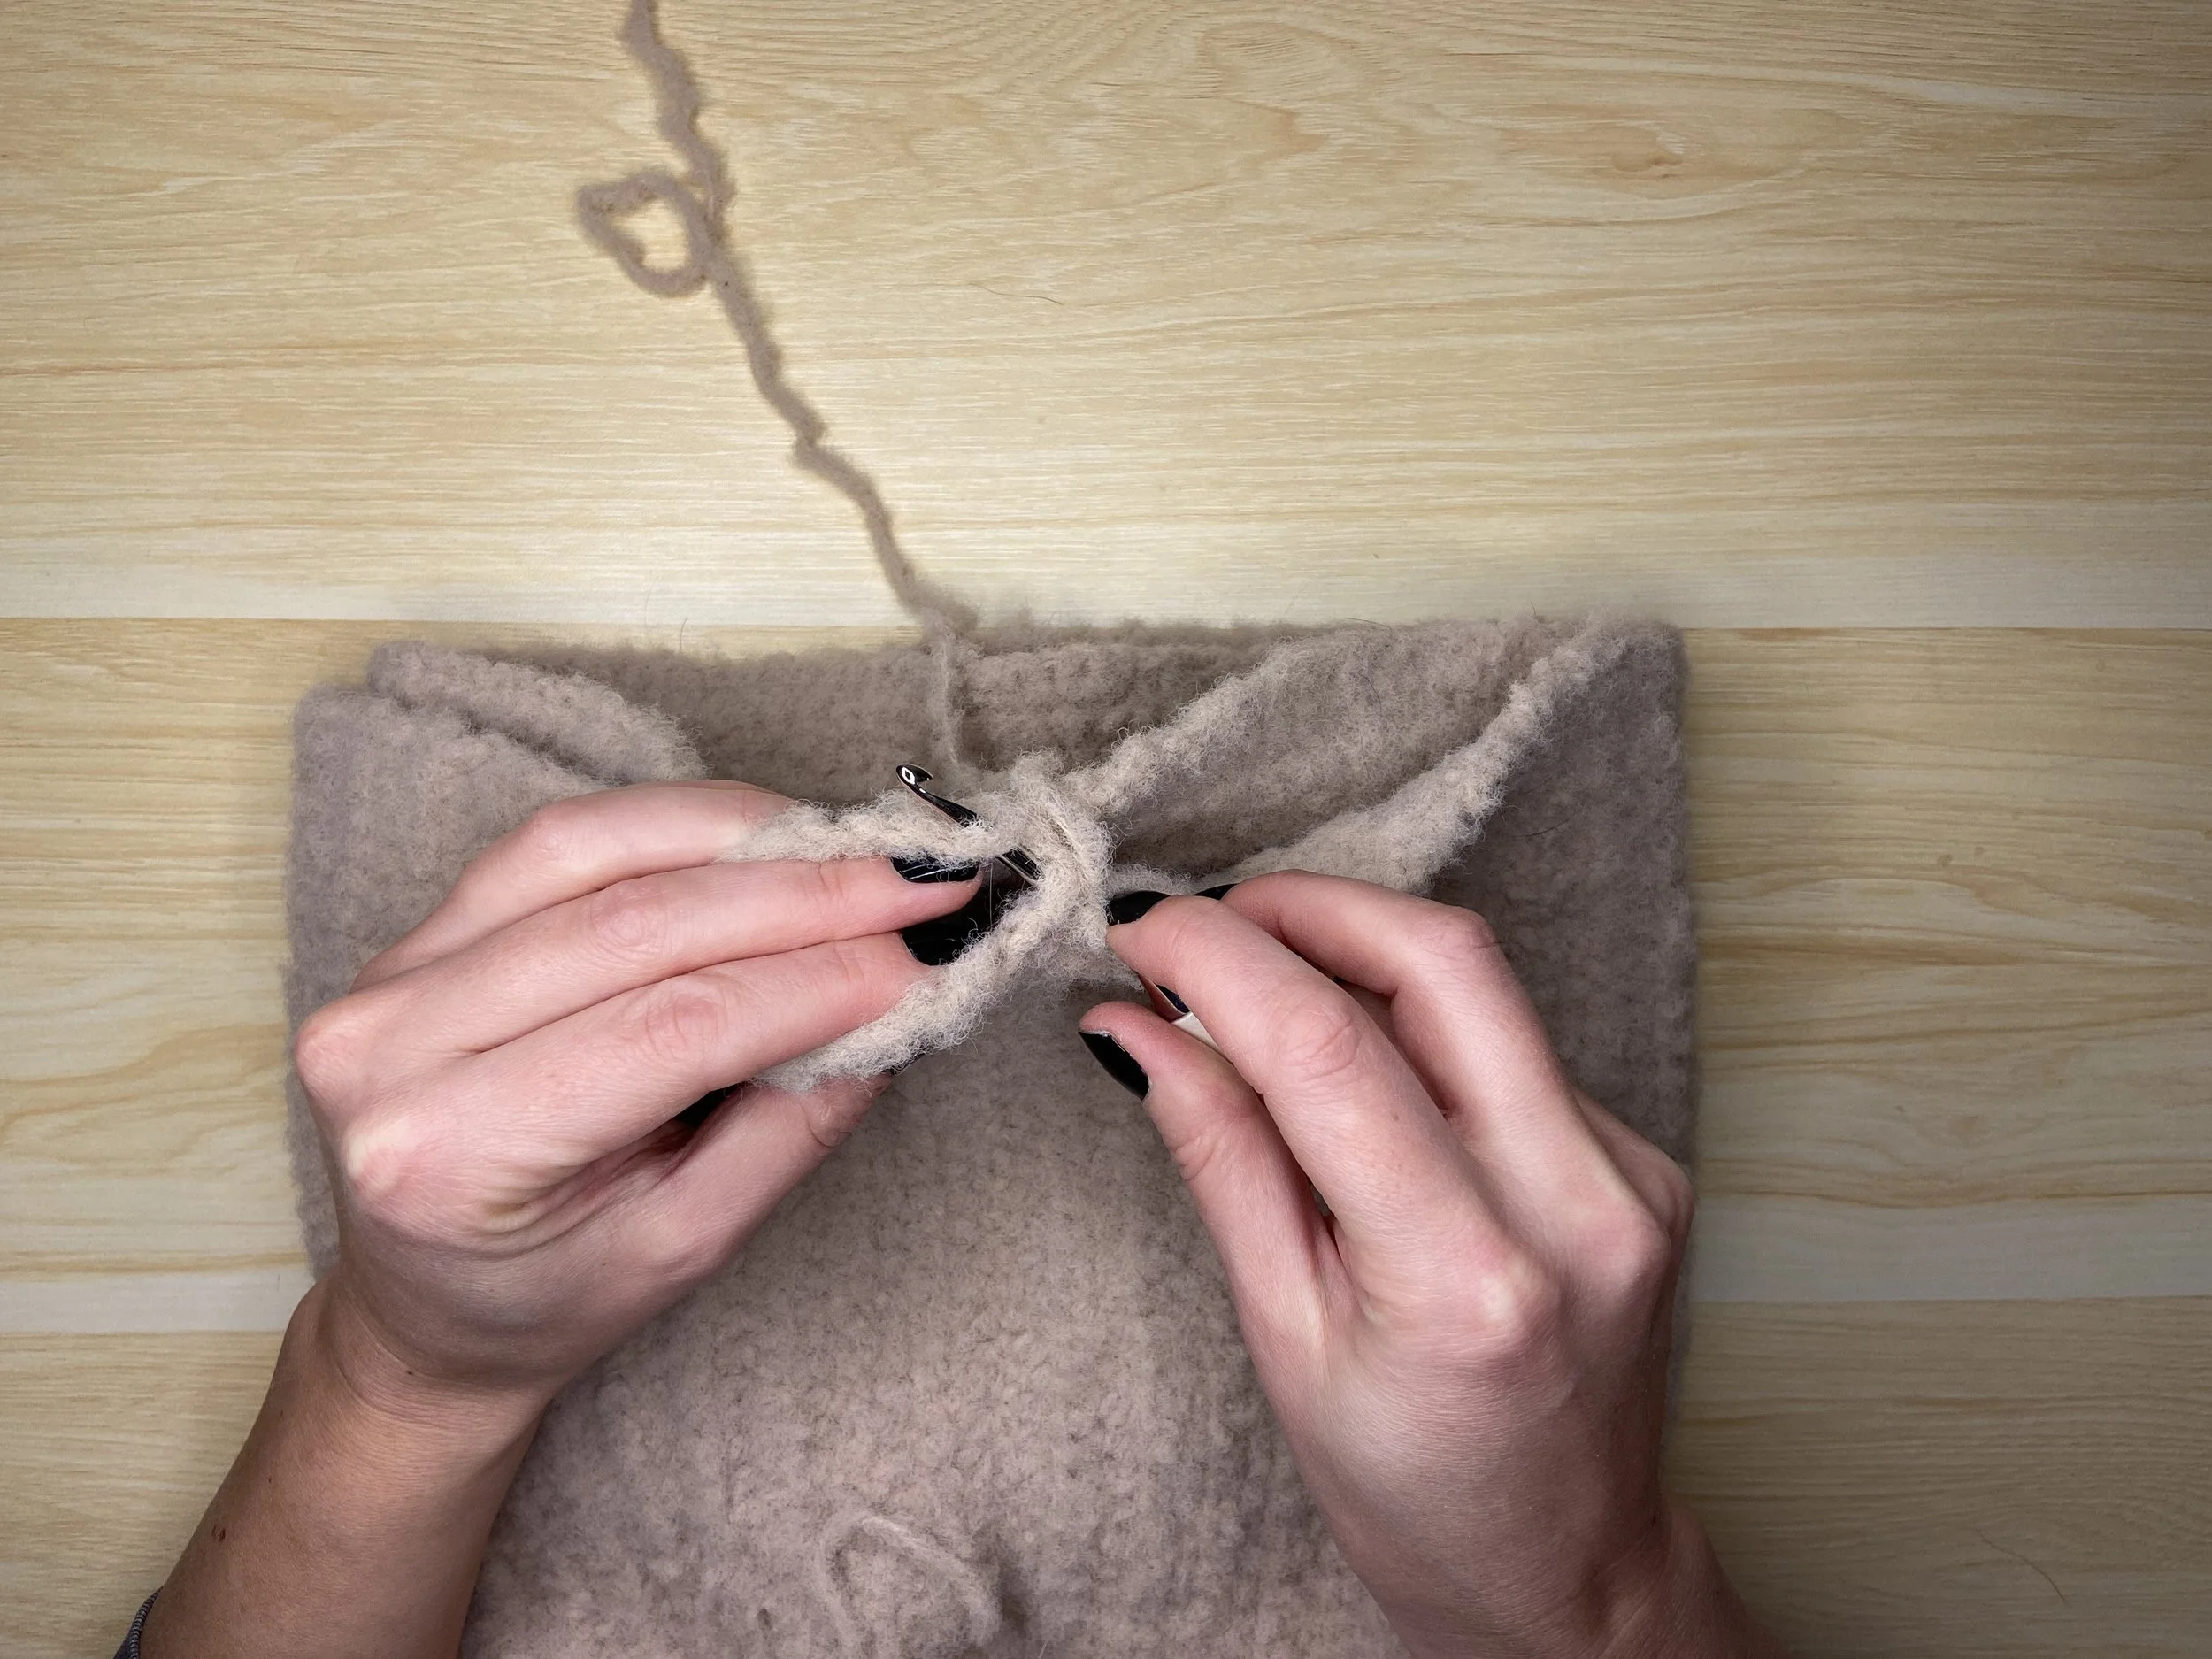
Note
The next round connects the hood to the cowl. You will work stitches through the ends of the rows of the hood at the same time as working the stitches of the cowl. Wrap the hood around the cowl with the seam of the hood & the joining seam of the cowl lined up. If this step is too challenging you can also just continue working only the cowl and seam the end of hood to the cowl using your yarn needle & scrap yarn when it is complete!
Round 24
CH 2, turn. Working through both layers of fabric (the hood & the cowl) work 3 HDCs per 2 rows of the hood and 1 HDC per ST of the cowl around (See Images). Join with a SL ST.
Rounds 25 - 27
Rep Round 2 three more times.
Round 28
CH 2, turn. *HDC 3, 2HDC*, rep * around. Join with a SL ST. <135>
Rounds 29 - 31
Rep Round 2 three more times.
Round 32
CH 2, turn. *HDC 4, 2HDC*, rep * around. Join with a SL ST. <162>
Rounds 33 - 35
Rep Round 2 three more times. Fasten off. Weave in ends.
Thank you so much for making the Willow Hooded Cowl! Tag me @ilovetinderbox on your favourite social media platform (I’m on almost all of them!) so I can see your finished product. If you have any questions please email me courtney@ilovetinderbox.com
Happy crocheting,
Courtney