
Hey hey it’s Part 5 of Gauge Week!
Today we’re talking swatching with different fibres and the *dreaded* blocking of swatches.
The first thing to note is that not all yarns that are labelled the same weight are indeed the same. Unfortunately, this just isn’t as globally regulated as we would all want it to be. Some DK yarns are thinner than other DK yarns, some worsted weight yarns are thicker than other worsted weight yarns. No two is created equal!
The second thing to keep in mind is that different fibres respond differently to being crocheted or knitted. Wool has little teeth that help it cling together, acrylic holds its unblocked shape very closely (usually), and silkier fibres tend to have more drape/stretch. So unless you are working with the exact same yarn as the designer there is just no way to be certain of how your yarn choice will respond to the stitches it’s being given.
Using the methods you’ve learned here over the last few days, crochet up your gauge swatch. Here is a photo of 6 different fibres as pre-blocked swatches. All of these swatches are in yarn that is listed as DK weight, all completed with a 4.5mm hook and all have 19 stitches by 11 rows (aiming for a gauge of 15 stitches x 9 rows in a 4 x 4 inch blocked swatch of double crochet). I used the acrylic swatch, centre bottom in the photo, as my control to compare each of the swatches to.
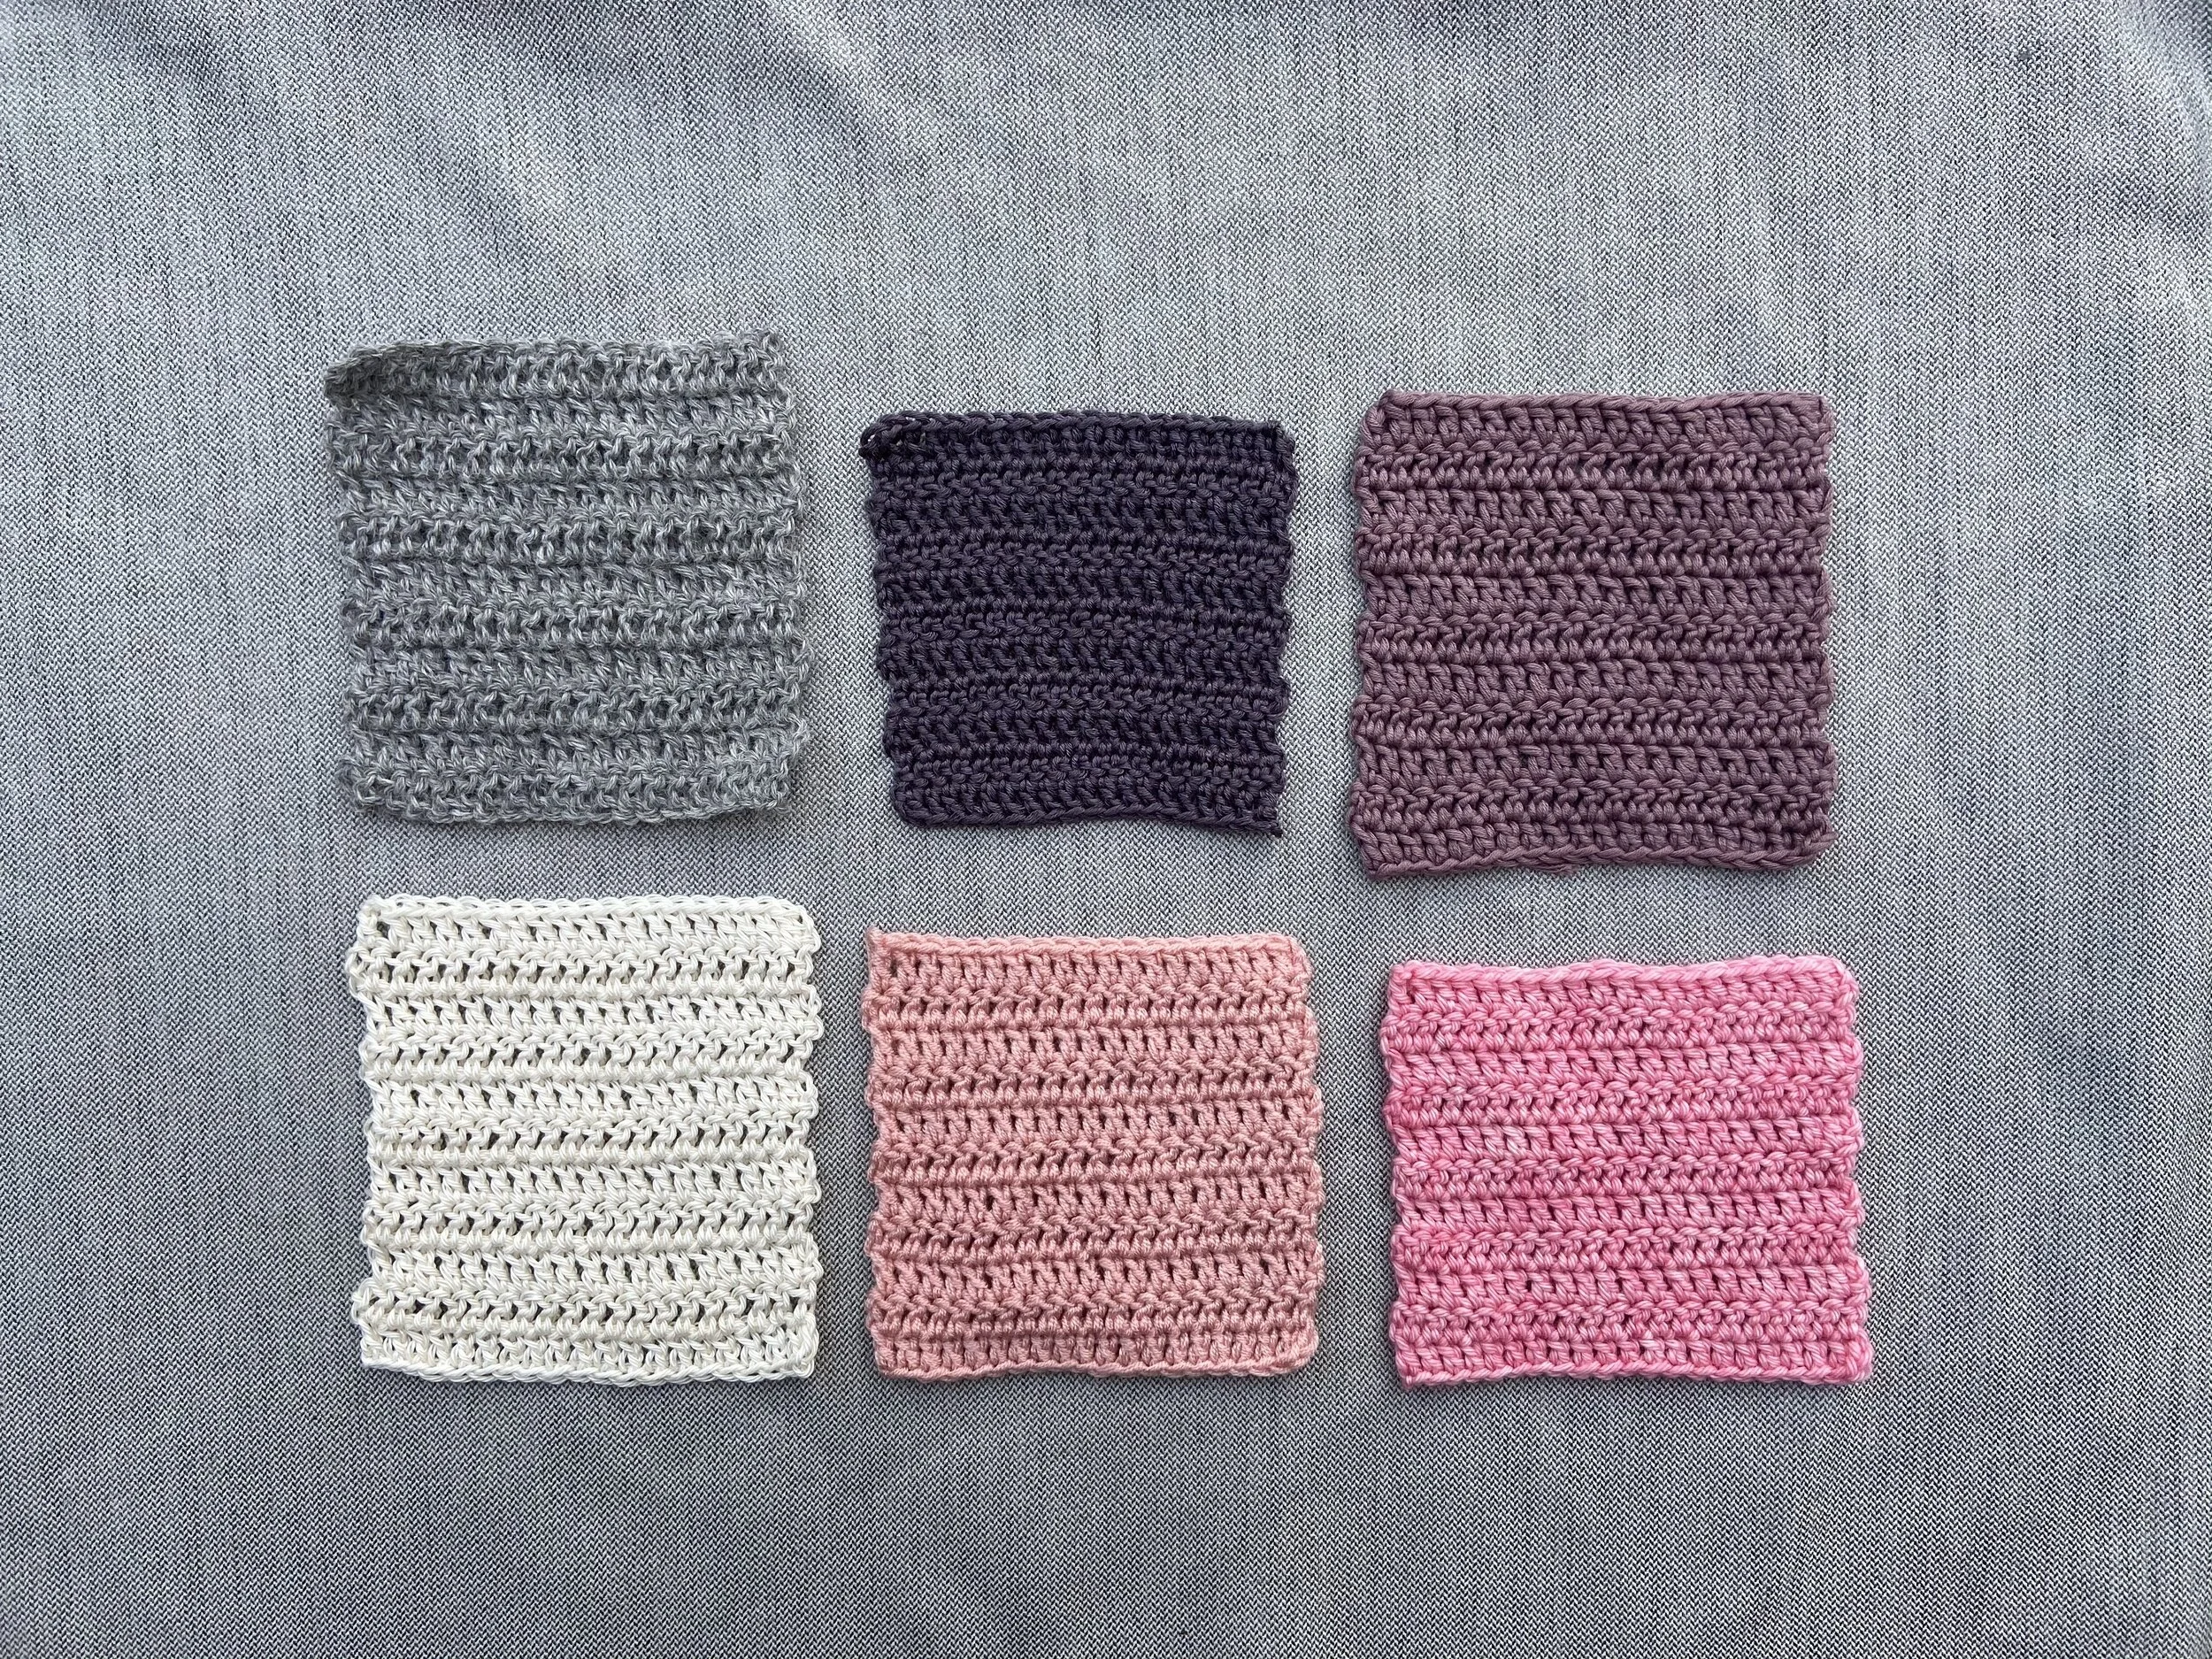
Out of the 6 swatches only 2 of them were the same gauge as my acrylic swatch pre-blocking (one was 100% cotton, one was 100% superwash merino). So already you can see how switching between different fibres and brands can affect gauge.
After blocking, every swatch except the acrylic changed size, and most, to my surprise, actually got closer to the target gauge. My cotton swatches grew a lot in length, my acrylic swatch did not change, my wool swatch grew a bit in width, and my alpaca and bamboo swatches grew in both directions. In this photo you can see the final blocked swatches still vary in size, even though they were all made by the same crocheter, with the same hook, the same number of stitches and rows and the same weight of yarn.

Let’s look at the dark grey swatch (Lionbrand Truboo) – before blocking it was much too small. I could have gone up in hook size to achieve the proper gauge prior to blocking and carried on thinking everything was fine. Then when it would come time to block my piece would grow big time! This swatch was almost 2 full stitches and one full row too small pre-blocking but it came out to a perfect 15 stitches by 9 rows after blocking. That’s about a 15% increase in size!
So, why do we block our swatches?
We block our swatches because of the growth that so many different fibres experience when they get wet. Sure, you could not block your swatch or your final garment – but what happens when it’s time to wash your handmade sweater? Are you going to risk dipping it in the bath without knowing what will happen? *holds breath*
Blocking our swatches helps to eliminate that unknown factor that happens in blocking. We can rest assured that our final piece is going to be exactly as we want it.

Now, what happens if your pre-blocked swatch and post-blocked swatch have different gauge (as most do)? How do you factor that into the making of your piece?
You’re going to want to measure your swatch before AND after you block it. The measurement before blocking is the gauge you will want to maintain while making the piece. The measurement after blocking is what you will use to shape your piece after you take it out of the blocking bath!
For example – if you are aiming for a gauge of 15 stitches by 9 rows in a 4 x 4 inch blocked swatch, but your pre-blocked swatch is 16 stitches by 10 rows and your post-blocked swatch is accurate – you’re going to want to ensure your piece stays at 16 stitches by 10 rows throughout making it. This will mean your piece will be smaller while making it than the final product will be but that’s okay! Once you block your piece you know your yarn loosens to a gauge of 15 stitches by 9 rows and you have a finished piece that is the perfect size.
And that my friends is how and why it’s important to block your gauge swatches!
Thank you so much for joining me for Gauge Week! I hope all were able to learn a little something this week, or refresh yourself on some important skills!
Happy crocheting,
Courtney
Check out the other Gauge Week blog posts here:
Day 1: What is “gauge” and why do we do it?
Day 2: How to create a basic flat swatch
Day 3: How to gauge in the round (2 different techniques)
Day 4: How to adjust your gauge – beyond just changing hooks
Day 5: The importance of blocking your swatches (Today)
Happy crocheting,
Courtney
Items used in this blog post (click each for the link):
- Gauge ruler from Muster Pattern
- Furls Streamline Crochet Hook